Ever scrolled through YouTube and felt like some thumbnails are just… a mess? That cluttered, confusing look is what I call the ridged thumbnails vertical effect. It’s a classic design mistake that makes your videos incredibly easy to ignore, and it’s a killer for your click-through rates (CTR). For creators, educators, and researchers, understanding how to fix this is the first step toward getting your hard work seen.
Why Your Thumbnails Look 'Ridged' and Hurt Your Channel
The term "ridged thumbnails vertical" is an analogy I've found really useful for my workflow. Think about it this way: in medicine, vertical ridges on your fingernails can sometimes signal an underlying health problem, like damage to the nail bed where growth starts. In fact, dermatologists explain that trauma to this area can leave permanent grooves. You can even read more about how fingernail health reflects deeper issues on wvderm.com.
In the same way, a ‘ridged’ thumbnail points to a fundamental flaw in your design strategy. This isn't just about making things look pretty; it's about clear communication. For a researcher sharing complex findings or an educator explaining a new concept, a visually crowded thumbnail creates instant confusion and suggests the video itself might be just as chaotic.
It screams "unprofessional" and practically begs viewers to scroll right past all your hard work.
The Anatomy of a Bad Thumbnail
So, what exactly turns a thumbnail ‘ridged’? It’s usually a mix of a few common blunders that pile up to create a visual train wreck. I often see this happen when creators, especially those new to design, try to cram way too much information into that tiny little rectangle, resulting in a cluttered and unappealing image.
To help you spot these issues in your own work, I've put together a quick comparison. Think of this as a diagnostic tool for your channel's visual health.
Ridged vs Healthy Thumbnail Characteristics
| Ridged Thumbnail Trait (Low CTR) | Healthy Thumbnail Trait (High CTR) |
|---|---|
| Multiple, competing focal points | A single, clear subject |
| Low-contrast, muddy colors | Bold, high-contrast colors |
| Tiny, unreadable fonts | Large, legible text |
| Overloaded with text | 1-3 powerful keywords |
| Generic or stock-like feel | Arouses curiosity or emotion |
| Complex, busy background | Simple, clean background |
A quick look at this table makes the problem obvious. A ‘ridged’ design is a barrier between your content and your audience. No matter how incredible your video is, a bad first impression means most people will never even click to find out.
A great thumbnail has one job: to earn the click. It should promise a clear solution or spark curiosity, not present a visual puzzle that viewers have to solve.
By learning to spot and fix these "ridged" designs, you’re not just cleaning up your channel's look—you're actively boosting its performance and giving your amazing content the audience it deserves.
Diagnosing Your Channel's Thumbnail Health
Before you can fix what's broken, you have to figure out what is actually broken. It’s the same with your channel's visual strategy. Think of yourself as a researcher trying to understand why your thumbnails just aren't performing as well as they should be.
The idea of "ridged thumbnails vertical" is more than just a catchy phrase; it's a symptom. In human health, vertical ridges in fingernails aren't just cosmetic—they can point to underlying nutritional issues. You can read more about how nail health reflects our well-being on timesofindia.indiatimes.com.
In the same way, a pattern of messy, inconsistent, or just plain boring thumbnails hints at a deeper problem with your content strategy.
Finding the Root Cause in Your Data
So, what are the usual suspects behind a 'ridged' thumbnail strategy? Often, the culprits are hiding in plain sight. We’re talking about inconsistent branding, low-contrast colors that get lost in the YouTube feed, or text so small it’s unreadable on a phone. I see this all the time with educators who try to cram an entire complex chart into a tiny thumbnail space.
But here’s the good news: you don't have to guess. Your data is the most powerful diagnostic tool you have.
The goal isn't just to make 'pretty' thumbnails; it's to make effective ones. Your click-through rate (CTR) is the ultimate measure of a thumbnail's health and its ability to grab a viewer's attention.
This is where a tool like YouTube Channel Analytics becomes invaluable. It lets you go beyond surface-level stats and really dig into your video performance to spot the patterns in your underperforming content. By connecting your visuals to hard data, you can solve the "ridged thumbnails vertical" problem for good.
For instance, you might discover that:
- Thumbnails using a particular font consistently tank your CTR.
- Videos with a bold, blue background outperform the muted grey ones every time.
- Designs that feature a human face get 20% more clicks than those that don't.
When you correlate visual elements with hard performance data, you stop guessing and start making data-driven decisions. This is the first, most crucial step toward healing your channel's visual identity and turning those "ridged thumbnails" into assets that drive real growth.
To get started, check out our deep dive on how to master YouTube channel analytics.
Creating Strong Thumbnails That Get Clicks
Let’s be real—a bad thumbnail can kill a great video. If you’re still cramming every inch of your thumbnail with text and clashing images, you're creating a ‘ridged’ mess that viewers will scroll right past.
So, how do we build thumbnails that actually get clicks? It all boils down to a few core ideas: a powerful focal point, colors that pop, and text that’s big, bold, and brief. This isn’t about being a graphic design wizard; it’s about sending a clear message, fast.
For instance, imagine a researcher talking about 'CRISPR Gene Editing.' A classic ‘ridged’ thumbnail would try to squeeze in a DNA helix, a microscope, and a wall of text. It's a visual headache. A strong thumbnail? It would feature one crisp, high-quality image of a DNA strand with just two words in huge letters: "CRISPR Explained." See the difference?
A Simple Process for Clean Design
You don't need a design degree to make a professional-looking thumbnail. All you need is a repeatable process and a tool that guides you toward good habits. This is where a tool like the YouTube Thumbnail Maker comes in handy, especially for beginners or busy educators. It’s packed with templates that are already set up to help you sidestep those common design traps that lead to the "ridged thumbnails vertical" look.
This infographic breaks down the workflow for creating a clean vertical thumbnail.
The big takeaway here is structure. When you lock in your layout first and then strategically add your text, you keep the design clean and incredibly easy for a viewer to understand in a split second.
Putting Principles into Practice
Here's the acid test: can someone understand your thumbnail in a three-second glance? If not, it’s back to the drawing board.
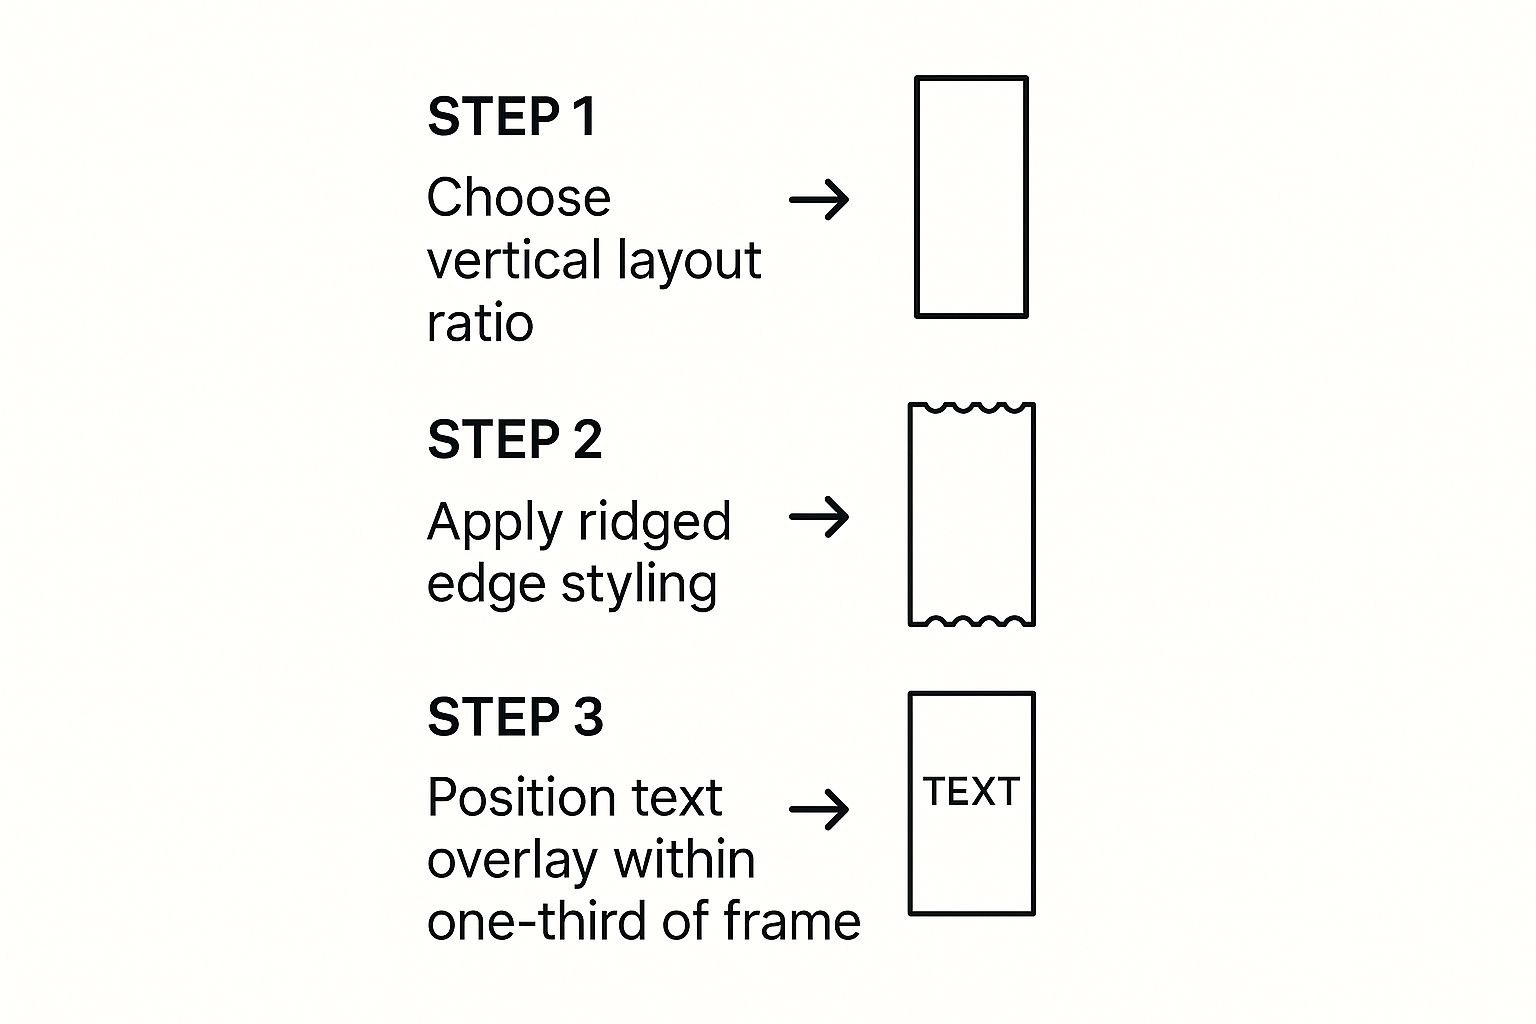
Start with a simple, high-resolution background that doesn’t fight for attention with your main subject. Then, add your text—and I mean no more than five words. Make it massive and use a font that’s easy to read. Most importantly, make sure your text has high contrast with the background so it practically leaps off the screen.
Pro Tip: Aim for your text to take up roughly one-third of the thumbnail space. This is a simple "rule of thirds" for text that makes it prominent enough to be legible on any device without smothering your visuals.
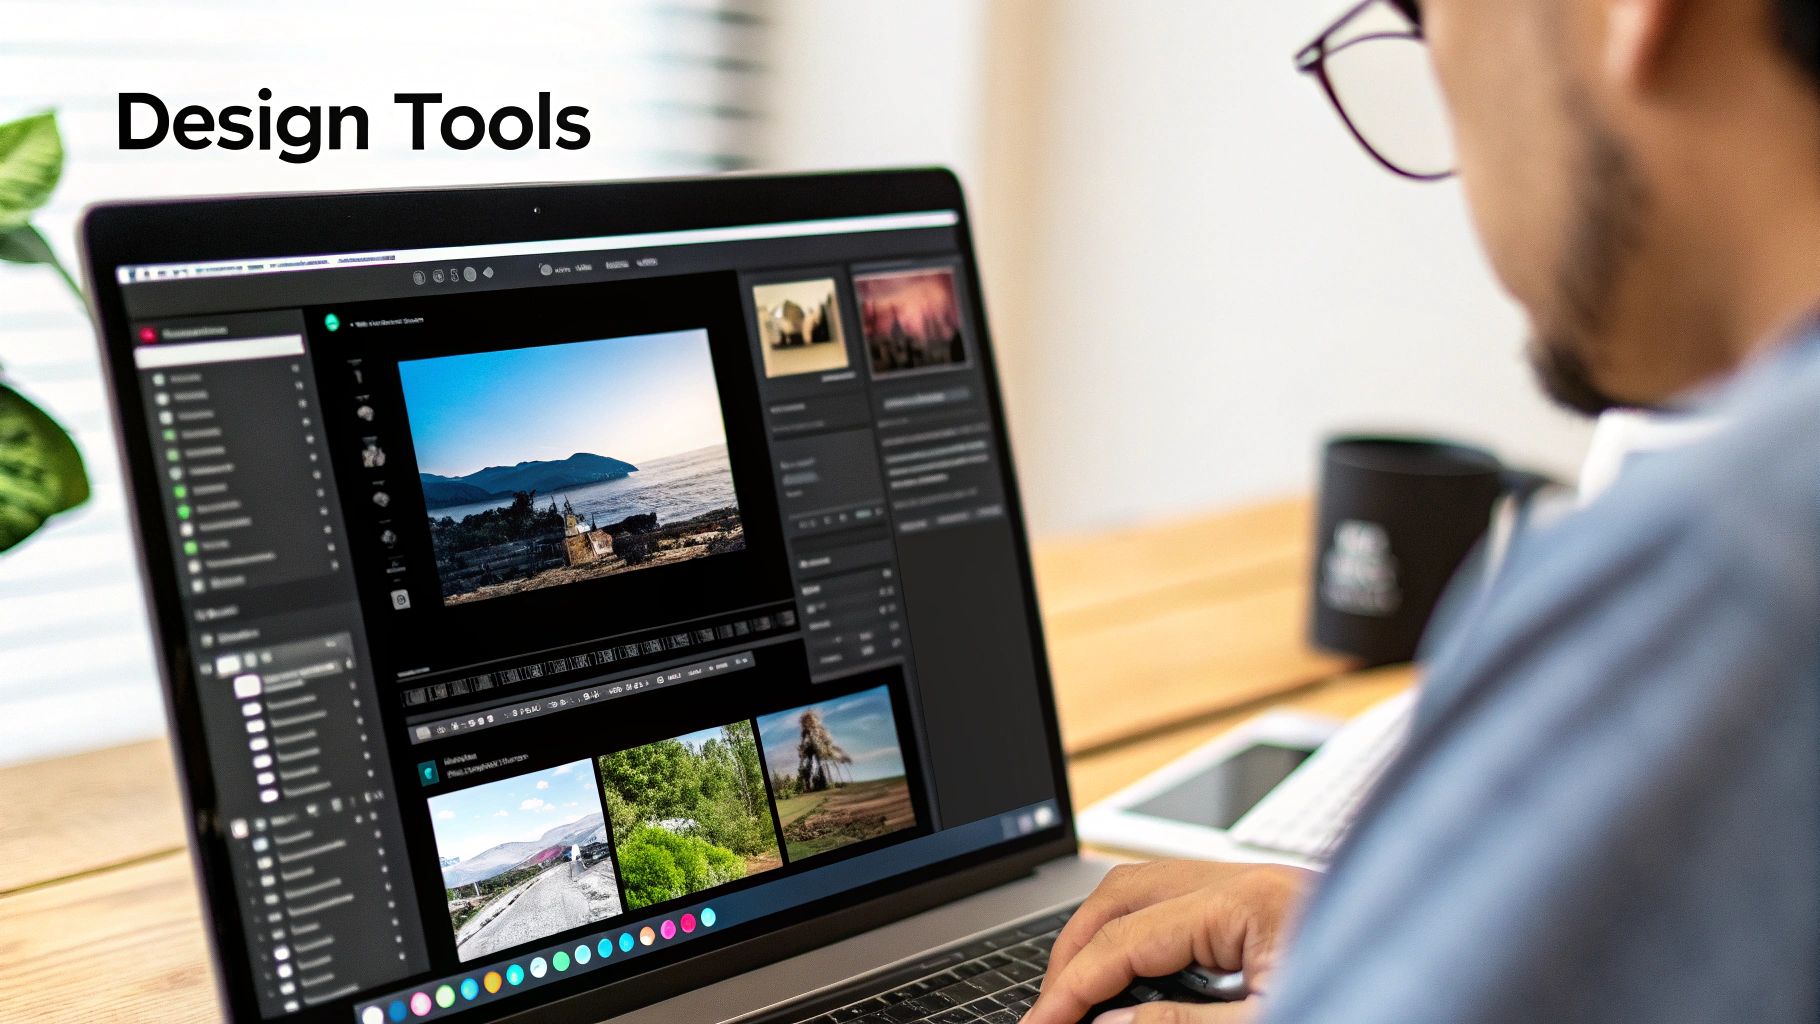
The screenshot below gives you a peek at how you can apply these rules in a real tool.
As you can see, the interface makes it dead simple to drop in bold text and high-contrast elements. You can achieve a polished look without any prior design chops.
Of course, none of this matters if you get the dimensions wrong. That’s a crucial first step. If you need a quick refresher, we have a complete guide covering the proper size for a YouTube thumbnail. Combine the right size with these design principles, and you'll have a thumbnail that works for you, not against you.
Using Advanced Design for a Professional Look
Alright, once you've gotten the hang of clean design basics, it's time to level up your visual brand. Moving beyond simple templates is all about refining your look with more control and nuance. This is where the advanced tools come in, letting you craft thumbnails that aren't just effective but are instantly recognizable as yours.
Layering and Effects for Clarity
Advanced design isn't about jamming more stuff onto your thumbnail; it's about making what's there crystal clear. This is where a tool like the YouTube Thumbnail Studio really shines, giving you granular control over layers, custom fonts, and subtle effects.
Let's say a researcher wants to make a video about hypothyroidism. Instead of a cluttered image, they can overlay a single, bold keyword like "Hypothyroidism" or a key data point right onto a relevant background. I've personally used this feature to add a soft outer glow to text, which cleanly separates it from a busy background and boosts readability. That kind of control is what stops you from creating a busy, "ridged" look.
Think of it this way: just like vertical nail ridges can point to underlying health issues, a cluttered thumbnail can signal a lack of focus. Experts have even noted how metabolic issues often show up in nail health. You can actually find more insights on what nail ridges might mean on lifeextension.com. In the same vein, a clean, well-layered design signals a clear, healthy message to your audience.
Creating a Consistent Brand Template
Honestly, the most powerful thing you can do with an advanced tool is create and save your own brand templates. Consistency is everything when you're trying to build channel authority. When viewers can spot your thumbnails in a crowded feed before they even read the title, you've already won half the battle.
Inside the YouTube Thumbnail Studio, you can lock in your entire visual identity:
- Font choice and size: Pick two or three fonts and stick with them. Consistency is key.
- Color palette: Lock in your brand’s main and secondary colors so every thumbnail feels related.
- Logo placement: Always put your logo or branding element in the same spot, like a specific corner.
Once you build that template, every thumbnail you create will be "healthy," professional, and unmistakably on-brand. This consistency strengthens your channel's identity, much like a great channel banner does. For more branding tips, check out our guide on creating professional templates for your YouTube banner.
Building a Sustainable Thumbnail Workflow
Let’s be honest, great design isn't a fluke—it's a system. If you want to consistently sidestep the dreaded "ridged thumbnails vertical" effect, you need a workflow that’s both efficient and repeatable. A solid process saves you a ton of time and makes sure every single video you publish has a professional, high-CTR visual ready to go.
Step 1: Research and Inspiration
A smart workflow always starts with a bit of recon. Before you even touch a design tool, do some quick competitor research with something like the YouTube Thumbnail Downloader. Just grab a handful of high-performing thumbnails from the top creators in your niche. What do they all have in common? Pay attention to their font choices, their color palettes, and how they frame their subjects. This isn't about copying them. It's about spotting the proven patterns that are already working.
Step 2: Find Your Thumbnail's "Hook"
Now, here’s where you can really streamline things. Instead of agonizing over catchy text for your thumbnail, just let your content do the heavy lifting for you.
Pro Tip: Use the YouTube Transcript Extractor to pull one powerful, punchy quote directly from your video. A surprising statistic or a compelling one-liner from your script often makes for the most effective thumbnail text. I use this all the time to find the perfect phrase that accurately reflects the video's core value.
This simple trick does two things beautifully. First, it guarantees your thumbnail is perfectly aligned with your video's core message. Second, it saves you a ton of creative energy. You’re making a promise in the visual that you know your content delivers on, building trust with your viewers one click at a time.
Step 3: Design, Analyze, and Repeat
Once you've published, use the YouTube Channel Analytics tool to track performance. Did that new style work? Did the extracted quote boost your CTR? This sustainable loop—research, create, and analyze—is the secret to maintaining a visual strategy that’s both healthy and incredibly effective.
Common Questions About Fixing Vertical Thumbnails
Let's cut through the noise. When creators, educators, and researchers talk about designing effective thumbnails, the same questions pop up again and again. Here are the straight answers you need to fix your visual strategy and stop that dreaded 'ridged' effect in its tracks.
How Can I Tell If My Thumbnail Is Too Busy?
You don't need fancy tools for this, just a friend and three seconds. Seriously. Show them your thumbnail for just three seconds, then hide it. Ask them what the video is about. If they can’t tell you, your thumbnail is too cluttered and has that 'ridged' look. It failed the test.
Your analytics will also tell the story. A low click-through rate (CTR) on a video with high impressions is a massive red flag. It means YouTube is showing your video to people, but your thumbnail isn't convincing them to click. Use a tool like YouTube Channel Analytics to spot these underperformers quickly.
The Fix: Keep it simple. Stick to one clear subject, no more than 3-5 words of big, bold text, and use high contrast between your main element and the background. When it comes to thumbnails, clarity always wins.
Does "Vertical Thumbnail" Only Mean It Is for YouTube Shorts?
Not at all. This is a common point of confusion. While YouTube Shorts do use a vertical (9:16) aspect ratio, the term 'ridged thumbnails vertical' in this guide describes a cluttered, ineffective design style that hurts your channel's health, not just a format for Shorts.
Think of it as a set of principles. The same rules of clarity, contrast, and focus apply to your standard 16:9 horizontal thumbnails, too. A clean design is what gets you clicks, no matter where your video shows up on the platform.
Which Tool Is Best for a Beginner to Avoid Bad Design?
If you're just starting out or feeling a bit lost in the world of design, go straight for the YouTube Thumbnail Maker. Its templates are your safety net—they're built on solid design principles that steer you clear of the common mistakes that cause that 'ridged' look. The drag-and-drop interface makes it incredibly easy to arrange your elements cleanly without any prior experience.
Once you get the hang of basic composition, you can graduate to the YouTube Thumbnail Studio for more advanced features like custom branding and layers. Of course, a great thumbnail needs a great topic. For a little inspiration, check out our guide on compelling video ideas for your YouTube channel.
What Is the Single Biggest Mistake to Avoid?
Trying to tell the entire story of your video in the thumbnail. That’s the single biggest mistake creators make. A thumbnail has one job and one job only: to earn the click. It does this by sparking curiosity and clearly communicating the video's core promise.
When you load it up with too much text, multiple competing images, or low-contrast colors, you create a visual mess that viewers will just scroll right past. Focus on one core idea, one strong image, and a few powerful words. I often use the YouTube Transcript Extractor to find that perfect, punchy phrase directly from my own script. Your goal is to create a thumbnail that promises value, not one that causes confusion.
Ready to stop guessing and start creating thumbnails that actually get clicks? YouTube Navigator offers a full suite of free tools—from the YouTube Thumbnail Maker to advanced analytics—to help you build a stronger, more professional channel.
Leave a Reply