Category: Uncategorized

  • Optimal Size for a YouTube Thumbnail to Boost Clicks

    Optimal Size for a YouTube Thumbnail to Boost Clicks

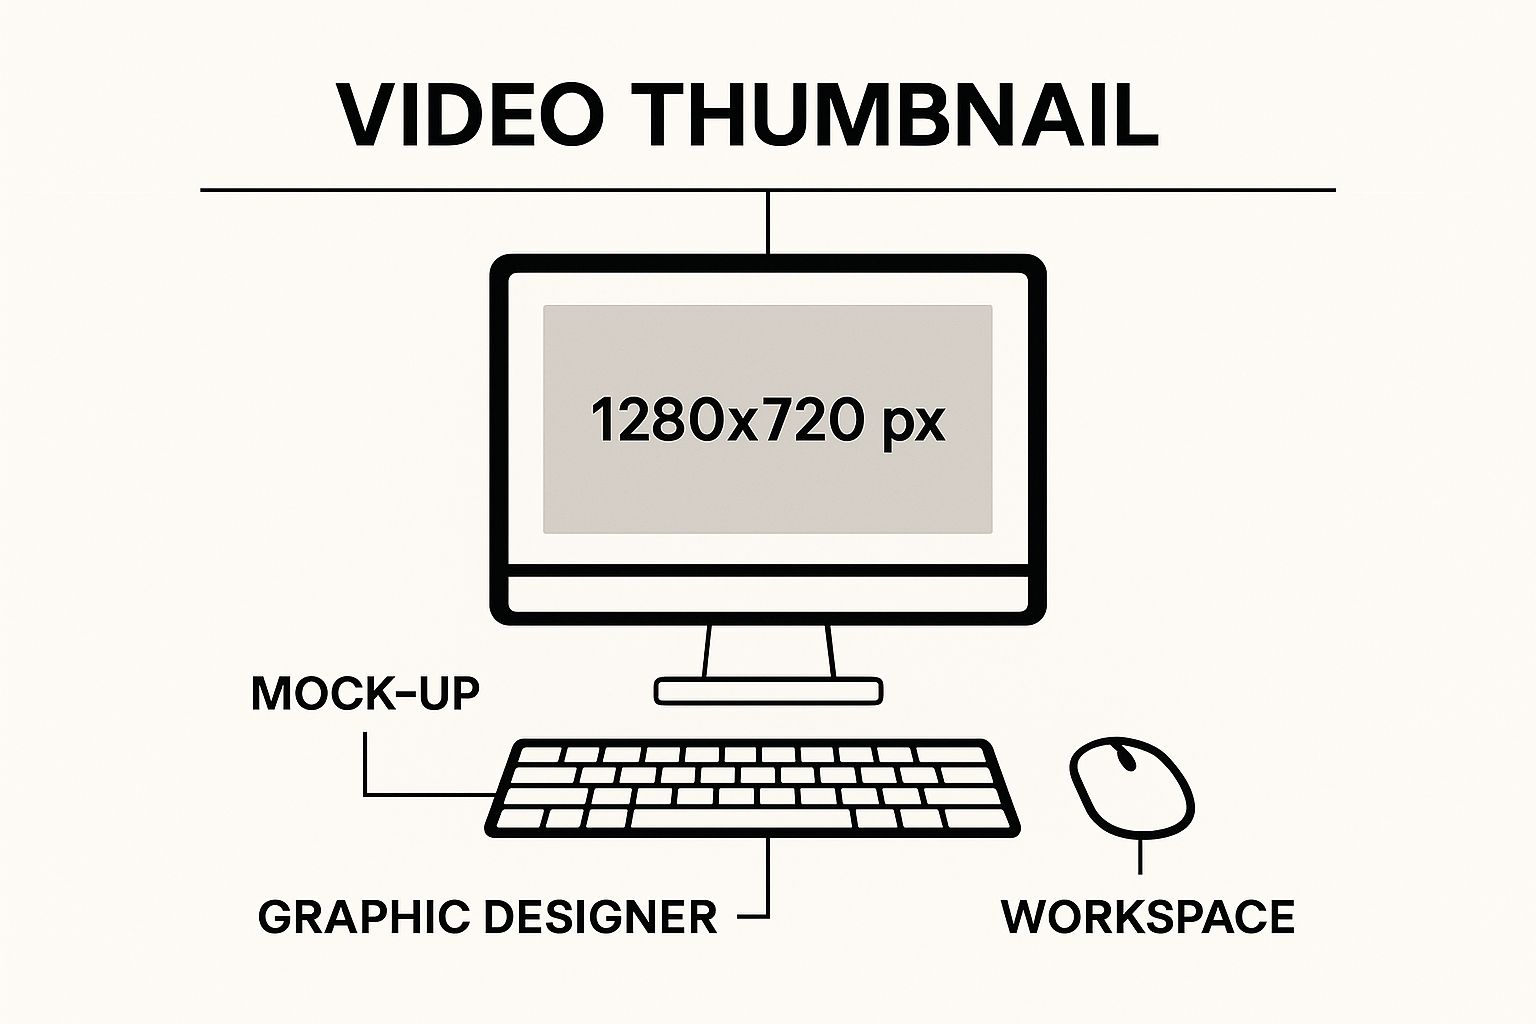
    Let's get right to it. The magic number you're looking for is 1280 x 720 pixels. That’s the ideal size for a YouTube thumbnail. Think of it as the universal key that unlocks a perfect, crisp look for your video's "cover art," no matter if you're an educator sharing a lecture on a smart TV or a researcher whose work is being viewed on a tiny phone screen.

    The Perfect YouTube Thumbnail Size and Why It Matters

    Your thumbnail isn't just a placeholder; it's the single most important piece of advertising for your video. For creators, educators, and researchers, it’s the first impression—the visual handshake that convinces a potential viewer to click. Nailing the technical specs is the foundation for a higher click-through rate (CTR) and signals the quality of your content before anyone even hits play.

    Why 1280 x 720 pixels specifically? It’s all about the 16:9 aspect ratio. This ratio perfectly mirrors the shape of the standard YouTube video player, creating a seamless and professional look. Get this right, and you'll avoid those ugly black bars or stretched-out images that can undermine your credibility.

    Key Technical Specifications

    Beyond just the resolution, YouTube has a few other ground rules you need to follow. These aren't arbitrary; they're designed to ensure your thumbnail uploads correctly and loads fast for everyone, everywhere.

    • Resolution: Stick to 1280 x 720 pixels. While the minimum width is 640 pixels, using the full resolution ensures your image is sharp and detailed.
    • Aspect Ratio: Always 16:9. This is non-negotiable for perfect alignment with the YouTube player.
    • File Formats: You’ve got options here. JPG, GIF, or PNG are all accepted.
    • File Size: Keep it lean. Your file must be under the 2MB limit.

    This simple graphic is a great reminder of the one number to remember for your design workflow.
    Image

    Here's a quick reference table to keep all those technical details straight. I recommend bookmarking this page—it’s a lifesaver when you’re deep in your creative process.

    YouTube Thumbnail Quick Reference Guide

    Specification Recommendation Why It's Important
    Resolution 1280 x 720 pixels Ensures your thumbnail is high-quality and looks sharp on all screens, from mobile to TV.
    Aspect Ratio 16:9 Perfectly matches the YouTube player, preventing black bars or awkward cropping.
    File Formats JPG, PNG, GIF These are the standard formats accepted by YouTube for easy uploading.
    File Size Under 2MB Guarantees your thumbnail loads quickly, providing a better experience for viewers with slower connections.
    Minimum Width 640 pixels An absolute minimum requirement for YouTube to accept the upload.

    Following these guidelines isn't just about pleasing the YouTube algorithm; it's about creating a better, more professional experience for your audience. It’s a small detail that makes a huge difference. You can learn more about these guidelines and their importance straight from YouTube’s official help center.

    Mastering File Size and Format Requirements

    While pixel dimensions get most of the glory, the file size and format of your thumbnail are just as critical. Let’s be real—a perfect size for a YouTube thumbnail isn’t just about how it looks; it’s about how it loads. Think of it this way: a stunning, high-res image is completely useless if it takes too long for a viewer's device to actually display it.

    That's precisely why YouTube put a strict 2MB file size limit in place. This rule is non-negotiable, and it’s there to make sure your video's "front door" appears instantly for everyone—whether they're on a blazing-fast fiber connection or a spotty mobile network. An oversized file can kill your page load time, and that's often all it takes for an impatient viewer to scroll right past. You can dig deeper into these performance-focused guidelines in various industry reports, like this one about best practices on Promo.com.

    Choosing the Right File Format

    YouTube gives you three main options for your thumbnail's file format: JPG, PNG, and GIF. Each has its own job to do, and picking the right one can make a huge difference in your thumbnail’s quality and final file size.

    • JPG (JPEG): This is your workhorse for any thumbnail with photographic elements. JPGs are brilliant at compressing complex images full of colors and gradients—like a shot of a person or a landscape. That compression is key to easily staying under the 2MB limit without a noticeable nosedive in visual quality.

    • PNG: Reach for PNG when your thumbnail is heavy on graphics, text, or logos. This format keeps sharp lines and text perfectly crisp and even supports transparency (a huge plus!). The trade-off? PNG files are often larger, so you’ll have to keep a close eye on that 2MB cap.

    • GIF: While YouTube technically supports GIFs, they're almost never the right choice. They are limited to just 256 colors and are really meant for simple animations, not the high-impact static image you need for a thumbnail.

    Pro Tip: Here’s a workflow the pros use: Design your thumbnail in a PNG format to keep everything sharp and high-quality. Once you’re happy with it, export a compressed JPG version specifically for uploading to YouTube. This gives you the best of both worlds—a crystal-clear design that loads in a flash. The same principles of visual clarity apply even when designing for different platforms, a topic we explore in our guide to YouTube TV channels.

    The Hidden Story Behind the Thumbnail

    Ever stop to think about why we call it a "thumbnail"? It’s one of those terms we use every day, but its origin story is surprisingly old and gives us a powerful way to think about creating great YouTube visuals. Understanding this history makes it crystal clear why getting the right size for a YouTube thumbnail is about more than just pixels—it's about psychology.

    The name actually comes from the art world, long before computers existed. For centuries, artists would create tiny preliminary sketches—often no bigger than a human thumbnail—to map out a larger, more detailed masterpiece. These weren't just doodles; they were bite-sized previews of the final work. Fast forward to the 1980s, and the term was borrowed by computer engineers to describe small, digital image previews. You can read more about this cool evolution and how YouTube adopted the term on ThumbnailTest.com.

    From Tiny Sketch to Digital Powerhouse

    This little history lesson reveals a timeless truth: a thumbnail’s job has always been to offer a compelling, super-quick preview to hook an audience. It tells a story at a glance, whether on an artist's easel or a viewer's screen. And in the crowded, fast-paced world of YouTube, that job is more critical than ever.

    A great thumbnail is a promise to the viewer. It communicates the value, tone, and topic of your video before they commit to clicking.

    Just like an artist’s sketch had to capture the spirit of a painting, your thumbnail has to capture the essence of your video. It's your single most important tool for cutting through the endless scroll and sparking that "I need to watch this" feeling. For an educator, this could mean using it to showcase a key concept from your lesson. For a researcher, it could mean visualizing a critical data point.

    So when you're brainstorming, don't just think of it as making an image. Think of it as crafting a modern-day preview sketch. If you need a little inspiration for what to put in that sketch, check out our guide on developing compelling video ideas for YouTube to make sure your visuals and content are perfectly aligned.

    Designing Thumbnails That Command Clicks

    Image

    Getting the technical specs right for your YouTube thumbnail size is just the first step. The real work starts now. It's time to take that 1280×720 canvas and turn it into a tiny, scroll-stopping billboard that makes people have to click.

    A killer thumbnail does more than just look pretty. It tells a miniature story and makes a powerful promise about the value your video delivers. It’s your single best shot to stand out in a sea of content.

    The secret? The best thumbnails tap directly into human psychology. They use high-contrast colors, expressive faces, and big, bold text to hijack a viewer’s attention in a fraction of a second.

    The Anatomy of a High-Performing Thumbnail

    To build a design that actually gets clicks, you need to nail three core components. Think of them as a three-legged stool—if one is weak, the whole thing topples over, and your click-through rate goes with it.

    • High-Contrast Colors: Your thumbnail needs to scream for attention. Use bright, opposing colors that leap off YouTube’s white, grey, or dark backgrounds. A classic trick is to darken your background image slightly and then layer it with electrifyingly bright text or graphics.

    • Expressive Faces: We are hardwired to connect with other human faces. A clear, high-quality shot of someone showing a strong emotion—like shock, joy, or intense curiosity—creates an instant emotional hook. It makes viewers wonder, "What on earth caused that reaction?"

    • Bold, Legible Text: Keep your text short and punchy. Aim for three to five powerful words, max. The font needs to be thick, clear, and readable even on a tiny smartphone screen. Your video’s title can handle the details; the thumbnail’s job is to create pure intrigue.

    Pro Tip: Before you open a blank canvas, do some recon. Analyze what the top creators in your niche are already doing successfully. With YouTube Navigator’s YouTube Thumbnail Downloader, you can easily save high-res thumbnails from any video for inspiration and analysis.

    Once you’ve gathered some inspiration, it's time to build your own. For a quick and effective design, a powerful YouTube thumbnail maker can give you a head start with templates built on these very principles. These tools are fantastic for getting professional results without the steep learning curve of complex design software.

    Common Thumbnail Mistakes and How to Fix Them

    So, you’ve nailed the perfect size for a YouTube thumbnail, but your click-through rate (CTR) is still flat. What gives? It’s a classic trap many creators fall into: hitting all the technical marks but failing on the design front. A thumbnail that doesn't connect with a real, live human is just a wasted pixel.

    Let’s troubleshoot the most common pitfalls I see all the time and, more importantly, figure out how to fix them.

    One of the biggest culprits is the "busy" thumbnail. When you try to cram every possible element—text, logos, graphics, your face, your dog's face—into that tiny rectangle, you create visual noise. Nothing stands out, and viewers, feeling overwhelmed, just keep on scrolling. The fix? Embrace simplicity. Focus on one core idea and let it breathe.

    Unreadable Text and Weak Visuals

    Another classic mistake is text you can’t actually read. A skinny font or colors that blend into the background are poison to your CTR, especially on a small phone screen. Your text needs to be a billboard, not a footnote. It has to be bold, clear, and instantly understandable.

    • The Fix for Text: Go for a thick, sans-serif font. A tried-and-true trick is to put a dark outline or a solid-colored box behind your text. This makes it pop against literally any background. And please, keep your message to a few powerful words.

    • The Fix for Visuals: Don't even think about using low-resolution or blurry images. A pixelated thumbnail screams "low-quality video" before anyone even clicks. Always start with high-resolution source images and make sure they’re sharp and in focus.

    Finally, nothing breaks trust faster than a misleading thumbnail. Using clickbait-y visuals that have zero to do with your video content might get you a few clicks, but it will tank your watch time. Viewers will bounce, signaling to the YouTube algorithm that your content isn't delivering on its promise.

    Key Insight: The best way to diagnose a weak thumbnail is to use a dedicated tool like YouTube Channel Analytics from YouTube Navigator. Sorting your videos by CTR allows you to see, at a glance, which thumbnails are underperforming. This data-first approach takes the guesswork out of figuring out which designs need a refresh.

    Once you’ve spotted a problem thumbnail, you can do a quick redesign. By spotting these common mistakes and using data to guide your redesigns, you can systematically level up your channel’s performance.

    Frequently Asked Questions About Thumbnail Size
    Image

    You've got the rules and the strategies down, but a few specific questions always seem to pop up once creators start getting serious about their thumbnails. Let's tackle the most common ones so you can design with total confidence.

    Does My Thumbnail Need to Be Exactly 1280×720?

    While 1280×720 pixels is the gold standard for quality, it’s not your only option. YouTube’s absolute minimum requirement is a width of 640 pixels. So, technically, you can go smaller.

    But here’s why you shouldn’t: sticking to the 1280×720 size for a YouTube thumbnail guarantees your image will look crisp and professional on every single device. It prevents that dreaded pixelation or blurriness, especially on larger screens like smart TVs where smaller images can look noticeably amateur.

    Key Takeaway: Think of 1280×720 not just as a rule, but as a quality guarantee. It’s your best shot at making a sharp first impression, no matter where your video shows up.

    Can I Update a Thumbnail on an Old Video?

    Absolutely! This is one of the most powerful—and underused—strategies for channel growth. You can swap out the thumbnail on any of your videos, anytime, directly from the YouTube Studio.

    This is a fantastic way to breathe new life into videos with a low click-through rate (CTR). By diving into your channel's analytics, you can pinpoint exactly which videos are underperforming. Armed with that data, you can A/B test new thumbnail designs and see if a fresh visual can reignite viewer interest. A tool like our YouTube Channel Analytics is perfect for this, as it helps you identify low-CTR videos that are prime candidates for a thumbnail refresh.

    What Is the Best Way to Design on Mobile?

    Creating pro-level thumbnails on your phone is totally doable if you have the right approach. The first step is to find design apps that let you set custom canvas dimensions. This way, you can start your project at the ideal 1280×720 pixels right from the get-go.

    The single most critical part of mobile design is constant previewing. Since you’re designing on a small screen, you have to zoom out—a lot. See what your thumbnail looks like when it's tiny. To make sure your design stays legible and pops off the page, prioritize high-contrast colors and simple, bold text.


    Ready to stop guessing and start designing thumbnails that actually get clicks? The tools at YouTube Navigator were built to solve these exact challenges. Use our free YouTube Thumbnail Studio to craft professional, high-impact designs with ease.

  • Your Guide to Using a YouTube Shorts Downloader Effectively

    Your Guide to Using a YouTube Shorts Downloader Effectively

    Let's be real—using a reliable YouTube Shorts downloader is a game-changer for creators, educators, and researchers. It's not just about grabbing funny clips. For professionals, the right tool is an essential part of a modern workflow, turning fleeting trends into tangible assets for analysis, repurposing, and inspiration.

    Think of it as your private, offline library for competitor research or a quick way to save your best work for cross-platform promotion. The key is to move beyond simple downloading and integrate it into a smarter content strategy.

    Why Smart Creators Use a Shorts Downloader

    Image

    It’s no secret that YouTube Shorts are an engagement powerhouse. But for the savviest creators, educators, and researchers, their value goes way beyond racking up views. Being able to download Shorts unlocks serious strategic advantages that can elevate your content, streamline your research, and boost your productivity.

    It’s like building a personal vault for deep-diving into what makes viral content tick. Or, it can be a simple toolkit for snagging your own best moments to repurpose elsewhere. Downloading is a must-have for creating reaction videos, educational compilations, or just archiving top-performing content to analyze trends later.

    Unlocking Strategic Advantages

    The sheer scale of Shorts is impossible to ignore. By January 2024, the format was pulling in an average of over 70 billion daily views. That’s not a typo. With a staggering 5 trillion total views since its launch, having a reliable method to save and study this firehose of content isn't just nice—it's crucial for anyone serious about digital media.

    This is exactly where a dedicated YouTube Shorts downloader becomes a key part of your workflow. It lets you:

    • Analyze Viral Content: Save top-performing Shorts in your niche. As a creator, you can break them down frame-by-frame to understand what makes them work, from audio choices to editing techniques.
    • Repurpose with Ease: Quickly grab your own Shorts to re-edit for other platforms like Instagram Reels or TikTok without losing video quality.
    • Create Compilations and B-Roll: Weave your best clips into longer videos or use them as dynamic B-roll to add energy to your tutorials or vlogs.
    • Offline Access for Research: If you're an educator or researcher, you can build a secure, offline library of examples for presentations, lectures, and studies, all without needing a constant internet connection.

    In a world of fast-moving content, a reliable downloader isn’t just a convenience—it’s a foundational part of a modern creator's toolkit for staying competitive and innovative.

    For those who want more technical control over their downloads, you can also learn about setting up yt-dlp. It's a command-line tool that offers advanced options for power users. Ultimately, having a go-to method for saving Shorts empowers you to work smarter, not harder.

    How to Download Shorts for Analysis

    Let’s walk through a smart and secure way to download YouTube Shorts. This isn't about using sketchy online tools littered with pop-up ads. Instead, we'll focus on a clean, efficient workflow that researchers, educators, and creators can use to build a library of content for analysis.

    Imagine you're an educator preparing a lecture on modern media literacy. You find a Short that perfectly illustrates a persuasive technique. The first move is simple: just copy the Short’s URL from your browser or the YouTube app. With that link, a trusted downloader saves a high-quality version to your device. This is how you build an offline collection of examples for deep-dive reviews, free from buffering or ads.

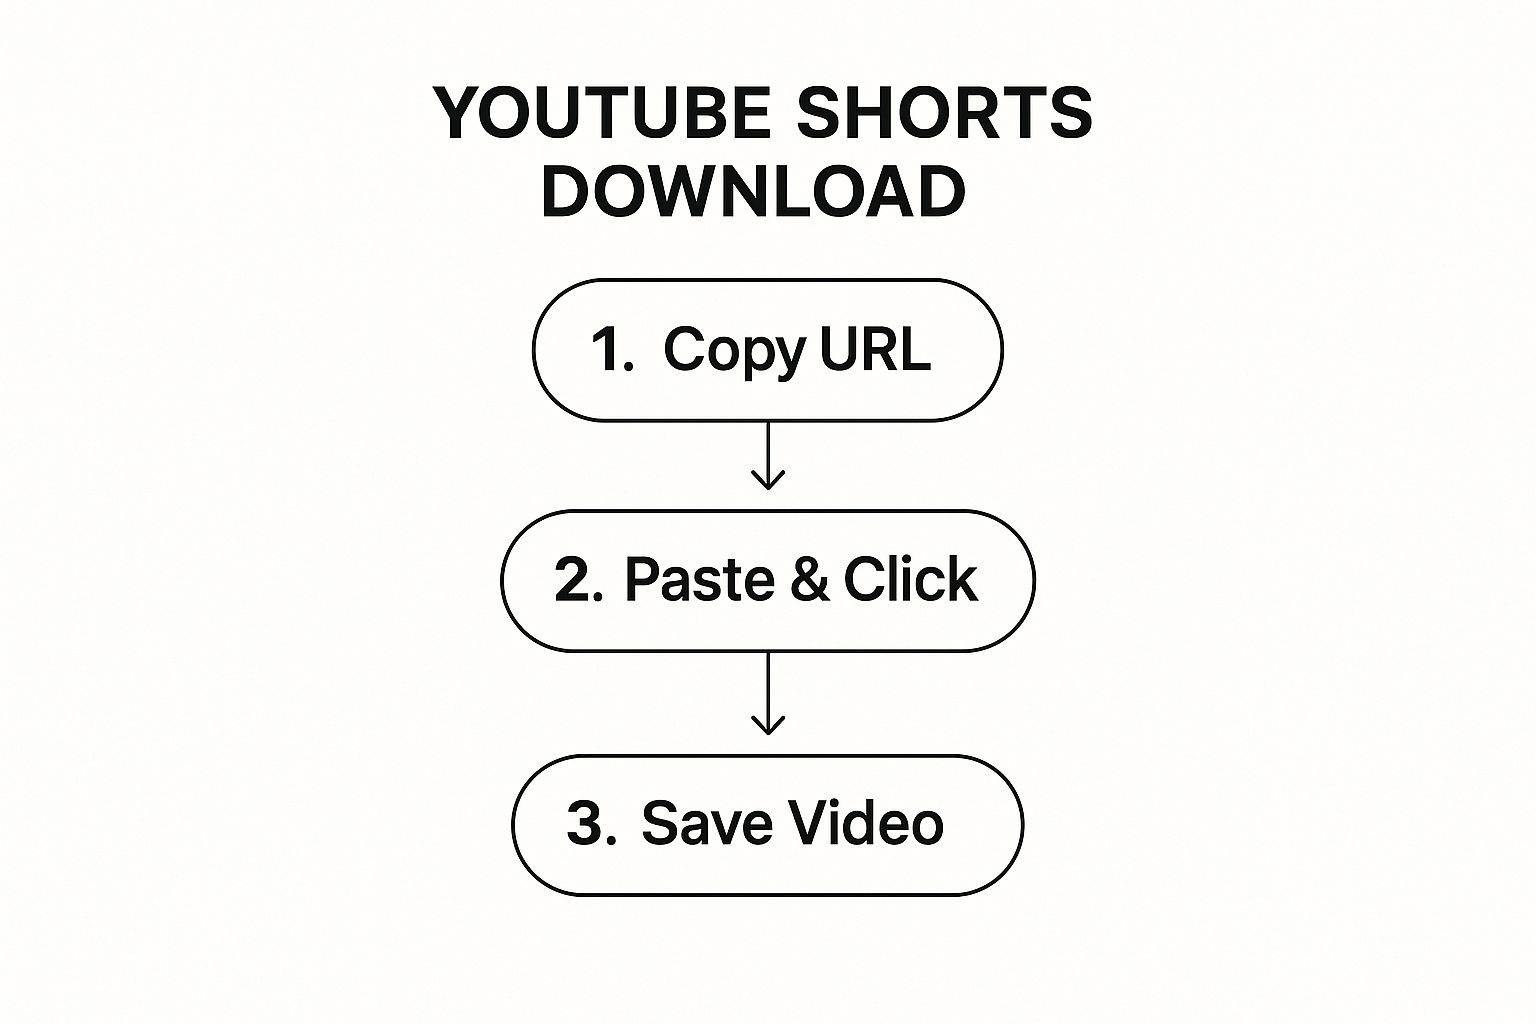
    This infographic breaks down the process into its three essential, straightforward steps.

    Image

    As you can see, the workflow is designed for pure speed and simplicity. It takes you from a URL to a saved file in just a couple of clicks.

    Integrating Tools for Deeper Insights

    To get the most out of your downloaded content, bringing other tools into the mix is a pro move. For example, after saving a Short, you might need a crisp, high-resolution still of its most powerful frame to use in a presentation or a thumbnail for a reaction video.

    This is where having a dedicated toolset really pays off. A great workflow might look something like this:

    • Find the right Short: Pinpoint the video you need for your research or creative project.
    • Download the video file: Use a reliable YouTube Shorts downloader to save the MP4.
    • Grab the key frame: Use a tool like the YouTube Thumbnail Downloader to pull a high-res image of the video's thumbnail, which often highlights its most compelling moment. This is perfect for archiving, inspiration, or creating new graphics.

    This multi-tool approach gives you both the dynamic video and a static image, setting you up for a much more thorough analysis.

    The best analysis comes from looking at content from multiple angles. Having both the full video and its key visual elements gives you the flexibility to deconstruct what makes a Short successful, from its pacing to its visual hooks.

    This method ensures you have everything you need for reports, presentations, or even planning your own content. By sticking to a secure and integrated workflow, you can stop worrying about the tech and focus on what really matters: turning raw content into powerful insights.

    Repurpose Your Shorts Content Intelligently

    Image

    Getting your hands on your Short with a youtube shorts downloader is a great start, but it’s just the first step. The real creative leverage—the kind that grows your brand or enriches your research—comes from repurposing. This is where you take that one 60-second clip and turn it into a powerhouse asset that works for you across your entire digital footprint.

    Don't just think about the single upload. Imagine stitching together your top-performing Shorts into a "greatest hits" compilation for a longer YouTube video. Or, pull the most dynamic moments from a downloaded Short and use them as slick B-roll to spice up your next tutorial or vlog. Suddenly, one piece of content has a much longer shelf life.

    From Video to Text and Beyond

    One of the smartest moves you can make is turning your video's audio into text. Let’s say you downloaded a Short where you shared a valuable insight. By feeding it into the YouTube Transcript Extractor, you get an accurate, time-stamped script in seconds. I've personally used this to turn quick video ideas into detailed blog post outlines, saving hours of manual transcription.

    This unlocks a whole new world of content:

    • Create Punchy Social Posts: Pull the most memorable quotes from your transcript and share them as quick insights on X (formerly Twitter) or LinkedIn.
    • Improve Accessibility: Add the transcript as captions to your videos or as a text description, making your content accessible to a wider audience.
    • Fuel Your Written Content: For researchers and educators, a transcript is a goldmine for pulling direct quotes for papers, articles, or lecture notes.

    This strategy shows how one solid Short can fuel your content calendar for days. For more tips on growing your channel's reach, check out our guide on setting up a YouTube TV channel.

    Smart Repurposing Ideas for Your Downloaded Shorts

    Here are some creative ways to extend the life of a single downloaded YouTube Short across different platforms, boosting your reach and engagement.

    Platform Repurposing Tactic Example for Creators & Educators
    Instagram Create a Reel or Story Use a 15-second clip from your Short, add a trending audio track, and include a poll sticker to boost interaction.
    TikTok Post a Stitch or Duet Find a related viral video and use a key moment from your Short to add your own commentary or educational take.
    X (Twitter) Share a GIF or short clip Turn the most visually interesting 3-5 seconds into a GIF and post it with a compelling question to spark conversation.
    LinkedIn Write a Text Post with a Quote Pull a powerful insight from your Short's transcript, write a short professional take on it, and link back to the original video.
    Pinterest Create an Idea Pin Use multiple clips from the Short to create a step-by-step visual guide, especially for DIY, recipe, or tutorial content.
    Blog/Research Paper Embed as a Visual Element Write an article expanding on the Short's topic and embed the video to provide a rich media example for your readers.

    By thinking this way, you're not just creating content; you're building a content ecosystem where every piece supports the others.

    The smartest creators don't just create content; they atomize it. They break down one primary asset into dozens of smaller pieces, distributing them across platforms to meet audiences where they are. This method ensures maximum visibility from a single recording session.

    This "content multiplication" saves an incredible amount of time and mental energy. Instead of constantly being on the hamster wheel of brainstorming, you can focus on smartly distributing the awesome content you’ve already made. When you see each Short as a collection of reusable parts—video clips, audio snippets, and text—you build a sustainable content engine.

    Navigating Copyright and Fair Use

    So, you've found a youtube shorts downloader and you're ready to start saving content. That's great, but before you go on a downloading spree, we need to talk about the serious stuff: copyright. The moment you save a video that isn't yours, you're stepping into a legal gray area, and understanding the rules is essential to protect your own channel and professional integrity.

    This isn't just about avoiding a legal headache; it's about being a good citizen of the creator community.

    The biggest line in the sand is between private use and public redistribution. Are you downloading a Short to study its editing style for your own creative growth? Or are you an educator saving it for an internal classroom presentation? Generally, you're in the clear. But the second you re-upload that content, everything changes. Sharing someone else's work without permission is a direct violation of YouTube's rules and copyright law.

    Understanding Fair Use

    This brings us to "fair use." You've probably heard the term, but what does it actually mean for a creator or researcher? Fair use is a legal principle that allows you to use copyrighted material without permission for specific purposes, like commentary, criticism, news reporting, or teaching. It’s a creator’s best defense, but it’s incredibly nuanced—not a get-out-of-jail-free card.

    The key to a solid fair use claim is making your work transformative. You can't just repost someone's video. You have to add something new—fresh commentary, unique analysis, educational context, or a new perspective.

    A lot of people think that just giving credit or adding a "no copyright infringement intended" disclaimer is enough. It's not. The law cares about how you transformed the original work, not just that you acknowledged it.

    Let's look at a couple of real-world examples:

    • For an Educator: A science teacher downloads a 5-second clip from an experiment Short. They include it in a classroom presentation to demonstrate a physics concept, pausing to explain the science. This is a classic example of fair use because the purpose is educational and it transforms the clip into a teaching tool.
    • For a Commentary Channel: A YouTuber creates a reaction video, using clips from a viral Short to provide funny or insightful critique. Because they're adding a new layer of commentary and analysis, this is a strong argument for fair use.

    Before you ever use downloaded content, ask yourself: "Am I just re-uploading this, or am I adding significant value and new meaning?" Answering that honestly will help you stay on the right side of copyright and build a channel that's both successful and ethical.

    Using Downloaded Shorts to Uncover Trends

    Image

    YouTube Shorts aren't just for a quick laugh; they're a live feed of what's capturing global attention. For a creator, marketer, or researcher serious about growth, using a youtube shorts downloader to build a curated library of viral content is like having a secret weapon for market research. This isn't about guessing what's popular—it's about seeing it firsthand.

    By saving and organizing the top-performing Shorts in your niche, you start to spot patterns that others miss. Whether it's comedy, tech reviews, or educational content, you'll notice which audio clips are trending, what editing styles are stopping the scroll, and which topics are exploding. You'll go from being a passive scroller to an active trend-spotter.

    Building Your Trend-Spotting Workflow

    Your collection of downloaded Shorts becomes your own private dataset. Once you've got a decent library built up, the real analysis begins.

    • Audio Analysis: Group videos by the sounds or songs they use. Is there a specific audio clip appearing constantly in your niche? That’s your cue.
    • Visual Style Review: Look for common threads in pacing, transitions, and on-screen text. Fast cuts might dominate gaming, while a slower, more aesthetic style could be winning in the lifestyle space.
    • Topic Clustering: Sort your downloaded Shorts by their core subject. This helps you identify which sub-topics are currently hitting a nerve with audiences and where there might be gaps to fill.

    This kind of analysis can reveal fascinating insights. For example, in early 2024, the U.S. and Indian markets accounted for 19.4% and 5.2% of Shorts traffic, respectively. With over 164.5 million Shorts users in the U.S. alone, the data from that market is a goldmine for understanding broader trends.

    The goal is to get ahead of the curve. Instead of just jumping on trends, you can start to anticipate them. Systematically analyzing what’s working gives you a powerful first-mover advantage, letting you create the next big thing before it’s even mainstream.

    Closing the Feedback Loop with Analytics

    This trend analysis becomes even more powerful when you connect it to your own channel's performance. After identifying a potential trend, create your own Short to test it. Then, dive into a tool like the YouTube Channel Analytics dashboard to see how it performs. Did it get more views? Higher engagement?

    This creates a perfect feedback loop. You can see if an industry-wide trend actually resonates with your specific audience. This data-driven approach means you’re making smarter decisions, keeping your content strategy fresh, relevant, and perfectly tuned to the people who follow you.

    Got Questions About Downloading Shorts? We've Got Answers

    Let's clear up some common questions that creators, educators, and researchers have about using a YouTube Shorts downloader. Knowing the ins and outs will help you use these tools confidently and correctly.

    Is It Legal to Use a YouTube Shorts Downloader?

    This is a big one, and the answer is all about intent. If you're downloading Shorts for your own personal use—like for offline viewing, private archiving for research, or to analyze an editing style—you're generally in the clear.

    The line gets crossed when you re-upload or publicly share that content without getting permission from the original creator. That's a fast track to violating both YouTube's Terms of Service and copyright law. Always use downloaded content ethically and look to transform it, not just repost it.

    Can I Download Shorts in High Definition?

    Absolutely. Most quality YouTube Shorts downloader tools will let you grab videos in various resolutions, often including 720p and 1080p (HD). The downloadable quality is, of course, limited by the quality of the original upload.

    For the sharpest results, use a tool built to handle high-resolution downloads without heavy compression. This is especially important for creators who plan to re-edit clips or researchers who need to see fine detail.

    The goal here isn't to plagiarize, but to learn. For example, you might download a Short to study its viral audio, then transcribe the YouTube video to break down the script's pacing. That’s a powerful and ethical way to deconstruct what makes top content successful.

    What Are the Risks of Using Random Online Downloaders?

    Tread carefully here. Using a random, untrusted online downloader from a quick search can expose you to serious risks, such as:

    • Malware or viruses hidden in the downloaded files.
    • Aggressive pop-up ads that disrupt your workflow.
    • Shady sites that might compromise your data privacy.

    These sites often try to sneak unwanted software onto your device. To keep your computer and personal information safe, it's always smarter to stick with well-known, secure tools from reputable developers.


    Ready to streamline your workflow with a full suite of professional-grade tools? Youtube Navigator offers everything from an HD downloader and the YouTube Transcript Extractor to a powerful YouTube Thumbnail Studio—all for free and without registration. Start optimizing your content creation today.

  • A Creator’s Guide to yt dlp for Smart Video Archiving

    A Creator’s Guide to yt dlp for Smart Video Archiving

    Let's be honest: if you're a creator, researcher, or educator serious about managing online video, you need a serious tool. Forget those clunky, ad-filled browser extensions. When you need real power and flexibility for archiving your content or research material, you need yt-dlp.

    In simple terms, yt-dlp is a free, open-source command-line program for downloading videos and audio from YouTube and hundreds of other websites. It’s the direct successor to the legendary youtube-dl, but supercharged with better performance, more features, and—most importantly—active, ongoing development that keeps it working when other tools fail.

    What Is yt-dlp and Why Should Creators and Researchers Use It?

    Image

    If you're a content creator, researcher, or educator, you've probably hit a wall with online video. Maybe you need to create a secure, offline backup of your own YouTube channel before disaster strikes. Perhaps you're an educator who needs to download a lecture series for offline viewing on a flight, or a researcher compiling video evidence for a project. This is exactly where yt-dlp comes in.

    Think of it as the Swiss Army knife for online video. Yes, it runs from the command line, which can look a little intimidating at first. But that interface is the key to unlocking a level of control and automation that web-based tools can only dream of.

    The Evolution from youtube-dl

    To really get why yt-dlp matters, you have to know its origin story. It started as a "fork" of the youtube-dl project, which was the undisputed champion for years. But as youtube-dl's development slowed to a crawl, the community of creators and power-users needed something better.

    That's when yt-dlp stepped up, rapidly adding bug fixes, new features, and support for websites that the original had long given up on. The transition became official when major Linux distributions like Ubuntu started replacing youtube-dl with yt-dlp in their core software libraries, cementing its place as the new standard. You can dig into its history on its Wikipedia page.

    yt-dlp vs youtube-dl Key Differences

    Curious why so many people made the switch? This table breaks down the key advantages that yt-dlp brought to the table, making the choice a no-brainer for most users.

    Feature youtube-dl yt-dlp
    Development Status Mostly inactive; slow updates Actively maintained; frequent updates
    Download Speed Generally slower Optimized for faster downloads
    Feature Set Core features, but many are outdated More advanced features and format options
    Site Support Many sites are broken due to lack of updates Broader and more current site support
    Community Legacy user base Large, active, and growing community

    Ultimately, yt-dlp isn't just a replacement; it's a significant upgrade that addresses the shortcomings of its predecessor and keeps pace with the modern web.

    Why It’s an Essential Tool for Professionals

    So, why bother with a command-line tool when there are so many other YouTube video downloaders out there? For creators, educators, and researchers, the answer is control and automation.

    For creators, it's a bulletproof way to create personal backups of an entire channel—an invaluable insurance policy against accidental deletion or a channel ban. For researchers and educators, it's a streamlined method for building offline libraries of lectures, documentaries, or source material for later analysis.

    The real power of yt-dlp isn’t just grabbing a single video. It’s about programmatic control—the ability to archive entire playlists, download specific formats, and automate the entire process to save hours of manual work.

    You can tell it to grab the exact video quality you need, download a specific audio format, or even pull down subtitles, thumbnails, and metadata like the video description. This level of precision is what sets it apart. A video editor can use it to fetch a source file in the highest possible resolution, while a researcher might only need the audio and a time-stamped transcript.

    Installing yt-dlp on Your System

    Image

    Alright, let's get yt-dlp set up on your machine. Don't worry if you're not a command-line wizard—the process is more straightforward than it looks, and we'll break it down for every major operating system.

    Think of this initial setup as getting your keys to a powerful video archiving tool. While the steps vary a bit between Windows, macOS, and Linux, the end goal is the same: getting the program installed and ready to run from your terminal.

    Windows Installation

    For Windows folks, the most direct path is downloading the yt-dlp.exe file.

    • First, head over to the official yt-dlp GitHub release page.
    • Look for the latest release, which will be right at the top.
    • From the list of assets, find and download the yt-dlp.exe file.

    Now for a crucial tip to make your life easier: place that .exe file somewhere that your system can always find it. I recommend creating a simple folder like C:\Tools, moving yt-dlp.exe there, and then adding that folder to your system's PATH environment variable. This small step means you can run yt-dlp from any Command Prompt or PowerShell window without needing to be in that specific folder.

    macOS and Linux Installation

    If you're on macOS or Linux, package managers are your best friend. These tools make installing and managing software an absolute breeze, usually with just a single command.

    • For macOS (with Homebrew): If you use Homebrew (and if you don't, you should!), just pop open your Terminal and run: brew install yt-dlp.
    • For Linux (with pip): Most Linux systems come with Python and its package manager, pip. You can install yt-dlp with this simple command: python3 -m pip install -U yt-dlp.

    Trust me, using a package manager is the way to go. It makes updates dead simple. Instead of manually downloading new files, you just run a quick command (brew upgrade yt-dlp or the same pip command) to get the latest version. Of course, if the command line isn't your style for everyday downloads, you could always check out our guide on how to convert YouTube videos to MP4 using simpler web-based tools.

    The Essential Companion: FFmpeg

    Here’s a piece of advice I give everyone: install FFmpeg. It's not just a recommendation; it's essential if you want the best quality downloads. YouTube often serves its highest-quality video and audio as separate files. Without FFmpeg, yt-dlp can't combine them, and you'll be stuck with lower-quality versions.

    Installing FFmpeg is not optional if you want the best quality. It's the engine that handles the critical task of muxing—combining the best video track and the best audio track into a single, high-fidelity file.

    Getting it is easy:

    • Windows: Download the FFmpeg binaries from their official site and add the bin folder to your system's PATH, just like you did for yt-dlp.
    • macOS: Run brew install ffmpeg in your Terminal.
    • Linux: Use your distribution's package manager, like sudo apt-get install ffmpeg for Debian/Ubuntu systems.

    Verifying and Updating Your Installation

    Once you have both yt-dlp and FFmpeg installed, let's make sure everything is talking to each other. Open your terminal or command prompt and type:

    yt-dlp --version

    If it spits back a version number, you're in business!

    One last thing. The internet is always in motion, and YouTube changes things that can break downloaders. The yt-dlp developers are incredibly quick with fixes. To save yourself future headaches, get into the habit of running the update command regularly:

    yt-dlp -U

    This command quickly fetches and installs the latest version, ensuring you always have the most recent features and bug fixes. A little bit of maintenance goes a long way.

    Mastering Your First Download Commands

    Image

    Alright, with yt-dlp installed and waiting, you're ready to start archiving content. The real power of this tool comes from its command-line flags, which turn a simple download into a precise, customized operation. Let's walk through the essential commands that will become the foundation of your video-saving workflow.

    The most basic command is as simple as it gets. Just type yt-dlp followed by the URL of the video you want to grab.

    yt-dlp [video_url]

    When you run this, yt-dlp automatically fetches what it considers the "best" available format—usually a high-resolution video file with the audio already merged. It's perfect for those quick, no-fuss downloads where you just need a copy of the video right away.

    Choosing Your Ideal Quality

    But what if "best" isn't what you actually need? For creators, a massive 4K file can be overkill when you just need a 1080p clip for a reaction video. For researchers, a huge video file is cumbersome when all you need is a smaller, more portable version for analysis. This is where format selection becomes your best friend.

    To see all the available options for a particular video, use the -F (or --list-formats) flag.

    yt-dlp -F [video_url]

    This command doesn't download a thing. Instead, it prints a detailed table listing every available video and audio stream, each with a unique format code. You'll see different resolutions (like 1920×1080), video codecs (like avc1 or vp9), and audio-only streams (like m4a or opus).

    Once you've spotted the format you want, you can download it specifically using the -f (or --format) flag followed by its code. For example, to grab the stream with code 313 (a 4K video) and 140 (a high-quality M4A audio stream), your command would look like this:

    yt-dlp -f 313+140 [video_url]

    That little + sign is the magic here. It tells yt-dlp to download both the video and audio streams and then use FFmpeg to merge them into a single, perfect file. This command is your key to getting exactly what you need, every single time.

    Downloading Entire Playlists

    Manually downloading every video from a lecture series or your channel's backlog would be a complete nightmare. Thankfully, yt-dlp handles entire playlists with the same ease as a single video. Just feed it the playlist URL.

    yt-dlp [playlist_url]

    The tool is smart enough to detect it's a playlist and will start downloading every video in order. This is an absolute game-changer for educators archiving course materials or creators backing up a complete series. No complex scripting needed—a single command does all the heavy lifting.

    Grabbing Subtitles and Transcripts

    For researchers, accessibility advocates, and creators, the text within a video is often just as valuable as the visuals. yt-dlp makes saving subtitle files alongside your video incredibly simple.

    • For human-made subtitles: Use --write-subs to download any professionally created subtitle tracks available (e.g., in English, Spanish, etc.).
    • For auto-generated captions: Use --write-auto-subs to snag YouTube's machine-generated captions.

    So, if you wanted a video and its official English subtitles, you would run:

    yt-dlp --write-subs --sub-lang en [video_url]

    This command saves both the video file and a separate .vtt or .srt subtitle file, which is perfect for dropping into media players or your video editing software.

    Productivity Tip: If you only need the text for analysis, research, or repurposing into a blog post, running a command-line tool might be more effort than necessary. For a quick, no-install solution, a tool like the YouTube Transcript Extractor is often much faster. You can just paste a URL and get an accurate, time-stamped transcript right in your browser.

    By mastering these fundamental commands, you've officially moved beyond basic downloading. You now have a repeatable, efficient system for archiving video content with total precision. Whether you're saving a single clip or an entire library, these core flags give you the control you need to build a truly useful video archive.

    Unlocking Advanced Archival Techniques

    Okay, you've mastered the basics. Now it's time to go beyond one-off downloads and turn yt-dlp into a custom-built, automated archival machine. This is where the tool’s real power comes alive for creators and researchers, letting you set permanent rules, build smart filters, and forge a perfectly organized media library that fits your exact workflow.

    Let’s dive into the power-user features that will save you a ton of time and give you complete control over your downloads.

    Streamline Your Workflow with a Configuration File

    Are you tired of typing the same long string of commands every single time you want to download something? The yt-dlp.conf file is about to become your best friend. It’s just a simple text file where you stash your favorite commands to run by default.

    Every time you fire up yt-dlp, it automatically pulls in the settings from this file.

    Setting one up is a breeze:

    1. Create a plain text file named yt-dlp.conf.
    2. Drop it into the right configuration folder for your operating system.
    3. Add one command-line option per line.

    Let's say you're a creator who always wants the best 1080p video, the highest quality audio, and an embedded thumbnail. Your yt-dlp.conf file would look something like this:

    # Always grab the best 1080p video and best audio
    -f "bestvideo[height<=1080]+bestaudio/best"
    
    # Embed the thumbnail directly into the video file
    --embed-thumbnail
    
    # Also save a separate thumbnail image
    --write-thumbnail
    

    With that file in place, running yt-dlp [video_url] is all it takes to apply those rules. You’ve just turned a repetitive chore into a slick, one-command process.

    Advanced Filtering and File Naming

    Downloading your content is only half the battle; organizing it is what keeps your archive usable. This is where yt-dlp really flexes its muscles with powerful output templates and filtering options to keep things tidy from the get-go.

    The -o (or --output) flag lets you create a custom file-naming structure using dynamic variables. For a researcher archiving a lecture series, this is a game-changer. Imagine you want every file organized by the channel, upload date, and video title.

    You’d use a command like this:

    yt-dlp -o "%(uploader)s/%(upload_date)s - %(title)s.%(ext)s" [playlist_url]

    This command creates a folder for the channel (%(uploader)s) and saves each video inside with a clean name like 20241026 - Advanced Quantum Physics.mp4. No more tedious manual renaming or file sorting.

    Pro Tip: Combine output templates with date filtering for a killer continuous backup system. Using the --dateafter flag, you can tell yt-dlp to only grab videos uploaded after a certain date. This is perfect for setting up a weekly script to archive new videos from a channel without re-downloading everything you already have.

    The Creator’s Essential Skill: Downloading Private Videos

    As a YouTube creator, one of the most critical uses for yt-dlp is creating secure, offline backups of your own work—including your private and unlisted videos. Since these videos are tied to your account, you can't just download them anonymously.

    The fix is using the --cookies-from-browser flag. This lets yt-dlp borrow your browser's logged-in session to authenticate with YouTube, proving you have permission to access the content.

    The command couldn't be simpler:

    yt-dlp --cookies-from-browser chrome [your_private_video_url]

    (Just replace chrome with firefox, edge, or whatever browser you use).

    Honestly, this is a non-negotiable skill for any creator serious about protecting their work. It gives you a reliable local archive that’s completely independent of the YouTube platform, shielding you from accidental deletions or channel problems. The developers behind yt-dlp have consistently improved these features, adding things like better cookie management and resumable downloads that make the tool incredibly robust for creators.

    Embedding metadata like chapters and thumbnails (--embed-chapters and --embed-thumbnail) makes these personal archives even better, creating complete, navigable copies of your original uploads.

    While yt-dlp is amazing for video, if your main goal is to rip audio for a podcast or other projects, our guide on using a YouTube audio extractor offers more specialized strategies. By combining these advanced features, you elevate yt-dlp from a simple downloader into a core part of your content management strategy.

    Building Automated Archiving Workflows

    This is where yt-dlp goes from being a handy tool to an essential part of your content arsenal. Once you move past one-off downloads and start automating your archival process, you can put your entire content management on cruise control. It's about saving hours of mind-numbing manual work and making sure you never miss a thing.

    Think of it as making yt-dlp work for you in the background, whether you’re backing up your own YouTube channel or saving an entire lecture series for offline study. Let's dig into how you can create "set it and forget it" workflows that solve some of the biggest headaches for creators and researchers alike.

    Bulk Downloading from a List

    One of the most common hurdles is dealing with a long list of videos. Maybe you've gathered a bunch of URLs for research, competitor analysis, or a curated educational series. Instead of running the same command over and over, you can feed yt-dlp a simple list.

    The key here is the --batch-file flag. Just create a plain text file (I usually call mine links.txt) and drop one video URL on each line. Then, point yt-dlp to it with a single command:

    yt-dlp --batch-file links.txt

    That’s it. The command will chew through every URL in your file, downloading the videos one by one. It’s a clean and incredibly efficient way to manage bulk jobs without flooding your terminal history.

    For creators, this is a fantastic method for archiving specific sets of videos from your channel, like all sponsored content or a particular series. Just grab the URLs, pop them in a file, and let yt-dlp do the heavy lifting.

    Scheduling Automatic Channel Backups

    For many, the holy grail is a fully automated channel backup. By setting up a script to run on a schedule—say, weekly or monthly—you can ensure your entire video library is safely tucked away offline. This usually involves creating a simple script and telling your operating system's task scheduler to run it for you.

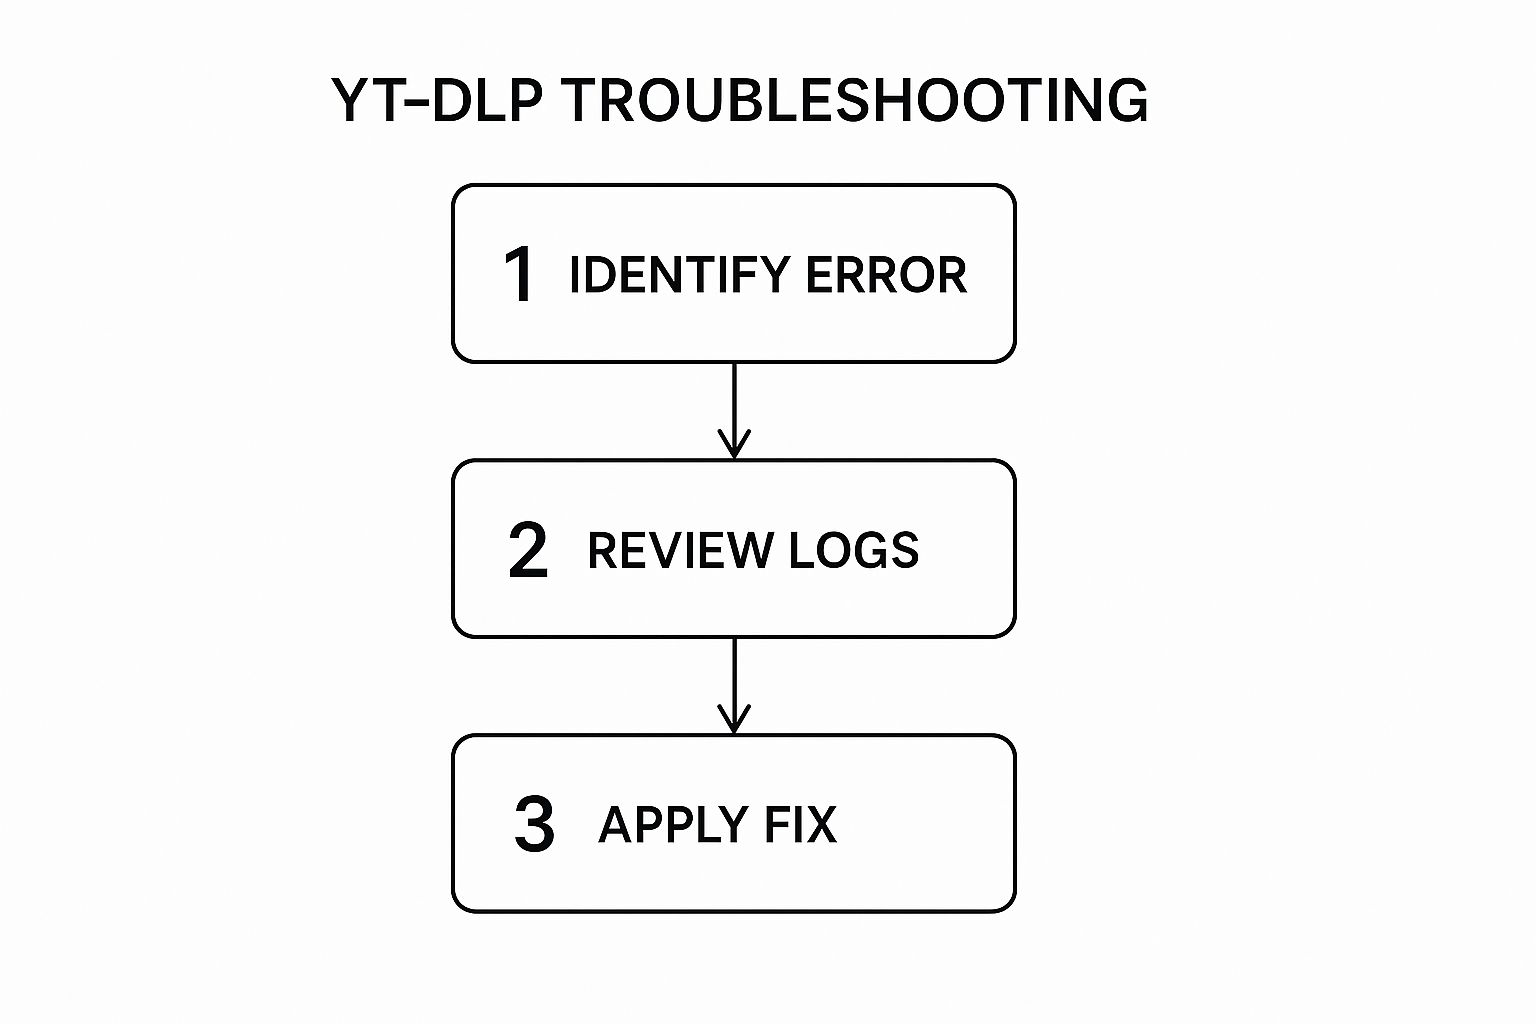
    Of course, when you start automating, things can sometimes go sideways. This visual gives you a basic flow for troubleshooting when your scripts hit a snag, which is a normal part of the process.

    Image

    The main takeaway is to be methodical. Identifying the error and checking your logs are always the first steps toward a fix.

    Here’s how you can get this running on different systems:

    • On Windows: The go-to is the Task Scheduler app. You’ll create a new task that points to a batch script (a .bat file) containing your yt-dlp command and set it to run on a schedule.
    • On macOS or Linux: You'll want to use a cron job. Just edit your crontab by running crontab -e and add a new line that executes your shell script at your desired interval.

    To get you started, here are a few practical script snippets for common automation tasks.

    Example yt dlp Automation Scripts

    These scripts provide a solid foundation for building your own automated workflows. You can copy and paste them into a .bat (Windows) or .sh (Linux/macOS) file and then schedule it to run. Remember to replace the placeholder channel URL with your own.

    Task Windows Batch Script Linux/macOS Bash Script
    Backup Entire Channel @echo off
    yt-dlp --download-archive archive.txt "https://www.youtube.com/c/YourChannel"
    #!/bin/bash
    yt-dlp --download-archive ~/archive.txt "https://www.youtube.com/c/YourChannel"
    Download New Videos with Thumbnails @echo off
    yt-dlp -o "%%(upload_date)s - %%(title)s.%%(ext)s" --write-thumbnail --download-archive archive.txt "https://www.youtube.com/c/YourChannel"
    #!/bin/bash
    yt-dlp -o "%(upload_date)s - %(title)s.%(ext)s" --write-thumbnail --download-archive ~/archive.txt "https://www.youtube.com/c/YourChannel"
    Archive Audio-Only (Podcast-Style) @echo off
    yt-dlp -x --audio-format mp3 --download-archive audio_archive.txt "https://www.youtube.com/playlist?list=YourPlaylistID"
    #!/bin/bash
    yt-dlp -x --audio-format mp3 --download-archive ~/audio_archive.txt "https://www.youtube.com/playlist?list=YourPlaylistID"

    A simple script like the ones above will download an entire channel, use --download-archive to smartly skip videos it has already grabbed, and even save a thumbnail for each one. This ensures that after the first big run, only new content gets archived. It's efficient and completely hands-off.

    Integrating Archives into Your Content Strategy

    An automated video archive is more than a simple backup; it’s a goldmine for your content strategy. With local copies of your videos, you unlock fresh opportunities for analysis and repurposing that you just can't get from the YouTube dashboard alone.

    For example, a creator can systematically download their entire library and then use a tool for YouTube Channel Analytics to analyze performance trends across their archived content. This deep dive can reveal which topics, formats, or video lengths have performed best over time, giving you data-driven insights to guide your next big idea.

    By including the --write-thumbnail flag in your scripts, you'll also build a local library of all your past thumbnails. When it's time to design a new one, this archive becomes an incredible source of inspiration. You can quickly browse your past creative and then use a tool like the YouTube Thumbnail Maker to craft something fresh and high-performing based on what’s worked before.

    What makes these automated workflows so reliable long-term is the fact that yt-dlp is constantly updated. A quick look at the project's GitHub repository reveals a relentless pace of improvements, with over 5,000 lines of changelog entries. This active development means that as platforms change, your scripts are far less likely to break. You can check out the project's impressive update history on its GitHub changelog.

    Frequently Asked Questions About yt-dlp

    Even a powerhouse tool like yt-dlp can throw you a curveball now and then. Maybe you’ve hit a weird error, or you’re trying to pull off a specific kind of download. It happens.

    I’ve rounded up some of the most common questions and troubleshooting snags people run into. Here are some straightforward, practical answers to get you back on track.

    Why Am I Getting a 403 Forbidden Error?

    This is easily the most common headache, and it almost always means one thing: YouTube (or another site) updated something on their end and temporarily broke yt-dlp. A '403 Forbidden' error is the server actively telling you, "Nope, you can't have this."

    The first thing you should always try is updating yt-dlp itself. The developers are incredibly fast at pushing out fixes for these kinds of site changes. Just pop open your terminal and run:

    yt-dlp -U

    If an update doesn't fix it, the video might be private, members-only, or age-restricted. For those, you need to prove you have permission to be there. You can do this by passing your browser's login cookies to yt-dlp. For example, if you're logged into YouTube in Chrome, this command tells yt-dlp to use that session:

    yt-dlp --cookies-from-browser chrome "[video_url]"

    This lets yt-dlp download on your behalf, using the same access your logged-in browser has.

    How Can I Download Only the Audio from a Video?

    This is a fantastic feature for creators and researchers. It's perfect for saving lectures for offline listening, creating a podcast from video interviews, or isolating audio for transcription and analysis. The easiest way to do it is with the -x (or --extract-audio) flag.

    For total control, you can even tell it what format you want. This is my go-to command for grabbing audio:

    yt-dlp -x --audio-format mp3 "[video_url]"

    When you run this, yt-dlp smartly downloads the necessary streams, rips the audio track, converts it to a clean MP3, and then deletes the leftover video file. You're left with just the audio, nice and tidy.

    Is It Legal to Use yt-dlp?

    Let's be crystal clear: the yt-dlp software itself is 100% legal. It’s just a versatile tool for transferring data, no different from your web browser.

    The tricky part is what you download. The legality depends entirely on the content, the copyright, your local laws, and what you plan to do with the file.

    Key Takeaway: Using yt-dlp to download copyrighted material without permission from the creator is where you can get into trouble. The tool is intended for legitimate archival purposes, such as making personal backups of content you own, have the rights to, or for educational uses permitted under fair use guidelines.

    Always be mindful of the website's terms of service and respect the rights of creators. This guide is for educational purposes only, and you are responsible for using the tool lawfully.

    How Can I Fix Extremely Slow Downloads?

    It’s incredibly frustrating when a download crawls at a snail's pace. More often than not, this isn't your internet connection—it's the video platform (like YouTube) putting the brakes on your download, a practice known as throttling.

    If you know your own connection is solid, there are a few things to try. A common first step is adding the --no-mtime flag. This stops yt-dlp from trying to set the file's "last modified" time to match the server's, a small step that can sometimes trip up a throttled connection.

    Another simple trick? Just try downloading at a different time of day when servers might be less busy. For more stubborn cases, advanced users can route their download through a proxy using the --proxy URL command, but that’s usually overkill for everyday downloads.

    And if you need to grab content without the download hassle, you might be interested in a different approach entirely. For instance, learning how to transcribe a YouTube video often involves simpler browser-based tools that skip the download complexities.


    Ready to take your YouTube workflow to the next level? From in-depth analytics to effortless thumbnail creation, YouTube Navigator provides a complete suite of free tools to help you succeed. Streamline your content strategy today at https://youtubenavigator.com.