Author: nicolaigaina

  • Optimal Size for a YouTube Thumbnail to Boost Clicks

    Optimal Size for a YouTube Thumbnail to Boost Clicks

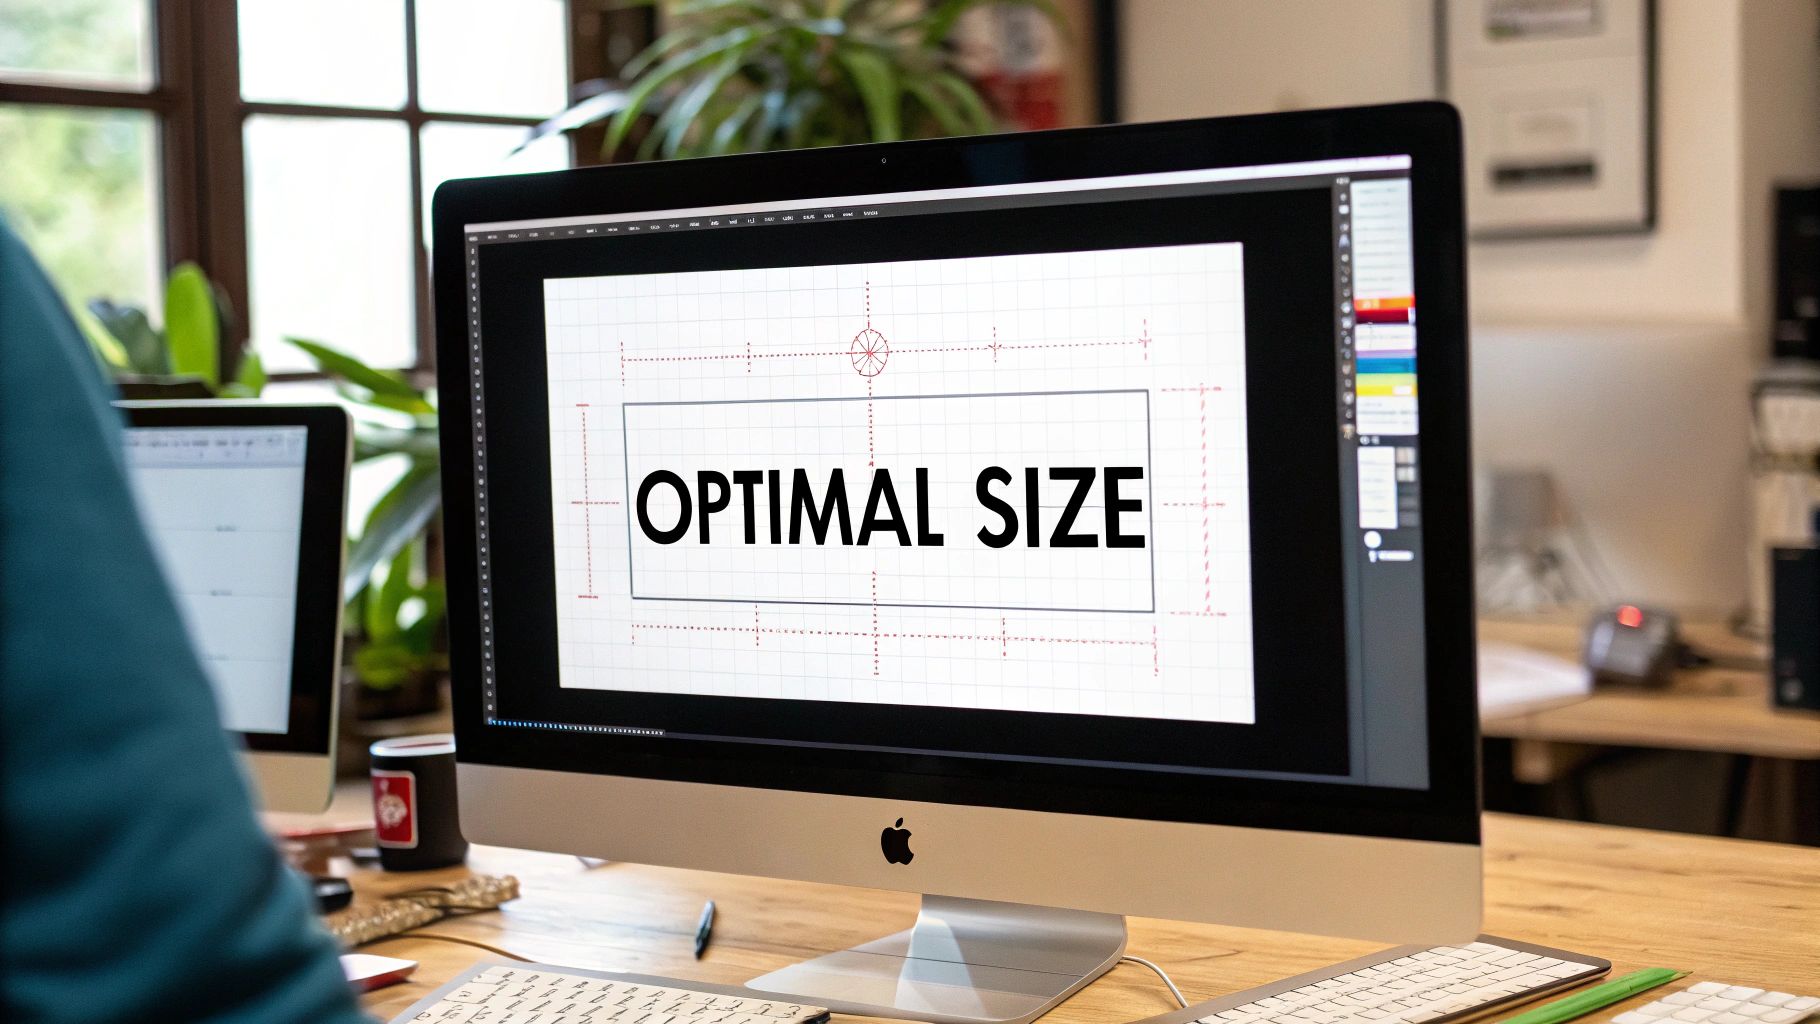
    Let's get right to it. The magic number you're looking for is 1280 x 720 pixels. That’s the ideal size for a YouTube thumbnail. Think of it as the universal key that unlocks a perfect, crisp look for your video's "cover art," no matter if you're an educator sharing a lecture on a smart TV or a researcher whose work is being viewed on a tiny phone screen.

    The Perfect YouTube Thumbnail Size and Why It Matters

    Your thumbnail isn't just a placeholder; it's the single most important piece of advertising for your video. For creators, educators, and researchers, it’s the first impression—the visual handshake that convinces a potential viewer to click. Nailing the technical specs is the foundation for a higher click-through rate (CTR) and signals the quality of your content before anyone even hits play.

    Why 1280 x 720 pixels specifically? It’s all about the 16:9 aspect ratio. This ratio perfectly mirrors the shape of the standard YouTube video player, creating a seamless and professional look. Get this right, and you'll avoid those ugly black bars or stretched-out images that can undermine your credibility.

    Key Technical Specifications

    Beyond just the resolution, YouTube has a few other ground rules you need to follow. These aren't arbitrary; they're designed to ensure your thumbnail uploads correctly and loads fast for everyone, everywhere.

    • Resolution: Stick to 1280 x 720 pixels. While the minimum width is 640 pixels, using the full resolution ensures your image is sharp and detailed.
    • Aspect Ratio: Always 16:9. This is non-negotiable for perfect alignment with the YouTube player.
    • File Formats: You’ve got options here. JPG, GIF, or PNG are all accepted.
    • File Size: Keep it lean. Your file must be under the 2MB limit.

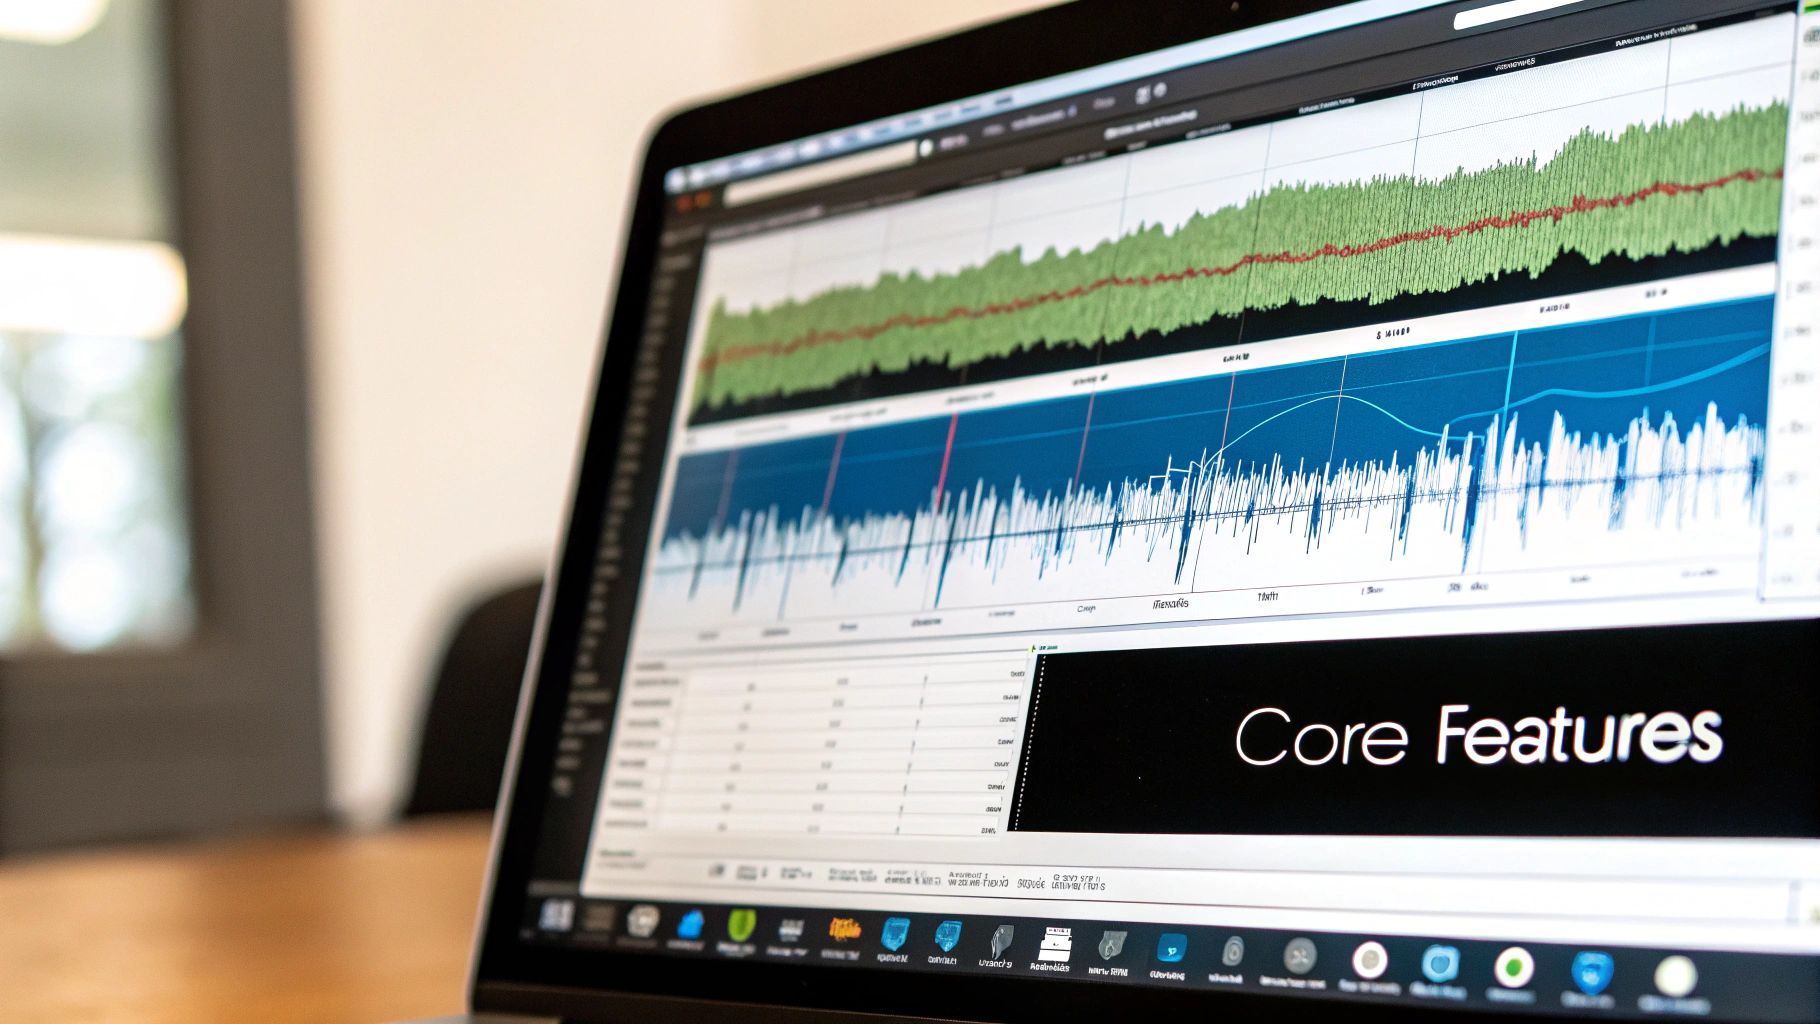
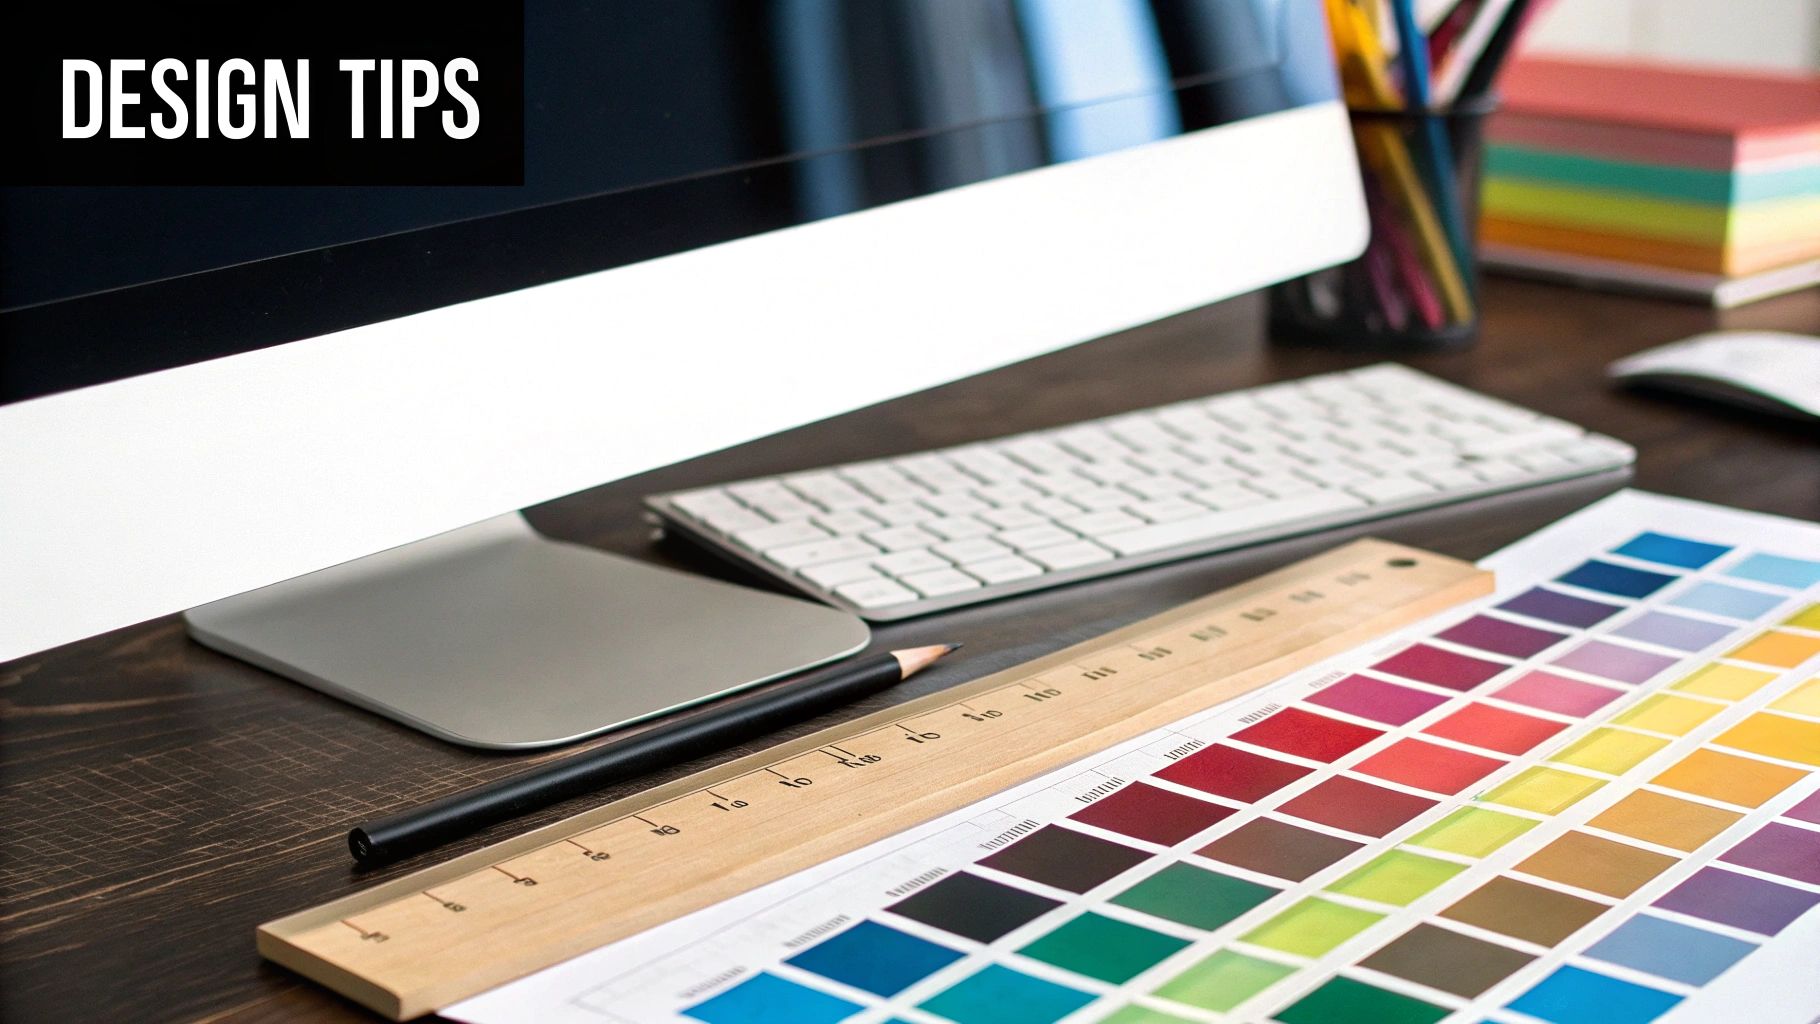
    This simple graphic is a great reminder of the one number to remember for your design workflow.

    Image

    Here's a quick reference table to keep all those technical details straight. I recommend bookmarking this page—it’s a lifesaver when you’re deep in your creative process.

    YouTube Thumbnail Quick Reference Guide

    Specification Recommendation Why It's Important
    Resolution 1280 x 720 pixels Ensures your thumbnail is high-quality and looks sharp on all screens, from mobile to TV.
    Aspect Ratio 16:9 Perfectly matches the YouTube player, preventing black bars or awkward cropping.
    File Formats JPG, PNG, GIF These are the standard formats accepted by YouTube for easy uploading.
    File Size Under 2MB Guarantees your thumbnail loads quickly, providing a better experience for viewers with slower connections.
    Minimum Width 640 pixels An absolute minimum requirement for YouTube to accept the upload.

    Following these guidelines isn't just about pleasing the YouTube algorithm; it's about creating a better, more professional experience for your audience. It’s a small detail that makes a huge difference. You can learn more about these guidelines and their importance straight from YouTube’s official help center.

    Mastering File Size and Format Requirements

    While pixel dimensions get most of the glory, the file size and format of your thumbnail are just as critical. Let’s be real—a perfect size for a YouTube thumbnail isn’t just about how it looks; it’s about how it loads. Think of it this way: a stunning, high-res image is completely useless if it takes too long for a viewer's device to actually display it.

    That's precisely why YouTube put a strict 2MB file size limit in place. This rule is non-negotiable, and it’s there to make sure your video's "front door" appears instantly for everyone—whether they're on a blazing-fast fiber connection or a spotty mobile network. An oversized file can kill your page load time, and that's often all it takes for an impatient viewer to scroll right past. You can dig deeper into these performance-focused guidelines in various industry reports, like this one about best practices on Promo.com.

    Choosing the Right File Format

    YouTube gives you three main options for your thumbnail's file format: JPG, PNG, and GIF. Each has its own job to do, and picking the right one can make a huge difference in your thumbnail’s quality and final file size.

    • JPG (JPEG): This is your workhorse for any thumbnail with photographic elements. JPGs are brilliant at compressing complex images full of colors and gradients—like a shot of a person or a landscape. That compression is key to easily staying under the 2MB limit without a noticeable nosedive in visual quality.

    • PNG: Reach for PNG when your thumbnail is heavy on graphics, text, or logos. This format keeps sharp lines and text perfectly crisp and even supports transparency (a huge plus!). The trade-off? PNG files are often larger, so you’ll have to keep a close eye on that 2MB cap.

    • GIF: While YouTube technically supports GIFs, they're almost never the right choice. They are limited to just 256 colors and are really meant for simple animations, not the high-impact static image you need for a thumbnail.

    Pro Tip: Here’s a workflow the pros use: Design your thumbnail in a PNG format to keep everything sharp and high-quality. Once you’re happy with it, export a compressed JPG version specifically for uploading to YouTube. This gives you the best of both worlds—a crystal-clear design that loads in a flash. The same principles of visual clarity apply even when designing for different platforms, a topic we explore in our guide to YouTube TV channels.

    The Hidden Story Behind the Thumbnail

    Ever stop to think about why we call it a "thumbnail"? It’s one of those terms we use every day, but its origin story is surprisingly old and gives us a powerful way to think about creating great YouTube visuals. Understanding this history makes it crystal clear why getting the right size for a YouTube thumbnail is about more than just pixels—it's about psychology.

    The name actually comes from the art world, long before computers existed. For centuries, artists would create tiny preliminary sketches—often no bigger than a human thumbnail—to map out a larger, more detailed masterpiece. These weren't just doodles; they were bite-sized previews of the final work. Fast forward to the 1980s, and the term was borrowed by computer engineers to describe small, digital image previews. You can read more about this cool evolution and how YouTube adopted the term on ThumbnailTest.com.

    From Tiny Sketch to Digital Powerhouse

    This little history lesson reveals a timeless truth: a thumbnail’s job has always been to offer a compelling, super-quick preview to hook an audience. It tells a story at a glance, whether on an artist's easel or a viewer's screen. And in the crowded, fast-paced world of YouTube, that job is more critical than ever.

    A great thumbnail is a promise to the viewer. It communicates the value, tone, and topic of your video before they commit to clicking.

    Just like an artist’s sketch had to capture the spirit of a painting, your thumbnail has to capture the essence of your video. It's your single most important tool for cutting through the endless scroll and sparking that "I need to watch this" feeling. For an educator, this could mean using it to showcase a key concept from your lesson. For a researcher, it could mean visualizing a critical data point.

    So when you're brainstorming, don't just think of it as making an image. Think of it as crafting a modern-day preview sketch. If you need a little inspiration for what to put in that sketch, check out our guide on developing compelling video ideas for YouTube to make sure your visuals and content are perfectly aligned.

    Designing Thumbnails That Command Clicks

    Image

    Getting the technical specs right for your YouTube thumbnail size is just the first step. The real work starts now. It's time to take that 1280×720 canvas and turn it into a tiny, scroll-stopping billboard that makes people have to click.

    A killer thumbnail does more than just look pretty. It tells a miniature story and makes a powerful promise about the value your video delivers. It’s your single best shot to stand out in a sea of content.

    The secret? The best thumbnails tap directly into human psychology. They use high-contrast colors, expressive faces, and big, bold text to hijack a viewer’s attention in a fraction of a second.

    The Anatomy of a High-Performing Thumbnail

    To build a design that actually gets clicks, you need to nail three core components. Think of them as a three-legged stool—if one is weak, the whole thing topples over, and your click-through rate goes with it.

    • High-Contrast Colors: Your thumbnail needs to scream for attention. Use bright, opposing colors that leap off YouTube’s white, grey, or dark backgrounds. A classic trick is to darken your background image slightly and then layer it with electrifyingly bright text or graphics.

    • Expressive Faces: We are hardwired to connect with other human faces. A clear, high-quality shot of someone showing a strong emotion—like shock, joy, or intense curiosity—creates an instant emotional hook. It makes viewers wonder, "What on earth caused that reaction?"

    • Bold, Legible Text: Keep your text short and punchy. Aim for three to five powerful words, max. The font needs to be thick, clear, and readable even on a tiny smartphone screen. Your video’s title can handle the details; the thumbnail’s job is to create pure intrigue.

    Pro Tip: Before you open a blank canvas, do some recon. Analyze what the top creators in your niche are already doing successfully. With YouTube Navigator’s YouTube Thumbnail Downloader, you can easily save high-res thumbnails from any video for inspiration and analysis.

    Once you’ve gathered some inspiration, it's time to build your own. For a quick and effective design, a powerful YouTube thumbnail maker can give you a head start with templates built on these very principles. These tools are fantastic for getting professional results without the steep learning curve of complex design software.

    Common Thumbnail Mistakes and How to Fix Them

    So, you’ve nailed the perfect size for a YouTube thumbnail, but your click-through rate (CTR) is still flat. What gives? It’s a classic trap many creators fall into: hitting all the technical marks but failing on the design front. A thumbnail that doesn't connect with a real, live human is just a wasted pixel.

    Let’s troubleshoot the most common pitfalls I see all the time and, more importantly, figure out how to fix them.

    One of the biggest culprits is the "busy" thumbnail. When you try to cram every possible element—text, logos, graphics, your face, your dog's face—into that tiny rectangle, you create visual noise. Nothing stands out, and viewers, feeling overwhelmed, just keep on scrolling. The fix? Embrace simplicity. Focus on one core idea and let it breathe.

    Unreadable Text and Weak Visuals

    Another classic mistake is text you can’t actually read. A skinny font or colors that blend into the background are poison to your CTR, especially on a small phone screen. Your text needs to be a billboard, not a footnote. It has to be bold, clear, and instantly understandable.

    • The Fix for Text: Go for a thick, sans-serif font. A tried-and-true trick is to put a dark outline or a solid-colored box behind your text. This makes it pop against literally any background. And please, keep your message to a few powerful words.

    • The Fix for Visuals: Don't even think about using low-resolution or blurry images. A pixelated thumbnail screams "low-quality video" before anyone even clicks. Always start with high-resolution source images and make sure they’re sharp and in focus.

    Finally, nothing breaks trust faster than a misleading thumbnail. Using clickbait-y visuals that have zero to do with your video content might get you a few clicks, but it will tank your watch time. Viewers will bounce, signaling to the YouTube algorithm that your content isn't delivering on its promise.

    Key Insight: The best way to diagnose a weak thumbnail is to use a dedicated tool like YouTube Channel Analytics from YouTube Navigator. Sorting your videos by CTR allows you to see, at a glance, which thumbnails are underperforming. This data-first approach takes the guesswork out of figuring out which designs need a refresh.

    Once you’ve spotted a problem thumbnail, you can do a quick redesign. By spotting these common mistakes and using data to guide your redesigns, you can systematically level up your channel’s performance.

    Frequently Asked Questions About Thumbnail Size

    Image

    You've got the rules and the strategies down, but a few specific questions always seem to pop up once creators start getting serious about their thumbnails. Let's tackle the most common ones so you can design with total confidence.

    Does My Thumbnail Need to Be Exactly 1280×720?

    While 1280×720 pixels is the gold standard for quality, it’s not your only option. YouTube’s absolute minimum requirement is a width of 640 pixels. So, technically, you can go smaller.

    But here’s why you shouldn’t: sticking to the 1280×720 size for a YouTube thumbnail guarantees your image will look crisp and professional on every single device. It prevents that dreaded pixelation or blurriness, especially on larger screens like smart TVs where smaller images can look noticeably amateur.

    Key Takeaway: Think of 1280×720 not just as a rule, but as a quality guarantee. It’s your best shot at making a sharp first impression, no matter where your video shows up.

    Can I Update a Thumbnail on an Old Video?

    Absolutely! This is one of the most powerful—and underused—strategies for channel growth. You can swap out the thumbnail on any of your videos, anytime, directly from the YouTube Studio.

    This is a fantastic way to breathe new life into videos with a low click-through rate (CTR). By diving into your channel's analytics, you can pinpoint exactly which videos are underperforming. Armed with that data, you can A/B test new thumbnail designs and see if a fresh visual can reignite viewer interest. A tool like our YouTube Channel Analytics is perfect for this, as it helps you identify low-CTR videos that are prime candidates for a thumbnail refresh.

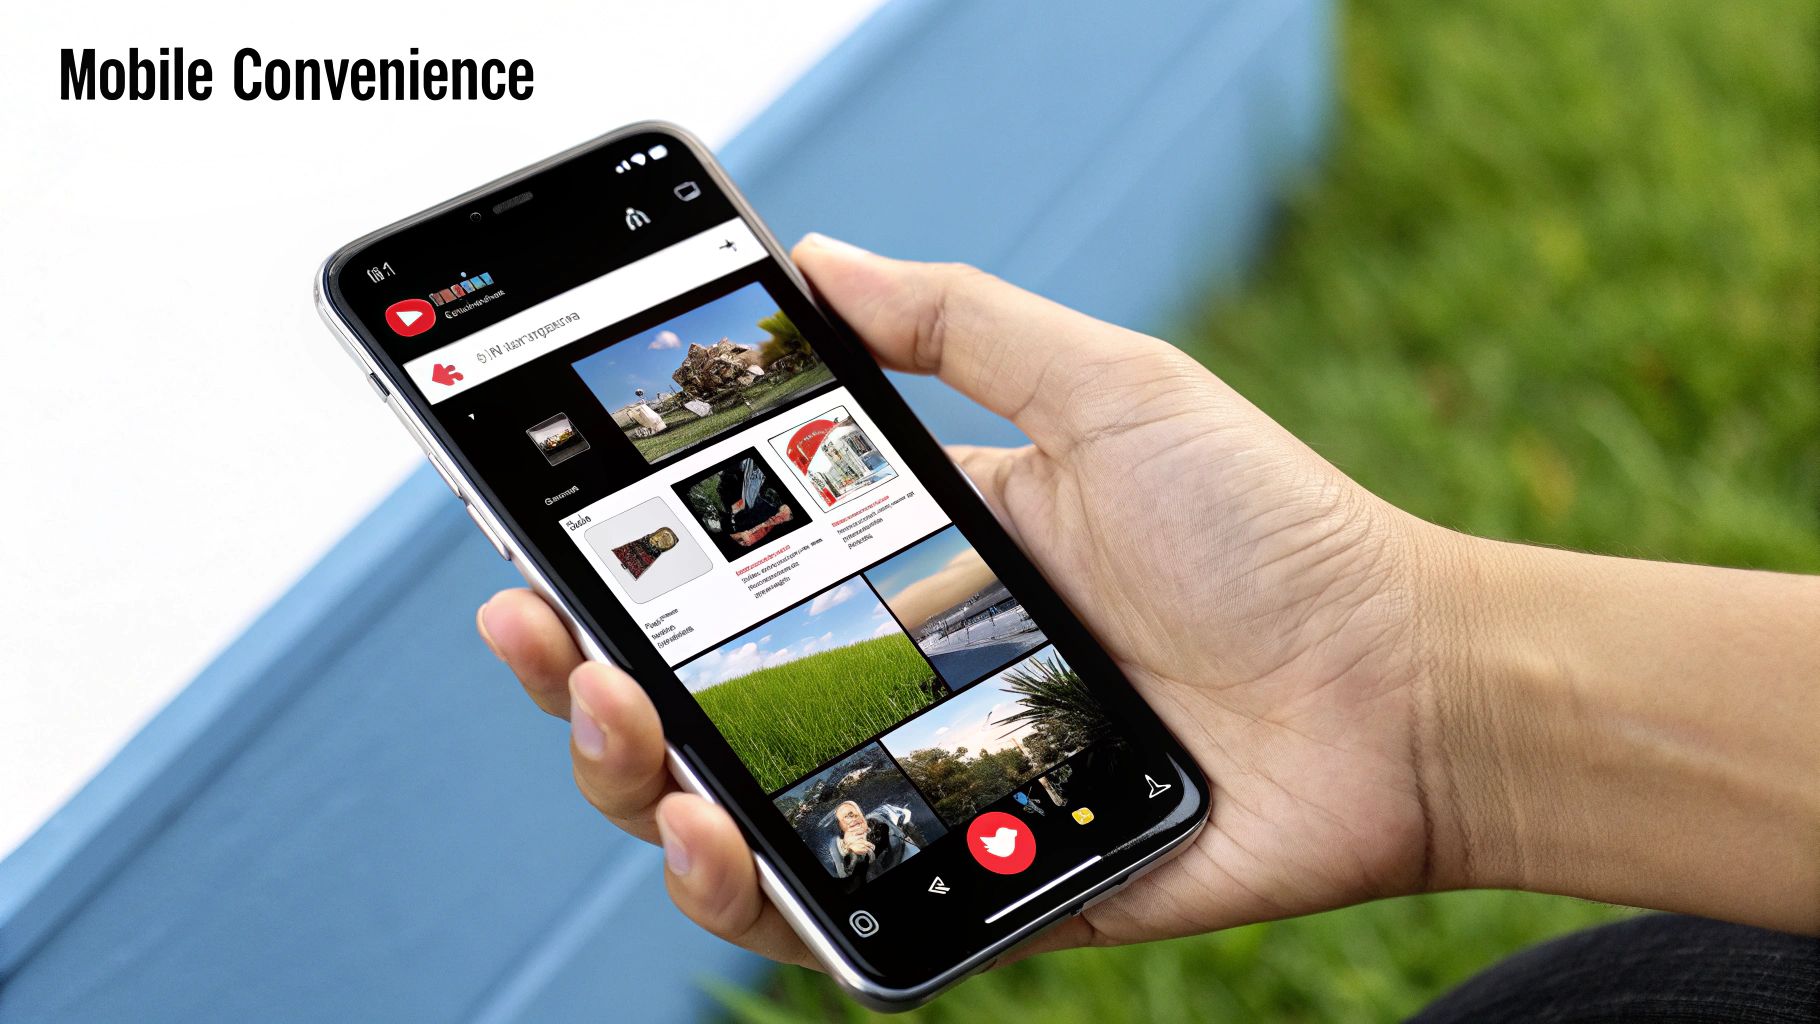
    What Is the Best Way to Design on Mobile?

    Creating pro-level thumbnails on your phone is totally doable if you have the right approach. The first step is to find design apps that let you set custom canvas dimensions. This way, you can start your project at the ideal 1280×720 pixels right from the get-go.

    The single most critical part of mobile design is constant previewing. Since you’re designing on a small screen, you have to zoom out—a lot. See what your thumbnail looks like when it's tiny. To make sure your design stays legible and pops off the page, prioritize high-contrast colors and simple, bold text.


    Ready to stop guessing and start designing thumbnails that actually get clicks? The tools at YouTube Navigator were built to solve these exact challenges. Use our free YouTube Thumbnail Studio to craft professional, high-impact designs with ease.

  • Your Guide to Using a YouTube Shorts Downloader Effectively

    Your Guide to Using a YouTube Shorts Downloader Effectively

    Let's be real—using a reliable YouTube Shorts downloader is a game-changer for creators, educators, and researchers. It's not just about grabbing funny clips. For professionals, the right tool is an essential part of a modern workflow, turning fleeting trends into tangible assets for analysis, repurposing, and inspiration.

    Think of it as your private, offline library for competitor research or a quick way to save your best work for cross-platform promotion. The key is to move beyond simple downloading and integrate it into a smarter content strategy.

    Why Smart Creators Use a Shorts Downloader

    Image

    It’s no secret that YouTube Shorts are an engagement powerhouse. But for the savviest creators, educators, and researchers, their value goes way beyond racking up views. Being able to download Shorts unlocks serious strategic advantages that can elevate your content, streamline your research, and boost your productivity.

    It’s like building a personal vault for deep-diving into what makes viral content tick. Or, it can be a simple toolkit for snagging your own best moments to repurpose elsewhere. Downloading is a must-have for creating reaction videos, educational compilations, or just archiving top-performing content to analyze trends later.

    Unlocking Strategic Advantages

    The sheer scale of Shorts is impossible to ignore. By January 2024, the format was pulling in an average of over 70 billion daily views. That’s not a typo. With a staggering 5 trillion total views since its launch, having a reliable method to save and study this firehose of content isn't just nice—it's crucial for anyone serious about digital media.

    This is exactly where a dedicated YouTube Shorts downloader becomes a key part of your workflow. It lets you:

    • Analyze Viral Content: Save top-performing Shorts in your niche. As a creator, you can break them down frame-by-frame to understand what makes them work, from audio choices to editing techniques.
    • Repurpose with Ease: Quickly grab your own Shorts to re-edit for other platforms like Instagram Reels or TikTok without losing video quality.
    • Create Compilations and B-Roll: Weave your best clips into longer videos or use them as dynamic B-roll to add energy to your tutorials or vlogs.
    • Offline Access for Research: If you're an educator or researcher, you can build a secure, offline library of examples for presentations, lectures, and studies, all without needing a constant internet connection.

    In a world of fast-moving content, a reliable downloader isn’t just a convenience—it’s a foundational part of a modern creator's toolkit for staying competitive and innovative.

    For those who want more technical control over their downloads, you can also learn about setting up yt-dlp. It's a command-line tool that offers advanced options for power users. Ultimately, having a go-to method for saving Shorts empowers you to work smarter, not harder.

    How to Download Shorts for Analysis

    Let’s walk through a smart and secure way to download YouTube Shorts. This isn't about using sketchy online tools littered with pop-up ads. Instead, we'll focus on a clean, efficient workflow that researchers, educators, and creators can use to build a library of content for analysis.

    Imagine you're an educator preparing a lecture on modern media literacy. You find a Short that perfectly illustrates a persuasive technique. The first move is simple: just copy the Short’s URL from your browser or the YouTube app. With that link, a trusted downloader saves a high-quality version to your device. This is how you build an offline collection of examples for deep-dive reviews, free from buffering or ads.

    This infographic breaks down the process into its three essential, straightforward steps.

    Image

    As you can see, the workflow is designed for pure speed and simplicity. It takes you from a URL to a saved file in just a couple of clicks.

    Integrating Tools for Deeper Insights

    To get the most out of your downloaded content, bringing other tools into the mix is a pro move. For example, after saving a Short, you might need a crisp, high-resolution still of its most powerful frame to use in a presentation or a thumbnail for a reaction video.

    This is where having a dedicated toolset really pays off. A great workflow might look something like this:

    • Find the right Short: Pinpoint the video you need for your research or creative project.
    • Download the video file: Use a reliable YouTube Shorts downloader to save the MP4.
    • Grab the key frame: Use a tool like the YouTube Thumbnail Downloader to pull a high-res image of the video's thumbnail, which often highlights its most compelling moment. This is perfect for archiving, inspiration, or creating new graphics.

    This multi-tool approach gives you both the dynamic video and a static image, setting you up for a much more thorough analysis.

    The best analysis comes from looking at content from multiple angles. Having both the full video and its key visual elements gives you the flexibility to deconstruct what makes a Short successful, from its pacing to its visual hooks.

    This method ensures you have everything you need for reports, presentations, or even planning your own content. By sticking to a secure and integrated workflow, you can stop worrying about the tech and focus on what really matters: turning raw content into powerful insights.

    Repurpose Your Shorts Content Intelligently

    Image

    Getting your hands on your Short with a youtube shorts downloader is a great start, but it’s just the first step. The real creative leverage—the kind that grows your brand or enriches your research—comes from repurposing. This is where you take that one 60-second clip and turn it into a powerhouse asset that works for you across your entire digital footprint.

    Don't just think about the single upload. Imagine stitching together your top-performing Shorts into a "greatest hits" compilation for a longer YouTube video. Or, pull the most dynamic moments from a downloaded Short and use them as slick B-roll to spice up your next tutorial or vlog. Suddenly, one piece of content has a much longer shelf life.

    From Video to Text and Beyond

    One of the smartest moves you can make is turning your video's audio into text. Let’s say you downloaded a Short where you shared a valuable insight. By feeding it into the YouTube Transcript Extractor, you get an accurate, time-stamped script in seconds. I've personally used this to turn quick video ideas into detailed blog post outlines, saving hours of manual transcription.

    This unlocks a whole new world of content:

    • Create Punchy Social Posts: Pull the most memorable quotes from your transcript and share them as quick insights on X (formerly Twitter) or LinkedIn.
    • Improve Accessibility: Add the transcript as captions to your videos or as a text description, making your content accessible to a wider audience.
    • Fuel Your Written Content: For researchers and educators, a transcript is a goldmine for pulling direct quotes for papers, articles, or lecture notes.

    This strategy shows how one solid Short can fuel your content calendar for days. For more tips on growing your channel's reach, check out our guide on setting up a YouTube TV channel.

    Smart Repurposing Ideas for Your Downloaded Shorts

    Here are some creative ways to extend the life of a single downloaded YouTube Short across different platforms, boosting your reach and engagement.

    Platform Repurposing Tactic Example for Creators & Educators
    Instagram Create a Reel or Story Use a 15-second clip from your Short, add a trending audio track, and include a poll sticker to boost interaction.
    TikTok Post a Stitch or Duet Find a related viral video and use a key moment from your Short to add your own commentary or educational take.
    X (Twitter) Share a GIF or short clip Turn the most visually interesting 3-5 seconds into a GIF and post it with a compelling question to spark conversation.
    LinkedIn Write a Text Post with a Quote Pull a powerful insight from your Short's transcript, write a short professional take on it, and link back to the original video.
    Pinterest Create an Idea Pin Use multiple clips from the Short to create a step-by-step visual guide, especially for DIY, recipe, or tutorial content.
    Blog/Research Paper Embed as a Visual Element Write an article expanding on the Short's topic and embed the video to provide a rich media example for your readers.

    By thinking this way, you're not just creating content; you're building a content ecosystem where every piece supports the others.

    The smartest creators don't just create content; they atomize it. They break down one primary asset into dozens of smaller pieces, distributing them across platforms to meet audiences where they are. This method ensures maximum visibility from a single recording session.

    This "content multiplication" saves an incredible amount of time and mental energy. Instead of constantly being on the hamster wheel of brainstorming, you can focus on smartly distributing the awesome content you’ve already made. When you see each Short as a collection of reusable parts—video clips, audio snippets, and text—you build a sustainable content engine.

    Navigating Copyright and Fair Use

    So, you've found a youtube shorts downloader and you're ready to start saving content. That's great, but before you go on a downloading spree, we need to talk about the serious stuff: copyright. The moment you save a video that isn't yours, you're stepping into a legal gray area, and understanding the rules is essential to protect your own channel and professional integrity.

    This isn't just about avoiding a legal headache; it's about being a good citizen of the creator community.

    The biggest line in the sand is between private use and public redistribution. Are you downloading a Short to study its editing style for your own creative growth? Or are you an educator saving it for an internal classroom presentation? Generally, you're in the clear. But the second you re-upload that content, everything changes. Sharing someone else's work without permission is a direct violation of YouTube's rules and copyright law.

    Understanding Fair Use

    This brings us to "fair use." You've probably heard the term, but what does it actually mean for a creator or researcher? Fair use is a legal principle that allows you to use copyrighted material without permission for specific purposes, like commentary, criticism, news reporting, or teaching. It’s a creator’s best defense, but it’s incredibly nuanced—not a get-out-of-jail-free card.

    The key to a solid fair use claim is making your work transformative. You can't just repost someone's video. You have to add something new—fresh commentary, unique analysis, educational context, or a new perspective.

    A lot of people think that just giving credit or adding a "no copyright infringement intended" disclaimer is enough. It's not. The law cares about how you transformed the original work, not just that you acknowledged it.

    Let's look at a couple of real-world examples:

    • For an Educator: A science teacher downloads a 5-second clip from an experiment Short. They include it in a classroom presentation to demonstrate a physics concept, pausing to explain the science. This is a classic example of fair use because the purpose is educational and it transforms the clip into a teaching tool.
    • For a Commentary Channel: A YouTuber creates a reaction video, using clips from a viral Short to provide funny or insightful critique. Because they're adding a new layer of commentary and analysis, this is a strong argument for fair use.

    Before you ever use downloaded content, ask yourself: "Am I just re-uploading this, or am I adding significant value and new meaning?" Answering that honestly will help you stay on the right side of copyright and build a channel that's both successful and ethical.

    Using Downloaded Shorts to Uncover Trends

    Image

    YouTube Shorts aren't just for a quick laugh; they're a live feed of what's capturing global attention. For a creator, marketer, or researcher serious about growth, using a youtube shorts downloader to build a curated library of viral content is like having a secret weapon for market research. This isn't about guessing what's popular—it's about seeing it firsthand.

    By saving and organizing the top-performing Shorts in your niche, you start to spot patterns that others miss. Whether it's comedy, tech reviews, or educational content, you'll notice which audio clips are trending, what editing styles are stopping the scroll, and which topics are exploding. You'll go from being a passive scroller to an active trend-spotter.

    Building Your Trend-Spotting Workflow

    Your collection of downloaded Shorts becomes your own private dataset. Once you've got a decent library built up, the real analysis begins.

    • Audio Analysis: Group videos by the sounds or songs they use. Is there a specific audio clip appearing constantly in your niche? That’s your cue.
    • Visual Style Review: Look for common threads in pacing, transitions, and on-screen text. Fast cuts might dominate gaming, while a slower, more aesthetic style could be winning in the lifestyle space.
    • Topic Clustering: Sort your downloaded Shorts by their core subject. This helps you identify which sub-topics are currently hitting a nerve with audiences and where there might be gaps to fill.

    This kind of analysis can reveal fascinating insights. For example, in early 2024, the U.S. and Indian markets accounted for 19.4% and 5.2% of Shorts traffic, respectively. With over 164.5 million Shorts users in the U.S. alone, the data from that market is a goldmine for understanding broader trends.

    The goal is to get ahead of the curve. Instead of just jumping on trends, you can start to anticipate them. Systematically analyzing what’s working gives you a powerful first-mover advantage, letting you create the next big thing before it’s even mainstream.

    Closing the Feedback Loop with Analytics

    This trend analysis becomes even more powerful when you connect it to your own channel's performance. After identifying a potential trend, create your own Short to test it. Then, dive into a tool like the YouTube Channel Analytics dashboard to see how it performs. Did it get more views? Higher engagement?

    This creates a perfect feedback loop. You can see if an industry-wide trend actually resonates with your specific audience. This data-driven approach means you’re making smarter decisions, keeping your content strategy fresh, relevant, and perfectly tuned to the people who follow you.

    Got Questions About Downloading Shorts? We've Got Answers

    Let's clear up some common questions that creators, educators, and researchers have about using a YouTube Shorts downloader. Knowing the ins and outs will help you use these tools confidently and correctly.

    Is It Legal to Use a YouTube Shorts Downloader?

    This is a big one, and the answer is all about intent. If you're downloading Shorts for your own personal use—like for offline viewing, private archiving for research, or to analyze an editing style—you're generally in the clear.

    The line gets crossed when you re-upload or publicly share that content without getting permission from the original creator. That's a fast track to violating both YouTube's Terms of Service and copyright law. Always use downloaded content ethically and look to transform it, not just repost it.

    Can I Download Shorts in High Definition?

    Absolutely. Most quality YouTube Shorts downloader tools will let you grab videos in various resolutions, often including 720p and 1080p (HD). The downloadable quality is, of course, limited by the quality of the original upload.

    For the sharpest results, use a tool built to handle high-resolution downloads without heavy compression. This is especially important for creators who plan to re-edit clips or researchers who need to see fine detail.

    The goal here isn't to plagiarize, but to learn. For example, you might download a Short to study its viral audio, then transcribe the YouTube video to break down the script's pacing. That’s a powerful and ethical way to deconstruct what makes top content successful.

    What Are the Risks of Using Random Online Downloaders?

    Tread carefully here. Using a random, untrusted online downloader from a quick search can expose you to serious risks, such as:

    • Malware or viruses hidden in the downloaded files.
    • Aggressive pop-up ads that disrupt your workflow.
    • Shady sites that might compromise your data privacy.

    These sites often try to sneak unwanted software onto your device. To keep your computer and personal information safe, it's always smarter to stick with well-known, secure tools from reputable developers.


    Ready to streamline your workflow with a full suite of professional-grade tools? Youtube Navigator offers everything from an HD downloader and the YouTube Transcript Extractor to a powerful YouTube Thumbnail Studio—all for free and without registration. Start optimizing your content creation today.

  • A Creator’s Guide to yt dlp for Smart Video Archiving

    A Creator’s Guide to yt dlp for Smart Video Archiving

    Let's be honest: if you're a creator, researcher, or educator serious about managing online video, you need a serious tool. Forget those clunky, ad-filled browser extensions. When you need real power and flexibility for archiving your content or research material, you need yt-dlp.

    In simple terms, yt-dlp is a free, open-source command-line program for downloading videos and audio from YouTube and hundreds of other websites. It’s the direct successor to the legendary youtube-dl, but supercharged with better performance, more features, and—most importantly—active, ongoing development that keeps it working when other tools fail.

    What Is yt-dlp and Why Should Creators and Researchers Use It?

    Image

    If you're a content creator, researcher, or educator, you've probably hit a wall with online video. Maybe you need to create a secure, offline backup of your own YouTube channel before disaster strikes. Perhaps you're an educator who needs to download a lecture series for offline viewing on a flight, or a researcher compiling video evidence for a project. This is exactly where yt-dlp comes in.

    Think of it as the Swiss Army knife for online video. Yes, it runs from the command line, which can look a little intimidating at first. But that interface is the key to unlocking a level of control and automation that web-based tools can only dream of.

    The Evolution from youtube-dl

    To really get why yt-dlp matters, you have to know its origin story. It started as a "fork" of the youtube-dl project, which was the undisputed champion for years. But as youtube-dl's development slowed to a crawl, the community of creators and power-users needed something better.

    That's when yt-dlp stepped up, rapidly adding bug fixes, new features, and support for websites that the original had long given up on. The transition became official when major Linux distributions like Ubuntu started replacing youtube-dl with yt-dlp in their core software libraries, cementing its place as the new standard. You can dig into its history on its Wikipedia page.

    yt-dlp vs youtube-dl Key Differences

    Curious why so many people made the switch? This table breaks down the key advantages that yt-dlp brought to the table, making the choice a no-brainer for most users.

    Feature youtube-dl yt-dlp
    Development Status Mostly inactive; slow updates Actively maintained; frequent updates
    Download Speed Generally slower Optimized for faster downloads
    Feature Set Core features, but many are outdated More advanced features and format options
    Site Support Many sites are broken due to lack of updates Broader and more current site support
    Community Legacy user base Large, active, and growing community

    Ultimately, yt-dlp isn't just a replacement; it's a significant upgrade that addresses the shortcomings of its predecessor and keeps pace with the modern web.

    Why It’s an Essential Tool for Professionals

    So, why bother with a command-line tool when there are so many other YouTube video downloaders out there? For creators, educators, and researchers, the answer is control and automation.

    For creators, it's a bulletproof way to create personal backups of an entire channel—an invaluable insurance policy against accidental deletion or a channel ban. For researchers and educators, it's a streamlined method for building offline libraries of lectures, documentaries, or source material for later analysis.

    The real power of yt-dlp isn’t just grabbing a single video. It’s about programmatic control—the ability to archive entire playlists, download specific formats, and automate the entire process to save hours of manual work.

    You can tell it to grab the exact video quality you need, download a specific audio format, or even pull down subtitles, thumbnails, and metadata like the video description. This level of precision is what sets it apart. A video editor can use it to fetch a source file in the highest possible resolution, while a researcher might only need the audio and a time-stamped transcript.

    Installing yt-dlp on Your System

    Image

    Alright, let's get yt-dlp set up on your machine. Don't worry if you're not a command-line wizard—the process is more straightforward than it looks, and we'll break it down for every major operating system.

    Think of this initial setup as getting your keys to a powerful video archiving tool. While the steps vary a bit between Windows, macOS, and Linux, the end goal is the same: getting the program installed and ready to run from your terminal.

    Windows Installation

    For Windows folks, the most direct path is downloading the yt-dlp.exe file.

    • First, head over to the official yt-dlp GitHub release page.
    • Look for the latest release, which will be right at the top.
    • From the list of assets, find and download the yt-dlp.exe file.

    Now for a crucial tip to make your life easier: place that .exe file somewhere that your system can always find it. I recommend creating a simple folder like C:\Tools, moving yt-dlp.exe there, and then adding that folder to your system's PATH environment variable. This small step means you can run yt-dlp from any Command Prompt or PowerShell window without needing to be in that specific folder.

    macOS and Linux Installation

    If you're on macOS or Linux, package managers are your best friend. These tools make installing and managing software an absolute breeze, usually with just a single command.

    • For macOS (with Homebrew): If you use Homebrew (and if you don't, you should!), just pop open your Terminal and run: brew install yt-dlp.
    • For Linux (with pip): Most Linux systems come with Python and its package manager, pip. You can install yt-dlp with this simple command: python3 -m pip install -U yt-dlp.

    Trust me, using a package manager is the way to go. It makes updates dead simple. Instead of manually downloading new files, you just run a quick command (brew upgrade yt-dlp or the same pip command) to get the latest version. Of course, if the command line isn't your style for everyday downloads, you could always check out our guide on how to convert YouTube videos to MP4 using simpler web-based tools.

    The Essential Companion: FFmpeg

    Here’s a piece of advice I give everyone: install FFmpeg. It's not just a recommendation; it's essential if you want the best quality downloads. YouTube often serves its highest-quality video and audio as separate files. Without FFmpeg, yt-dlp can't combine them, and you'll be stuck with lower-quality versions.

    Installing FFmpeg is not optional if you want the best quality. It's the engine that handles the critical task of muxing—combining the best video track and the best audio track into a single, high-fidelity file.

    Getting it is easy:

    • Windows: Download the FFmpeg binaries from their official site and add the bin folder to your system's PATH, just like you did for yt-dlp.
    • macOS: Run brew install ffmpeg in your Terminal.
    • Linux: Use your distribution's package manager, like sudo apt-get install ffmpeg for Debian/Ubuntu systems.

    Verifying and Updating Your Installation

    Once you have both yt-dlp and FFmpeg installed, let's make sure everything is talking to each other. Open your terminal or command prompt and type:

    yt-dlp --version

    If it spits back a version number, you're in business!

    One last thing. The internet is always in motion, and YouTube changes things that can break downloaders. The yt-dlp developers are incredibly quick with fixes. To save yourself future headaches, get into the habit of running the update command regularly:

    yt-dlp -U

    This command quickly fetches and installs the latest version, ensuring you always have the most recent features and bug fixes. A little bit of maintenance goes a long way.

    Mastering Your First Download Commands

    Image

    Alright, with yt-dlp installed and waiting, you're ready to start archiving content. The real power of this tool comes from its command-line flags, which turn a simple download into a precise, customized operation. Let's walk through the essential commands that will become the foundation of your video-saving workflow.

    The most basic command is as simple as it gets. Just type yt-dlp followed by the URL of the video you want to grab.

    yt-dlp [video_url]

    When you run this, yt-dlp automatically fetches what it considers the "best" available format—usually a high-resolution video file with the audio already merged. It's perfect for those quick, no-fuss downloads where you just need a copy of the video right away.

    Choosing Your Ideal Quality

    But what if "best" isn't what you actually need? For creators, a massive 4K file can be overkill when you just need a 1080p clip for a reaction video. For researchers, a huge video file is cumbersome when all you need is a smaller, more portable version for analysis. This is where format selection becomes your best friend.

    To see all the available options for a particular video, use the -F (or --list-formats) flag.

    yt-dlp -F [video_url]

    This command doesn't download a thing. Instead, it prints a detailed table listing every available video and audio stream, each with a unique format code. You'll see different resolutions (like 1920×1080), video codecs (like avc1 or vp9), and audio-only streams (like m4a or opus).

    Once you've spotted the format you want, you can download it specifically using the -f (or --format) flag followed by its code. For example, to grab the stream with code 313 (a 4K video) and 140 (a high-quality M4A audio stream), your command would look like this:

    yt-dlp -f 313+140 [video_url]

    That little + sign is the magic here. It tells yt-dlp to download both the video and audio streams and then use FFmpeg to merge them into a single, perfect file. This command is your key to getting exactly what you need, every single time.

    Downloading Entire Playlists

    Manually downloading every video from a lecture series or your channel's backlog would be a complete nightmare. Thankfully, yt-dlp handles entire playlists with the same ease as a single video. Just feed it the playlist URL.

    yt-dlp [playlist_url]

    The tool is smart enough to detect it's a playlist and will start downloading every video in order. This is an absolute game-changer for educators archiving course materials or creators backing up a complete series. No complex scripting needed—a single command does all the heavy lifting.

    Grabbing Subtitles and Transcripts

    For researchers, accessibility advocates, and creators, the text within a video is often just as valuable as the visuals. yt-dlp makes saving subtitle files alongside your video incredibly simple.

    • For human-made subtitles: Use --write-subs to download any professionally created subtitle tracks available (e.g., in English, Spanish, etc.).
    • For auto-generated captions: Use --write-auto-subs to snag YouTube's machine-generated captions.

    So, if you wanted a video and its official English subtitles, you would run:

    yt-dlp --write-subs --sub-lang en [video_url]

    This command saves both the video file and a separate .vtt or .srt subtitle file, which is perfect for dropping into media players or your video editing software.

    Productivity Tip: If you only need the text for analysis, research, or repurposing into a blog post, running a command-line tool might be more effort than necessary. For a quick, no-install solution, a tool like the YouTube Transcript Extractor is often much faster. You can just paste a URL and get an accurate, time-stamped transcript right in your browser.

    By mastering these fundamental commands, you've officially moved beyond basic downloading. You now have a repeatable, efficient system for archiving video content with total precision. Whether you're saving a single clip or an entire library, these core flags give you the control you need to build a truly useful video archive.

    Unlocking Advanced Archival Techniques

    Okay, you've mastered the basics. Now it's time to go beyond one-off downloads and turn yt-dlp into a custom-built, automated archival machine. This is where the tool’s real power comes alive for creators and researchers, letting you set permanent rules, build smart filters, and forge a perfectly organized media library that fits your exact workflow.

    Let’s dive into the power-user features that will save you a ton of time and give you complete control over your downloads.

    Streamline Your Workflow with a Configuration File

    Are you tired of typing the same long string of commands every single time you want to download something? The yt-dlp.conf file is about to become your best friend. It’s just a simple text file where you stash your favorite commands to run by default.

    Every time you fire up yt-dlp, it automatically pulls in the settings from this file.

    Setting one up is a breeze:

    1. Create a plain text file named yt-dlp.conf.
    2. Drop it into the right configuration folder for your operating system.
    3. Add one command-line option per line.

    Let's say you're a creator who always wants the best 1080p video, the highest quality audio, and an embedded thumbnail. Your yt-dlp.conf file would look something like this:

    # Always grab the best 1080p video and best audio
    -f "bestvideo[height<=1080]+bestaudio/best"
    
    # Embed the thumbnail directly into the video file
    --embed-thumbnail
    
    # Also save a separate thumbnail image
    --write-thumbnail
    

    With that file in place, running yt-dlp [video_url] is all it takes to apply those rules. You’ve just turned a repetitive chore into a slick, one-command process.

    Advanced Filtering and File Naming

    Downloading your content is only half the battle; organizing it is what keeps your archive usable. This is where yt-dlp really flexes its muscles with powerful output templates and filtering options to keep things tidy from the get-go.

    The -o (or --output) flag lets you create a custom file-naming structure using dynamic variables. For a researcher archiving a lecture series, this is a game-changer. Imagine you want every file organized by the channel, upload date, and video title.

    You’d use a command like this:

    yt-dlp -o "%(uploader)s/%(upload_date)s - %(title)s.%(ext)s" [playlist_url]

    This command creates a folder for the channel (%(uploader)s) and saves each video inside with a clean name like 20241026 - Advanced Quantum Physics.mp4. No more tedious manual renaming or file sorting.

    Pro Tip: Combine output templates with date filtering for a killer continuous backup system. Using the --dateafter flag, you can tell yt-dlp to only grab videos uploaded after a certain date. This is perfect for setting up a weekly script to archive new videos from a channel without re-downloading everything you already have.

    The Creator’s Essential Skill: Downloading Private Videos

    As a YouTube creator, one of the most critical uses for yt-dlp is creating secure, offline backups of your own work—including your private and unlisted videos. Since these videos are tied to your account, you can't just download them anonymously.

    The fix is using the --cookies-from-browser flag. This lets yt-dlp borrow your browser's logged-in session to authenticate with YouTube, proving you have permission to access the content.

    The command couldn't be simpler:

    yt-dlp --cookies-from-browser chrome [your_private_video_url]

    (Just replace chrome with firefox, edge, or whatever browser you use).

    Honestly, this is a non-negotiable skill for any creator serious about protecting their work. It gives you a reliable local archive that’s completely independent of the YouTube platform, shielding you from accidental deletions or channel problems. The developers behind yt-dlp have consistently improved these features, adding things like better cookie management and resumable downloads that make the tool incredibly robust for creators.

    Embedding metadata like chapters and thumbnails (--embed-chapters and --embed-thumbnail) makes these personal archives even better, creating complete, navigable copies of your original uploads.

    While yt-dlp is amazing for video, if your main goal is to rip audio for a podcast or other projects, our guide on using a YouTube audio extractor offers more specialized strategies. By combining these advanced features, you elevate yt-dlp from a simple downloader into a core part of your content management strategy.

    Building Automated Archiving Workflows

    This is where yt-dlp goes from being a handy tool to an essential part of your content arsenal. Once you move past one-off downloads and start automating your archival process, you can put your entire content management on cruise control. It's about saving hours of mind-numbing manual work and making sure you never miss a thing.

    Think of it as making yt-dlp work for you in the background, whether you’re backing up your own YouTube channel or saving an entire lecture series for offline study. Let's dig into how you can create "set it and forget it" workflows that solve some of the biggest headaches for creators and researchers alike.

    Bulk Downloading from a List

    One of the most common hurdles is dealing with a long list of videos. Maybe you've gathered a bunch of URLs for research, competitor analysis, or a curated educational series. Instead of running the same command over and over, you can feed yt-dlp a simple list.

    The key here is the --batch-file flag. Just create a plain text file (I usually call mine links.txt) and drop one video URL on each line. Then, point yt-dlp to it with a single command:

    yt-dlp --batch-file links.txt

    That’s it. The command will chew through every URL in your file, downloading the videos one by one. It’s a clean and incredibly efficient way to manage bulk jobs without flooding your terminal history.

    For creators, this is a fantastic method for archiving specific sets of videos from your channel, like all sponsored content or a particular series. Just grab the URLs, pop them in a file, and let yt-dlp do the heavy lifting.

    Scheduling Automatic Channel Backups

    For many, the holy grail is a fully automated channel backup. By setting up a script to run on a schedule—say, weekly or monthly—you can ensure your entire video library is safely tucked away offline. This usually involves creating a simple script and telling your operating system's task scheduler to run it for you.

    Of course, when you start automating, things can sometimes go sideways. This visual gives you a basic flow for troubleshooting when your scripts hit a snag, which is a normal part of the process.

    Image

    The main takeaway is to be methodical. Identifying the error and checking your logs are always the first steps toward a fix.

    Here’s how you can get this running on different systems:

    • On Windows: The go-to is the Task Scheduler app. You’ll create a new task that points to a batch script (a .bat file) containing your yt-dlp command and set it to run on a schedule.
    • On macOS or Linux: You'll want to use a cron job. Just edit your crontab by running crontab -e and add a new line that executes your shell script at your desired interval.

    To get you started, here are a few practical script snippets for common automation tasks.

    Example yt dlp Automation Scripts

    These scripts provide a solid foundation for building your own automated workflows. You can copy and paste them into a .bat (Windows) or .sh (Linux/macOS) file and then schedule it to run. Remember to replace the placeholder channel URL with your own.

    Task Windows Batch Script Linux/macOS Bash Script
    Backup Entire Channel @echo off
    yt-dlp --download-archive archive.txt "https://www.youtube.com/c/YourChannel"
    #!/bin/bash
    yt-dlp --download-archive ~/archive.txt "https://www.youtube.com/c/YourChannel"
    Download New Videos with Thumbnails @echo off
    yt-dlp -o "%%(upload_date)s - %%(title)s.%%(ext)s" --write-thumbnail --download-archive archive.txt "https://www.youtube.com/c/YourChannel"
    #!/bin/bash
    yt-dlp -o "%(upload_date)s - %(title)s.%(ext)s" --write-thumbnail --download-archive ~/archive.txt "https://www.youtube.com/c/YourChannel"
    Archive Audio-Only (Podcast-Style) @echo off
    yt-dlp -x --audio-format mp3 --download-archive audio_archive.txt "https://www.youtube.com/playlist?list=YourPlaylistID"
    #!/bin/bash
    yt-dlp -x --audio-format mp3 --download-archive ~/audio_archive.txt "https://www.youtube.com/playlist?list=YourPlaylistID"

    A simple script like the ones above will download an entire channel, use --download-archive to smartly skip videos it has already grabbed, and even save a thumbnail for each one. This ensures that after the first big run, only new content gets archived. It's efficient and completely hands-off.

    Integrating Archives into Your Content Strategy

    An automated video archive is more than a simple backup; it’s a goldmine for your content strategy. With local copies of your videos, you unlock fresh opportunities for analysis and repurposing that you just can't get from the YouTube dashboard alone.

    For example, a creator can systematically download their entire library and then use a tool for YouTube Channel Analytics to analyze performance trends across their archived content. This deep dive can reveal which topics, formats, or video lengths have performed best over time, giving you data-driven insights to guide your next big idea.

    By including the --write-thumbnail flag in your scripts, you'll also build a local library of all your past thumbnails. When it's time to design a new one, this archive becomes an incredible source of inspiration. You can quickly browse your past creative and then use a tool like the YouTube Thumbnail Maker to craft something fresh and high-performing based on what’s worked before.

    What makes these automated workflows so reliable long-term is the fact that yt-dlp is constantly updated. A quick look at the project's GitHub repository reveals a relentless pace of improvements, with over 5,000 lines of changelog entries. This active development means that as platforms change, your scripts are far less likely to break. You can check out the project's impressive update history on its GitHub changelog.

    Frequently Asked Questions About yt-dlp

    Even a powerhouse tool like yt-dlp can throw you a curveball now and then. Maybe you’ve hit a weird error, or you’re trying to pull off a specific kind of download. It happens.

    I’ve rounded up some of the most common questions and troubleshooting snags people run into. Here are some straightforward, practical answers to get you back on track.

    Why Am I Getting a 403 Forbidden Error?

    This is easily the most common headache, and it almost always means one thing: YouTube (or another site) updated something on their end and temporarily broke yt-dlp. A '403 Forbidden' error is the server actively telling you, "Nope, you can't have this."

    The first thing you should always try is updating yt-dlp itself. The developers are incredibly fast at pushing out fixes for these kinds of site changes. Just pop open your terminal and run:

    yt-dlp -U

    If an update doesn't fix it, the video might be private, members-only, or age-restricted. For those, you need to prove you have permission to be there. You can do this by passing your browser's login cookies to yt-dlp. For example, if you're logged into YouTube in Chrome, this command tells yt-dlp to use that session:

    yt-dlp --cookies-from-browser chrome "[video_url]"

    This lets yt-dlp download on your behalf, using the same access your logged-in browser has.

    How Can I Download Only the Audio from a Video?

    This is a fantastic feature for creators and researchers. It's perfect for saving lectures for offline listening, creating a podcast from video interviews, or isolating audio for transcription and analysis. The easiest way to do it is with the -x (or --extract-audio) flag.

    For total control, you can even tell it what format you want. This is my go-to command for grabbing audio:

    yt-dlp -x --audio-format mp3 "[video_url]"

    When you run this, yt-dlp smartly downloads the necessary streams, rips the audio track, converts it to a clean MP3, and then deletes the leftover video file. You're left with just the audio, nice and tidy.

    Is It Legal to Use yt-dlp?

    Let's be crystal clear: the yt-dlp software itself is 100% legal. It’s just a versatile tool for transferring data, no different from your web browser.

    The tricky part is what you download. The legality depends entirely on the content, the copyright, your local laws, and what you plan to do with the file.

    Key Takeaway: Using yt-dlp to download copyrighted material without permission from the creator is where you can get into trouble. The tool is intended for legitimate archival purposes, such as making personal backups of content you own, have the rights to, or for educational uses permitted under fair use guidelines.

    Always be mindful of the website's terms of service and respect the rights of creators. This guide is for educational purposes only, and you are responsible for using the tool lawfully.

    How Can I Fix Extremely Slow Downloads?

    It’s incredibly frustrating when a download crawls at a snail's pace. More often than not, this isn't your internet connection—it's the video platform (like YouTube) putting the brakes on your download, a practice known as throttling.

    If you know your own connection is solid, there are a few things to try. A common first step is adding the --no-mtime flag. This stops yt-dlp from trying to set the file's "last modified" time to match the server's, a small step that can sometimes trip up a throttled connection.

    Another simple trick? Just try downloading at a different time of day when servers might be less busy. For more stubborn cases, advanced users can route their download through a proxy using the --proxy URL command, but that’s usually overkill for everyday downloads.

    And if you need to grab content without the download hassle, you might be interested in a different approach entirely. For instance, learning how to transcribe a YouTube video often involves simpler browser-based tools that skip the download complexities.


    Ready to take your YouTube workflow to the next level? From in-depth analytics to effortless thumbnail creation, YouTube Navigator provides a complete suite of free tools to help you succeed. Streamline your content strategy today at https://youtubenavigator.com.

  • Launch Your YouTube Channel Like a Pro

    Launch Your YouTube Channel Like a Pro

    When people hear “YouTube TV,” they often think of Google’s subscription service. But for creators, educators, and researchers, a YouTube channel is about building a professional, episodic content hub. It’s about structuring your videos like a TV series with consistent branding, a reliable release schedule, and a clear theme. The goal? To build a loyal, returning audience that can’t wait for your next “episode.”

    Defining Your Channel’s Foundation for Success

    Before you even think about hitting that record button, you need a blueprint. Too many creators dive straight into filming, only to hit a wall a few weeks later, wondering why their viewership is flat or where their next idea will come from. A solid foundation turns a passion project into a sustainable, long-term channel. This isn’t about luck; it’s about smart, upfront preparation to create a channel that feels intentional, professional, and binge-worthy from day one.

    The platform you’re about to join is enormous. YouTube kicked off in 2005 and now boasts over 2.5 billion monthly active users—that’s almost a third of the entire planet. With millions of videos uploaded every single day, you can’t afford to just wing it. If you want to see the full picture, check out this detailed overview from Analyzify on YouTube’s growth. This data isn’t here to scare you; it’s here to prove why a clear strategy is non-negotiable.

    Identify Your Niche and Audience

    Your first move is to carve out your corner of the internet. A great YouTube channel doesn’t try to please everyone. It hyper-serves a specific community with a shared interest, whether they’re fellow researchers, students, or hobbyists.

    So, ask yourself these three critical questions:

    • What am I genuinely passionate and knowledgeable about? Your enthusiasm is contagious. It’s the fuel that will keep you going and the magnet that will draw viewers in.
    • Who is my ideal viewer? Get specific. Are they students struggling with a concept? Researchers looking for new methodologies? Creators trying to solve a specific problem? Your content should feel like the exact solution or entertainment they were searching for.
    • Is there already an audience for this? A quick YouTube search is your best friend here. If you find existing communities around your topic, that’s a fantastic sign of built-in demand.

    Conduct Smart Competitor Analysis

    Once you’ve zeroed in on your niche, it’s time for a little recon. This isn’t about copying what the top channels are doing; it’s about spotting the gaps they’ve left behind. Watch what the leaders in your space are doing well, but more importantly, look for what they aren’t doing. Those gaps are your golden opportunities.

    Pro Tip: Don’t just watch their most popular videos. Use a tool like YouTube Channel Analytics to dig deeper. You can analyze their upload frequency, average video lengths, and engagement patterns to see the data driving their success. This is how you move from making guesses to making data-backed decisions.

    The planning phase is where the magic really starts. It’s the groundwork that makes everything else possible.

    Image

    This simple flow shows that a powerful launch starts long before you upload anything. It all begins with choosing the right niche.

    To help you nail this down, I’ve put together a simple blueprint. Think of it as your channel’s constitution—the foundational document that will guide all your creative decisions.

    Channel Concept Blueprint

    Strategy Element Key Questions to Answer Example (Educational Channel)
    Core Niche What specific topic will you own? “Beginner-friendly 3D printing for hobbyists.”
    Ideal Viewer Who are you making content for? “Tinkerers and makers (25-45) who just bought their first 3D printer and feel overwhelmed.”
    Unique Angle What makes you different? “Instead of complex technical jargon, I focus on fun, practical projects you can complete in a weekend.”
    Content ‘Series’ What are your recurring content pillars? “Weekly ‘Project Prints,’ monthly ‘Troubleshooting Tips,’ and a ‘3D Printing 101’ series for absolute beginners.”
    Release Schedule When will you post? “New Project Print every Friday, with a 101 video on the first Monday of each month.”

    Filling this out forces you to get crystal clear on your vision, making it much easier to stay on track once you start producing content.

    Structure Your Content and Schedule

    Think like a TV producer. Your channel should have seasons or series that encourage viewers to binge-watch. A great way to start is by outlining your first 10-15 video ideas. This simple exercise does two things: it proves your concept has enough depth to last, and it helps you map out a realistic release schedule.

    Consistency is everything. Whether you commit to posting daily, weekly, or bi-weekly, stick to it. A predictable schedule builds anticipation and trains your audience to make your channel a regular part of their routine. This reliability is a hallmark of every successful YouTube channel and the first step in building a genuine, lasting relationship with your community.

    Crafting a Professional and Memorable Brand

    Your brand is the visual promise you make to your audience. It’s that instant feeling they get when they see your content pop up in their feed. For a YouTube channel that’s going for that professional, episodic vibe, a solid brand identity is what separates a random video from a must-see series.

    It’s what makes your channel instantly recognizable in a sea of thumbnails. This identity really boils down to two things: consistent channel art (your banner and profile pic) and, most importantly, compelling thumbnails that absolutely scream “click me.”

    The Psychology of Visual Branding

    Before you even think about firing up a design tool, take a step back. What’s the message you want to send? Your color palette and font choices aren’t just for decoration; they’re powerful signals that set the entire tone for your channel.

    • Color Psychology: Colors carry emotional weight. Are you an educational channel aiming for trust and authority? Blues and greens are your friend. A high-energy comedy channel? Bold yellows and oranges can capture that chaotic energy. Just pick two or three main colors and stick with them.
    • Font Selection: Your fonts have a personality. A clean, sans-serif font like Montserrat or Roboto feels modern and clear—perfect for tech or how-to content. A more stylized or serif font might fit better for a channel about history or deep storytelling. The goal here is readability and consistency.

    Your channel banner is the first impression for new visitors. It needs to clearly state your channel’s name, what you’re all about, and maybe even your upload schedule. For your profile picture, a clean, high-resolution headshot or a simple, bold logo works best.

    Designing Thumbnails That Drive Clicks

    Think of your thumbnail as your video’s billboard. Its only job is to get someone to stop scrolling and click. A great thumbnail is crystal clear, delivers on the video’s core promise, and feels right at home with your brand.

    This is where having a reliable toolkit is a total game-changer. For creators who need to move fast, starting with a template is the only way to go. You can use a tool like the YouTube Thumbnail Maker to lock in a consistent look across all your videos without reinventing the wheel every time.

    Here’s a peek at the interface—it’s designed to be quick and intuitive.

    The drag-and-drop setup lets you quickly plug in your brand colors, fonts, and logos to pre-made layouts. This ensures every single thumbnail feels like it belongs to the same professional series.

    For creators who want to get their hands dirty, the YouTube Thumbnail Studio offers more advanced features like layers, custom fonts, and professional effects. This lets you build truly unique designs from the ground up without needing to master complex software like Photoshop. The end goal is to create a visual template you can adapt for each new video, saving you hours while making your brand stronger.

    Key Insight: A winning thumbnail strategy isn’t about creating a new masterpiece for every video. It’s about creating a system. A consistent template builds brand recognition and dramatically slashes your production time.

    Learning from the Best Without Copying

    So, how do you figure out what kind of thumbnails actually work in your niche? You study the competition. I don’t mean you should copy them—that’s a fast track to looking generic. Instead, you’re looking for patterns to understand what your specific audience responds to.

    Here’s a powerful trick: use the YouTube Thumbnail Downloader to grab high-resolution versions of thumbnails from the top videos in your space. Make a folder and collect 10-15 examples.

    Once you have your collection, start analyzing:

    • Are they using bright, high-contrast colors?
    • Is there a person’s face showing a strong emotion?
    • How much text is on there? Is it even readable on a phone?
    • What common visual tricks do you see (like arrows, circles, or before-and-after shots)?

    This kind of research is pure gold. You’ll see what’s grabbing eyeballs right now and can then weave those principles into your own unique style.

    If you’re still struggling to figure out what videos to even make, we’ve got a great guide on finding killer video ideas for YouTube that can kickstart your next series. When you pair a strong idea with a powerful visual, you build an unstoppable engine for channel growth.

    Mastering Your Content Production Workflow

    Great content doesn’t just happen by accident. It’s the result of a smart, repeatable process. For anyone serious about building a professional-grade YouTube channel, a solid workflow is what separates the hobbyists from the pros. It’s the secret to keeping your quality high and your schedule consistent without burning out.

    Think of your production quality as the engine of your channel. It’s what the most successful creators obsess over. The Indian music label T-Series, for example, didn’t become the most-viewed channel by accident; they did it by consistently releasing high-production music videos. Likewise, MrBeast captivates millions with huge, meticulously planned challenge videos. The common thread? A commitment to a polished final product, which all starts with a well-oiled workflow.

    From Script to Screen: A Practical Approach

    Every memorable video starts with a plan. A tight script or a detailed outline is your roadmap—it keeps your message clear, prevents rambling, and makes the editing process a whole lot less painful. Trust me, you’ll thank yourself later.

    Here’s a simple production flow you can adopt and make your own:

    • Scripting/Outlining: Jot down your key talking points or write a full script. This step helps you clarify your story and figure out what assets (like B-roll or graphics) you’ll need before you even press record.
    • Recording: Get your camera, lighting, and audio set up. Always do a quick test recording to catch any issues. A huge time-saver for series-based channels is batch recording—filming several “episodes” in one go.
    • Editing: This is where the magic happens. Assemble your footage, chop out the mistakes, and layer in your B-roll, graphics, and music. Pay close attention to your pacing to keep viewers hooked.
    • Sound Design: Don’t neglect your audio! A video with bad sound feels amateurish, even if the visuals are great. Spend time making your audio crisp and clear. It makes a world of difference.

    This kind of structured approach turns what can be a chaotic creative mess into a set of manageable tasks, helping you create better content, faster.

    The Secret Weapon: Content Repurposing with Transcripts

    One of the biggest struggles for creators is the relentless need for more content on more platforms. This is where you can work smarter, not harder. Every video you make is a goldmine of repurposable content, and the key to unlocking it is the transcript.

    Let’s be real: manually transcribing a video is a soul-crushing task. Instead, a tool like the YouTube Transcript Extractor can become an essential part of your workflow. With a single click, you can grab a complete, accurate, and time-stamped transcript from any of your videos.

    Here’s a peek at how simple the interface is. You just plug in a video URL.

    Image

    This screenshot shows just how easy it is to generate and copy the full text. Those time-stamps are incredibly useful for jumping to specific moments in your video.

    This isn’t just about getting text; it’s about multiplying your impact.

    Creator Insight: Think of your video transcript as the raw material for a dozen other pieces of content. It’s the most efficient way to expand your reach beyond YouTube without creating anything from scratch.

    Once you have that transcript, the possibilities are endless. You can instantly turn it into:

    • SEO-Rich Blog Posts: A full transcript is the perfect foundation for a detailed article on your website, helping you capture search traffic from Google.
    • Detailed Show Notes: Give your audience extra value by providing comprehensive notes, complete with links and resources you mentioned in the video.
    • Engaging Social Media Content: Pull out key quotes, tips, or surprising stats to create a week’s worth of posts for platforms like X, Instagram, or LinkedIn.
    • Accessible Content: Offering transcripts makes your videos accessible to a wider audience, including people who are deaf or hard of hearing, or those who simply prefer to read.

    And if you’re juggling lots of video files, our guide on the best YouTube video downloaders can be a lifesaver for organizing your raw footage and backups.

    By building transcription right into your workflow, you create a powerful content engine that squeezes every last drop of value out of each video you produce.

    Optimizing Your Videos for Maximum Discovery

    Alright, you’ve put in the work and created some amazing content for your YouTube channel. That’s a huge win, but it’s only half the game. If nobody can find your videos, all that effort goes to waste. This is where YouTube SEO comes in—it’s the art and science of making sure your videos show up when people search for what you offer.

    This process doesn’t start when you hit “publish.” It starts way before, with understanding what your audience is actually typing into the YouTube search bar. Forget guessing; this is about solid keyword research to find out what your community is hungry for. The goal is to perfectly align your video’s topic, title, and description with what viewers are searching for.

    Writing Titles and Descriptions That Work

    Your video’s title and description are your two most powerful tools for getting discovered. A great title makes a clear promise and sparks curiosity. A well-written description gives the YouTube algorithm context and offers real value to the viewer.

    Think of your title as a headline on a magazine rack. It has to grab someone’s attention and clearly state what’s inside. For example, instead of a flat title like “My New 3D Printer,” something like “3D Printing for Beginners: Your First Project from Start to Finish” is way better. It’s specific, speaks directly to an audience, and uses a phrase people are likely to search for.

    Your description is where you seal the deal. The first couple of lines are crucial because they’re what people see in search results. Use this space to hook them with the video’s main benefit and include your primary keyword again. Below that, you can flesh it out with more details, timestamps for easy navigation, and links to other resources. A detailed description tells YouTube your video is a comprehensive authority on the topic.

    One pro tip? You can easily transcribe YouTube videos you’ve already made to pull keyword-rich text directly from your own content for future descriptions.

    Using Data to Drive Your Optimization Strategy

    Optimization isn’t something you do once and forget about. It’s a cycle: you publish, you analyze what happened, and you tweak your approach for the next one. The best guide you have in this entire process is your own channel’s data. Metrics like Click-Through Rate (CTR) and Audience Retention don’t lie—they tell you exactly what’s resonating and what’s falling flat.

    This is where you need a command center. Using a tool like the YouTube Channel Analytics dashboard gives you a no-fluff, straightforward look at the numbers that actually matter, helping you shift from guessing to making informed decisions.

    Image

    A quick glance at this dashboard shows you the vital signs of your channel: total views, subscriber growth, and how your video count is trending. Seeing this data over time helps you draw a straight line between the content you’re making and the results you’re getting.

    A low CTR, for instance, might be a red flag that your thumbnails or titles aren’t compelling enough. A sudden drop-off in audience retention at a specific point in a video tells you exactly where you lost your viewers’ interest.

    Data-Driven Insight: Don’t just chase views. Pay close attention to which videos are driving subscriber growth. A video that convinces a viewer to hit “subscribe” is pure gold. You need to break down its topic, title, and thumbnail to figure out why it connected so well.

    Data-Informed Thumbnail Design

    We’ve already talked about creating consistent branding with your thumbnails, but optimization adds a whole new layer. Your thumbnails need to do more than just look good—they have to perform. A/B testing is a powerful idea here. While YouTube doesn’t have a native A/B testing tool for thumbnails for every creator, you can easily run simple experiments yourself.

    Try two different thumbnail styles for two similar videos and watch the CTR for a week.

    • Test 1: A thumbnail with a big, expressive face.
    • Test 2: A thumbnail focused on the outcome (e.g., the perfectly finished 3D print).

    By tracking this with a tool like YouTube Channel Analytics, you gather your own data on what your specific audience clicks on. This feedback loop—create, measure, iterate—is the engine that powers sustainable growth for any successful YouTube channel.

    Analyzing Performance to Fuel Channel Growth

    Image

    If you want to build a sustainable YouTube channel, you need to live by a simple mantra: create, measure, and iterate. Moving from random viral hits to predictable success means becoming a data-driven creator. You have to stop just looking at view counts and start digging into the “why” behind your performance. The key to making smarter content decisions is truly understanding what makes your audience tick.

    This data-first mindset is more critical than ever. The platform is a behemoth; in a single quarter of early 2025, YouTube’s ad revenue soared to $8.92 billion. As you can see in these detailed YouTube revenue statistics from Global Media Insight, the total estimated revenue for 2024 was around $39 billion, with another $14.5 billion coming from subscriptions. This scale means the competition is fierce, and your best advantage is knowing your numbers.

    Moving Beyond Vanity Metrics

    The first step is to break free from the allure of vanity metrics. Sure, seeing a huge view count is exciting, but it doesn’t tell you the whole story. The real gold is buried in the data that reveals audience loyalty and genuine engagement. This is where a focused tool can cut right through the noise.

    This is exactly what the YouTube Channel Analytics tool was designed for. It helps you zero in on the videos that aren’t just getting watched, but are actively converting casual viewers into loyal subscribers. For long-term growth, that distinction is everything.

    Creator Takeaway: Stop asking, “Which video got the most views?” Instead, ask, “Which video earned me the most subscribers?” When someone watches a video and is compelled to subscribe, that’s a direct signal of high-value content you need to double down on.

    By tracking subscriber acquisition per video, you can pinpoint the exact topics, formats, and even title styles that connect with your ideal audience.

    Identifying What Resonates and What Doesn’t

    One of the most powerful tools in your analytics arsenal is the audience retention graph. This chart is your minute-by-minute, second-by-second guide to what keeps your viewers glued to the screen and, more importantly, where they get bored and click away. Those drop-off points are pure, unfiltered feedback.

    For instance, if you consistently see a huge viewer drop-off during your slick 30-second animated intro, that’s a flashing sign to either shorten it or scrap it entirely. On the flip side, if viewers are re-watching a specific segment over and over, you’ve just found a topic that could be expanded into its own video. Analyzing these patterns helps you sharpen your editing and storytelling to keep people hooked. Our complete guide to YouTube channel analytics dives much deeper into how to read these critical data points.

    Building a Community Feedback Loop

    Your analytics dashboard gives you the hard numbers (the “what”), but you also need the story behind them (the “why”). This is where qualitative feedback comes in. Actively building a conversation with your community creates a powerful two-way street that fuels content ideas and builds incredible loyalty.

    Here’s how to build that feedback loop:

    • Effective Calls-to-Action (CTAs): Go beyond the generic “like and subscribe.” Ask specific, engaging questions in your videos. Try something like, “What project should I tackle next? Drop your ideas in the comments!” This directs the conversation and gives you an endless stream of audience-approved ideas.
    • The Community Tab: Once you unlock it, the Community tab is a game-changer. Use polls to let your audience vote on upcoming video topics. This not only guarantees built-in interest for your next video but also makes your subscribers feel like they’re part of the channel’s journey.
    • Analyzing Comments: Don’t just skim your comments—read them. Look for recurring questions or points of confusion. These are often perfect prompts for follow-up videos, tutorials, or a dedicated FAQ segment.

    When you combine hard data from your analytics with direct feedback from your community, you create a powerful, self-improving system. This ensures every video you make is more informed and more effective than the last, turning your YouTube channel into a destination viewers actively seek out.

    Common Questions About Launching a YouTube Channel

    Diving into a new venture, especially something as public as a YouTube channel, always brings up a ton of questions. I’ve seen it time and time again: even with a solid plan, creators get stuck on the small stuff or feel uncertain about the right next step.

    So, let’s clear the air. This section tackles the most common questions I hear from new and aspiring creators, with direct answers to help you push past those early-stage jitters with confidence.

    How Much Does It Cost to Start a YouTube Channel?

    Here’s the best part: getting started can be completely free. You can create a Google account, set up your channel, and upload videos without spending a single dollar. The real costs only show up when you decide to upgrade your production quality.

    You can absolutely begin with the smartphone in your pocket and some free editing software. As your channel finds its footing, you might choose to invest in a better camera, a quality microphone, or some professional lighting. But that comes later.

    Key Insight: Your biggest initial investment isn’t money; it’s your time. The hours you put into planning, recording, editing, and analyzing your performance are infinitely more valuable than expensive gear when you’re just starting out. Nail the content first, then upgrade your tools.

    How Long Should My Videos Be?

    There’s no magic number here. The “perfect” video length depends entirely on your niche, your topic, and what your audience expects. A huge myth is that every video needs to be over 10 minutes to make money. The truth? A short, punchy video that keeps people watching is always better than a long one that drags on.

    Instead of aiming for a specific runtime, focus on delivering complete value. Your video should be exactly as long as it needs to be to cover the topic well, without any filler.

    Using Data to Find the Sweet Spot

    To really dial in the right length, you need to look at your data. A tool like YouTube Channel Analytics is perfect for this. Check out your audience retention graphs—they show you the exact moment viewers start to drop off. If you see a consistent exodus at the five-minute mark, that’s your cue to tighten up your delivery and get to the good stuff faster.

    How Often Should I Post New Videos?

    Consistency is far more important than frequency. Think about it. Posting one great video every single week, on the same day and at the same time, is so much more effective than dropping three mediocre videos on a random schedule. Your audience learns when to expect new content, which builds a loyal following.

    Start with a schedule you can realistically stick to without burning out. Whether it’s weekly, bi-weekly, or even monthly, just be consistent. You can always ramp up the frequency later as you get your workflow down to a science.

    Can I Use Copyrighted Music or Video Clips?

    This is a massive trap for new creators. Using copyrighted material without getting permission or a proper license is a fast track to a copyright strike. That can get your video taken down or, even worse, your entire channel terminated. It’s just not worth the risk.

    Always use royalty-free music. The YouTube Audio Library is a great place to start, and there are other reputable services out there. For video clips, stick to stock footage sites or content you have explicit permission to use. This keeps your channel safe and ensures your hard work doesn’t disappear over a preventable mistake.

    How Do I Make My Videos More Accessible?

    Making your content accessible is a game-changer for reaching the widest possible audience. The easiest and most impactful place to start is with accurate closed captions (CC). While YouTube’s auto-generated captions are better than nothing, they’re often riddled with errors.

    Here’s a simple fix that makes a huge difference: use the YouTube Transcript Extractor. You can grab the full, time-stamped text from your video, quickly fix any mistakes, and upload it as a custom caption file. This simple step ensures that viewers who are deaf, hard of hearing, or just watching with the sound off can still enjoy and understand your content.


    Ready to stop guessing and start building your YouTube channel with a data-driven strategy? YouTube Navigator provides the free tools you need, from in-depth analytics to professional thumbnail creation. Streamline your workflow and make smarter decisions at https://youtubenavigator.com.

  • Discover a World of Movies on YouTube Today!

    Discover a World of Movies on YouTube Today!

    Of course you can watch full-length movies on YouTube! It’s a much bigger and more interesting place for movie lovers than most people think. From Hollywood blockbusters you can rent to entire channels streaming public domain classics, finding a full-length film is easier than ever. It’s basically become a go-to streaming service in its own right.

    The Different Ways to Watch Movies on YouTube

    Image

    When someone searches for “youtube the movies,” they’re usually expecting short clips or trailers. But the platform has quietly built up a massive library of films, with something for pretty much every taste. This wasn’t an overnight change; it happened because of some smart moves by both YouTube and the major movie studios.

    The most straightforward way to dive in is through the official YouTube Movies & TV service. It works just like any other digital video store—you can rent or buy new releases and old favorites from big names like Paramount and Warner Bros. The best part is it’s all built right into the YouTube you already use.

    More Than Just Rentals: Free Movies Abound

    But you don’t have to pay to get your movie fix. There’s a whole world of free, ad-supported films just waiting to be discovered.

    Here’s a quick breakdown of the main ways you can watch:

    Ways to Watch Movies on YouTube

    Method Cost Content Type Best For
    YouTube Movies & TV Rent or Buy New releases, popular films, classics Watching specific, recent blockbusters without a subscription.
    Official Studio Channels Free (with ads) Older catalog films, B-movies Casual viewing when you want something free and don’t mind ads.
    Public Domain Channels Free Classic films (pre-1960s), silent films Film buffs, students, and anyone curious about cinema history.
    YouTube Premium Subscription A curated selection of ad-free movies Subscribers who want an ad-free experience across the board.

    This table gives you a good sense of the landscape. Many studios and distribution companies now run their own channels where they legally upload full-length movies, funded by ads. It’s a great setup: you get free entertainment, and they make money from their older titles.

    On top of that, there’s a huge community dedicated to movies in the public domain. These channels are a goldmine, legally offering thousands of classics from the silent era all the way to 1950s B-movie horror. If you’re a student or researcher, it’s an amazing resource for film history.

    The platform’s incredible growth into a major entertainment hub is backed by some serious cash. YouTube’s global ad revenue soared to $36.1 billion in 2024. That’s a massive leap from the $0.8 billion it pulled in back in 2010.

    With such a gigantic library, you’ve got both a huge opportunity and a bit of a challenge. How do you find the good stuff? And how do you keep track of it all? This is where having the right set of tools becomes a game-changer for any movie fan. Understanding this landscape helps you see why powerful tools are needed to find, manage, and even analyze all this movie content. Our complete toolset at https://youtubenavigator.com is built to help you navigate this ever-growing movie universe like a pro.

    How to Find Full-Length Movies Like a Pro

    Image

    Let’s be honest, searching for “youtube the movies” can feel like digging for treasure without a map. The platform loves to serve up trailers and short clips, burying the actual full-length films you want to see deep in the results. To cut through that noise, you have to stop searching like everyone else and start thinking like a power user.

    Your first move? Get specific with your search terms. Instead of just typing a movie title, add keywords that tell YouTube exactly what you’re after. For example, searching for “Night of the Living Dead 1968 full movie” is worlds more effective than just the title. This little trick tells the algorithm you want the complete film from that specific year, which helps push all the remakes, clips, and reviews out of your way.

    Master YouTube’s Search Filters

    Beyond smart keywords, YouTube’s built-in filters are your secret weapon. Most people never even click the “Filters” button after they search, but that’s where the real magic happens. It unlocks a whole new level of control.

    Here are the filters I use all the time to find great films:

    • Duration: This is the big one. Immediately select “Over 20 minutes.” It’s the single most powerful way to weed out trailers and clips, instantly surfacing longer content.
    • Sort by: Ditch the default “Relevance” and switch to “Upload date.” This is my go-to for finding newly uploaded public domain films or official releases I might have otherwise missed.
    • Type: Don’t sleep on this one. Select “Playlist.” It’s a brilliant way to discover curated collections from film communities or official channels that have already done the hard work of grouping movies by genre, director, or era.

    The key is to combine these filters. A search for “classic film noir,” filtered by duration (over 20 minutes) and sorted by upload date, can unearth hidden gems uploaded just hours ago.

    Pro Tip: When you find a channel that consistently posts high-quality, legitimate movies, bookmark it. I’ve built up my own personal directory of trusted sources this way, and it makes my future movie hunts infinitely faster and more reliable.

    Verifying Channel Legitimacy

    Okay, so you’ve found a potential movie. The next step is to quickly vet the source. Not all uploaders are playing by the rules, and you want to make sure you’re watching a legal, high-quality version. A good first step is to check the channel’s “About” page. Official studio channels or reputable film archives will always have professional descriptions and links.

    For a deeper dive, a tool like the YouTube Channel Analytics tool from YouTube Navigator is invaluable. You can quickly get a sense of a channel’s legitimacy by looking at its subscriber growth, upload consistency, and engagement metrics. A channel with steady, organic growth and a solid history of posting full-length films is a much safer bet than one that popped up overnight with a weird mix of random content. This data-driven gut check helps you stick with reputable sources for your cinematic explorations.

    Turning Movie Watching Into Active Research

    Image

    For film students, critics, and true cinephiles, watching “youtube the movies” is never just about passive entertainment. It’s an opportunity for deep analysis—a chance to deconstruct the art of cinema piece by piece. The real work begins when the credits roll, turning a casual viewing into a hands-on research project.

    This active approach means moving beyond simply enjoying the story. It involves breaking down dialogue, studying visual composition, and understanding the promotional strategies that brought the film to its audience. The challenge, however, has always been getting your hands on this information efficiently.

    From Dialogue to Data

    Imagine you’re trying to analyze the thematic evolution of a character’s dialogue throughout a three-hour epic. Scrubbing back and forth through the video to find specific lines is tedious, imprecise, and a huge time sink. This is where having the right tool isn’t just a luxury; it’s essential for serious research.

    With the YouTube Transcript Extractor from YouTube Navigator, you can instantly pull the entire time-stamped script from any movie on the platform. This transforms hours of manual, mind-numbing work into a simple copy-and-paste action. Suddenly, you have a searchable, editable document right at your fingertips.

    For a film critic, this is a game-changer. You can use Ctrl+F to find every mention of a specific theme, track a character’s changing speech patterns, or pull exact quotes for a review—all without re-watching hours of footage. It’s about working smarter, not harder.

    The impact of YouTube on cinematic content is profound. Top creators are now producing narrative work that rivals traditional films. Channels like MrBeast (with an estimated $85 million in 2024) and Dhar Mann (estimated $45 million) create scripted content that blurs the lines between movies and digital video, making script analysis more relevant than ever.

    Analyzing Visual and Audio Elements

    Of course, a film’s power isn’t just in its script. It’s in its sound and visuals. A character’s musical theme, a recurring sound effect, or a key piece of foley art can be just as important as their words. While transcripts capture the dialogue, you might need to isolate the audio for deeper analysis. For those interested in this, our guide on how to use a YouTube audio extractor provides detailed steps for separating sound from video.

    Visuals are equally critical, especially when it comes to a film’s marketing and aesthetic. A movie’s thumbnail on YouTube isn’t just a placeholder; it’s a carefully chosen piece of marketing designed to convey a specific tone and attract viewers.

    Here’s how you can use visuals for your research:

    • Marketing Analysis: Use the YouTube Thumbnail Downloader to collect the promotional images for a series of films. You can then analyze trends in color palettes, font choices, and character poses across different genres or eras.
    • Visual Essays: Create a mood board or visual essay by downloading key thumbnails that represent a director’s signature style. This provides a powerful visual aid for presentations or video critiques.
    • Shot Composition Study: By downloading thumbnails of specific scenes, you can study the rule of thirds, leading lines, and color theory used by the cinematographer.

    By combining script analysis with visual deconstruction, you transform a simple movie on YouTube into a rich dataset, ready for any academic paper, video essay, or in-depth review.

    Downloading Movies for Offline Viewing

    So, you’ve found the perfect full-length movie on YouTube. Fantastic! But what happens when your Wi-Fi decides to take a vacation? Whether you’re getting ready for a long flight, a road trip into the digital unknown, or just dealing with a spotty home connection, buffering can turn movie night into a slow-motion nightmare.

    This is exactly where downloading movies for offline viewing becomes a game-changer.

    Having a local copy on your device means no more stuttering playback, no more hunting for sketchy public Wi-Fi, and total freedom to watch what you want, where you want. It’s the best way to curate your own personal film library that’s always ready to roll. The trick is to use a safe, efficient tool that gets the job done without messing with the video quality.

    This simple workflow gives you an idea of how to organize your movie hunt before you even start downloading.

    Image

    By figuring out your favorite genres, seeing what’s trending, and building a watchlist first, you make the whole process much smoother and more enjoyable.

    Securely Saving Movies for Later

    The most straightforward way to save films for offline viewing is with a tool designed specifically for this. Our own YouTube to MP4 Converter at YouTube Navigator was built for this exact purpose. It lets you quickly convert and download any movie you find on YouTube into a high-quality MP4 file, which you can then save directly to your laptop, tablet, or phone.

    Here’s how simple it is:

    • Grab the URL: Once you’ve found the movie you want, just copy its full web address from your browser.
    • Paste and Convert: Head over to the YouTube to MP4 Converter, paste the link into the box, and hit the convert button.
    • Pick Your Quality: The tool will show you a few download options, usually from standard definition (480p) up to high definition (720p or 1080p). For the best picture, I always recommend grabbing the highest resolution available.

    This process removes all the technical headaches, making it easy for anyone to start building an offline movie collection. If you want to dive deeper into the different tools out there, check out our guide to the best YouTube video downloaders.

    Managing Your Digital Movie Library

    As you start downloading, it’s smart to keep a few practical things in mind to manage your files. Higher-resolution videos look amazing, but they also create much bigger files. A single full-length movie in 1080p can easily eat up several gigabytes of space.

    A Quick Tip: If you’re downloading to watch on a smaller screen like a smartphone, a 720p file is often the perfect balance. It still looks crisp and clear but will save you a ton of storage space and download time compared to a 1080p version.

    Always think about your device’s storage and your internet connection when choosing the video quality. If you plan on building a serious collection, investing in an external hard drive is a brilliant move. It keeps your computer’s main drive from getting cluttered and gives you a dedicated, organized home for all your favorite films, ready for any occasion.

    Creating Inspired Content from Movies

    Let’s be honest—watching a truly great film does more than just kill a couple of hours. It can light a creative fire. You finish a cinematic masterpiece and suddenly you’re buzzing with ideas for a deep-dive video essay, a razor-sharp movie review, or a perfectly themed compilation. That impulse is gold. And with the right approach, you can ethically channel that inspiration into building your own successful channel.

    Your first shot at grabbing an audience is your thumbnail. It’s not just a preview; it’s a promise. When you’re making movie-related content, your thumbnail is going up against professionally designed film posters, so it has to command attention. This is where you turn your inspiration into a real, clickable asset.

    Crafting Thumbnails That Compel Clicks

    An effective thumbnail captures a film’s soul while promoting your unique angle. It’s an art. Start by studying the visual language of movie posters—look at their fonts, color palettes, and compositions. You can absorb these ideas and use them to inform your own designs. Tools like the YouTube Thumbnail Maker are a perfect launchpad, offering intuitive templates that get you started fast.

    For creators ready to push their visuals to the next level, the YouTube Thumbnail Studio offers more advanced firepower. Here, you can work with layers, apply professional-grade effects, and use custom fonts to create something that genuinely stands out from the noise. Imagine designing a thumbnail for your Blade Runner analysis that nails the iconic neon-noir aesthetic of the film’s own marketing. That’s the kind of detail that gets clicks.

    A powerful thumbnail is your single best tool for boosting click-through rates. It should instantly communicate your video’s topic and tone, whether it’s a serious critique, a funny review, or a historical analysis.

    Leveraging Content for Commentary and Critique

    Visuals draw people in, but substance makes them stay. This is where you can ethically weave parts of the movie itself into your work to back up your arguments, a practice often protected under fair use principles. Fair use allows for the use of copyrighted material for purposes like commentary, criticism, and education.

    To make your analysis hit harder, you need to reference specific moments. This is where the YouTube Transcript Extractor becomes invaluable. Instead of re-watching scenes over and over while manually transcribing dialogue, you can pull the entire script in seconds to find the perfect quote that nails your point.

    The same goes for visual analysis. The YouTube Thumbnail Downloader lets you grab specific stills to illustrate your arguments. For example:

    • For a character study: Download thumbnails showing a character at different points in the film to visually track their transformation.
    • For a scene breakdown: Grab key frames to highlight your points about cinematography, color grading, or shot composition.

    When you combine your original commentary with these carefully chosen clips and visuals, you create something new and transformative. Your video is no longer just a reaction; it’s a valuable piece of work that adds to the conversation.

    For those still searching for a unique angle, exploring different video ideas for YouTube can help you find your niche in the film community. By respecting copyright and focusing on insightful critique, you can build a thriving channel that celebrates the art of cinema.

    Sorting Out the Common Questions on YouTube Movies

    Let’s be honest, diving into the world of “YouTube the movies” can feel a little like the Wild West. Is it legal? Is the quality any good? Can I use a clip without getting a copyright strike? It’s easy to get tangled up in these questions.

    Getting clear on the rules of the road helps you watch, download, and create with total confidence. So, let’s tackle some of the things people ask us about all the time.

    One of the first things on everyone’s mind is legality. Is it actually okay to watch full-length films on YouTube? The short answer is a resounding yes, but only if you stick to the right sources. Streaming movies uploaded by the actual copyright holders—like big studios on the official “YouTube Movies & TV” service or classic films now in the public domain—is perfectly fine.

    The murky water is with unauthorized uploads. Watching those can put you on the wrong side of copyright law. The simplest way to stay safe? Focus on official channels and trusted film archives. You can even use a tool like YouTube Channel Analytics to get a feel for a channel’s history and credibility before you settle in with your popcorn.

    Ensuring Quality and Using Content Fairly

    Okay, so you’ve found a legal source. The next big question is usually about quality. How can you be sure the movie you download won’t look like it was filmed on a potato?

    When you fire up a reliable tool like the YouTube to MP4 Converter, you’ll almost always see a menu of available resolutions—think 480p, 720p, or 1080p. For the best viewing experience, always go for the highest number available.

    Just remember, the final quality is 100% dependent on the source video. You can’t magically download a 1080p version if the original upload was only 480p.

    Key Takeaway: For creators, the “Fair Use” doctrine is a game-changer. It can allow you to use small snippets of copyrighted works for things like commentary, criticism, or parody. But be warned: it’s a legally complex area with very few hard-and-fast rules.

    This brings us to the final big question: can you actually use clips from movies in your own YouTube videos? To stay as safe as possible, the golden rules are to use very short clips, add your own significant transformative commentary that gives it new meaning, and always credit the original source.

    This is where a tool like the YouTube Transcript Extractor becomes incredibly useful. It lets you find the exact lines or moments you want to analyze without having to scrub endlessly through the video file. If you want to get deeper into this, we’ve got a whole guide on how to transcribe a YouTube video that breaks it all down.


    Ready to master your YouTube workflow? From finding hidden movie gems to creating stunning content, YouTube Navigator provides the free, professional-grade tools you need. Explore our full suite of utilities at https://youtubenavigator.com and start optimizing your process today.

  • Your Guide to YouTube Video Downloaders

    Your Guide to YouTube Video Downloaders

    Let’s be honest, a good YouTube video downloader is more than just a slick tool for watching videos on a plane. For creators, educators, and researchers, it’s a vital piece of the puzzle. Having a high-quality, local copy of a video isn’t just about convenience—it’s about having peace of mind and total creative control.

    Why Creators Need a Reliable YouTube Downloader

    Image

    The need to save YouTube videos goes way beyond just casual viewing. For professionals whose entire workflow revolves around video, having secure access to local files is absolutely non-negotiable.

    Picture a video editor hunting for the perfect B-roll clip or a researcher trying to archive a lecture series for deep analysis. In those moments, relying on a streaming connection just doesn’t cut it.

    Preserve Your Creative Work

    As a creator, your uploaded videos are your digital portfolio. Trusting YouTube to be your sole backup is a risky game. Videos can be deleted by accident, channels can be suspended without warning, and sometimes, tech just fails.

    By downloading your own content, you’re essentially creating a personal vault. This archive guarantees you always have the original, high-quality file, protecting your hard work from platform mishaps and keeping it safe for good.

    Streamline Your Production Workflow

    For marketers and video editors, every minute counts. Grabbing clips, sound effects, or even just a bit of inspiration from YouTube is standard practice. A powerful downloader makes this process seamless.

    Instead of wrestling with spotty Wi-Fi or platform restrictions, you can quickly grab what you need and get back to work. This is where a dedicated tool like a secure YouTube to MP4 Converter becomes a game-changer. It lets you pull down pristine video and audio files without navigating the sketchy, ad-filled websites that put your security at risk.

    The sheer scale of YouTube makes this even more critical. For any creator, educator, or researcher trying to do focused, professional work, offline access is the only way to stay sane and productive.

    So, Is Downloading YouTube Videos Actually Allowed?

    Image

    Let’s be clear, figuring out the rules for downloading YouTube videos can feel a bit like tiptoeing through a legal minefield. On one hand, YouTube’s official Terms of Service are firm: you’re not supposed to download content unless you have explicit permission from YouTube or the copyright owner.

    This makes sense. It’s all about protecting creators and the platform’s business model, which is built on ads. It’s also why they launched YouTube Premium, which offers official offline access. The demand is huge, and it’s a gap that various YouTube video downloaders also fill for legitimate purposes.

    But here’s the thing: it’s not as black and white as it seems. There are plenty of perfectly valid—and widely accepted—reasons for educators, creators, and researchers to download a video that still respect creators’ rights.

    When Downloading Makes Perfect Sense

    The real dividing line is between personal use and unauthorized redistribution. If you download someone’s video and re-upload it as your own, that’s not just unethical—it’s illegal. But many creators, educators, and researchers download content for responsible purposes all the time.

    Here are a few common-sense scenarios where it’s generally okay:

    • Backing Up Your Own Work: If you’re a creator, downloading your own videos is just smart. It’s your intellectual property, and having a local master copy is a no-brainer.
    • Using Public Domain Content: Videos in the public domain are copyright-free. You can download and use them however you like, for any reason.
    • Working with Creative Commons Videos: Many creators use Creative Commons licenses, which give you permission to reuse their work, often with simple conditions like giving them credit.

    There’s also the crucial concept of “fair use.” This legal doctrine allows you to use copyrighted material without permission for things like commentary, criticism, news reporting, and teaching. A film critic downloading clips to analyze a movie, for instance, is creating something new and transformative—a classic example of fair use.

    A researcher might download a lecture to pull specific data points for a study. In these cases, having a text version is a game-changer. That’s where a tool like a YouTube Transcript Extractor becomes incredibly useful, turning spoken words into a searchable document that makes in-depth analysis significantly easier.

    How to Download Videos Securely and Efficiently

    Let’s be honest—navigating the world of online tools can be a real headache. You just want to grab a file, but you end up dodging a minefield of ads, confusing pop-ups, and questionable links. A clean, professional tool makes all the difference, turning what feels like a tedious chore into a quick, two-click process.

    The whole point is to improve your productivity and security. You need the content, not the drama.

    The process should feel completely intuitive. It all starts with one simple action: copying the URL of the YouTube video you want. Once you have that link, a reliable tool takes over, giving you clear options instead of sending you down a rabbit hole of redirects. This is exactly how you can get started with the YouTube to MP4 Converter from YouTube Navigator.

    This simple, no-nonsense workflow is laid out in the infographic below.

    As you can see, the process is stripped down to the essentials. It’s all about getting you from the video link to a downloaded file as quickly and safely as possible.

    Choosing the Right Format for Your Project

    Once you paste your video link, you’ll face a crucial choice: what file format and resolution do you need? This isn’t just a technical detail; it directly impacts how you can use the content. Are you grabbing a crisp, high-quality clip for a video project, or do you just need the audio for transcription?

    • For Video Content: Your go-to choice should be MP4. It’s the universal standard for video. If you’re a social media manager sourcing a clip for an Instagram Reel or a video editor needing some B-roll, you’ll want an MP4 file. For the best visual quality, always select the highest resolution available, like 1080p.
    • For Audio-Only Content: In this case, MP3 is your best friend. This format strips away the video, leaving you with a lightweight audio file. It’s perfect for podcasters who want to use a snippet of an interview, researchers transcribing a lecture, or anyone who just wants to save a song or sound effect.

    Choosing Your Download Format and Quality

    To make things even clearer, this table breaks down which format and quality settings work best for different real-world scenarios. It’s designed to help you select the right file for your project, from high-fidelity video for editing to compact audio files for transcription.

    Use Case Recommended Format Recommended Quality Why It’s a Good Choice
    Editing a professional video MP4 1080p or 4K Delivers the highest visual fidelity for crisp, clear footage in your final project.
    Creating social media clips MP4 720p or 1080p A great balance of quality and file size, perfect for platforms like Instagram or TikTok.
    Classroom or presentation use MP4 720p Good quality for projection without creating a massive file that’s hard to store or share.
    Transcribing an interview or lecture MP3 128kbps Provides clear audio in a very small file size, making it easy to share and work with.
    Listening to a podcast or music MP3 320kbps Offers the highest audio quality for an MP3, ensuring a rich listening experience.

    Choosing the right settings from the start saves you time and ensures your final output is exactly what you need.

    A Practical Example in Action

    Let’s put this into a real-world context. Imagine you’re a history teacher preparing a lesson on a major historical event. You find an excellent 10-minute documentary on YouTube that explains the key points perfectly. Instead of gambling on the school’s unpredictable internet during class, you decide to download it.

    You simply copy the video’s URL, paste it into the converter, and select “MP4” at 720p resolution—a great balance of quality and file size for classroom projection. In under a minute, you have a reliable, offline copy ready for your lesson plan, ensuring a smooth and uninterrupted presentation for your students.

    Unlock Your Content’s Full Potential

    Downloading a video is a great start, but it’s really just the first step. The real magic happens when you stop seeing that downloaded file as a finished product and start treating it as raw material for a bigger content strategy. This is how you move beyond simple offline viewing and build a smarter, more efficient workflow.

    Instead of just saving a video to watch later, think of it as cracking open a treasure chest of assets. A single download can become the foundation for blog posts, social media updates, deep-dive research, and so much more.

    Build a Content Repurposing Engine

    Let me paint a picture for you. Say you’ve just downloaded an insightful interview from a competitor’s channel to do a bit of market research. What’s next?

    • First, you could use the YouTube Transcript Extractor to pull a full, time-stamped script in seconds. That text is perfect for creating an internal summary, grabbing key quotes for a presentation, or even analyzing the exact language they use to connect with their audience.
    • Next, maybe you’re curious about their visual strategy. With the YouTube Thumbnail Downloader, you can grab a high-res copy of their thumbnail. This isn’t about copying, of course, but about inspiration—breaking down their design choices, color palettes, and text overlays for archival or analysis.
    • Finally, armed with all these insights, you can fire up the YouTube Thumbnail Maker or YouTube Thumbnail Studio. Using what you’ve learned, you can design a completely new, on-brand thumbnail for your own upcoming video, making sure it’s built to grab attention and earn those clicks.

    This kind of integrated approach turns a simple download into a full-blown content creation system. It’s just a smarter way to work, letting you squeeze every drop of value from any piece of content you come across.

    This whole method is about more than just being efficient; it’s about being resourceful. When you systematically break down and repurpose content, you make sure no good idea goes to waste. That’s a huge advantage when you’re constantly on the hunt for fresh inspiration. For more on that, you can check out our guide on new video ideas for your YouTube channel.

    Common Downloader Pitfalls You Must Avoid

    Image

    Let’s be honest—the internet is flooded with YouTube video downloaders, and a lot of them are sketchy. Choosing the wrong one is like wandering into a digital minefield. You could end up with a device full of malware, a browser choked with adware, or worse, your personal data compromised. Too many of these sites prioritize their ad revenue over your safety.

    You can usually spot the bad apples by a few common red flags. If a site bombards you with aggressive pop-up ads the second you land on it, that’s your cue to leave. Those pop-ups are notorious for leading to malicious downloads. Another major warning sign is any tool that forces you to install a browser extension or asks for personal info just to grab a file. Why would they need that? They don’t.

    The core principle is simple: a reputable downloader should do one job—and do it well—without tricking you into installing junk or harvesting your data. Your security should always be the number one priority.

    When you compare that risky experience to a clean, professional service, the difference is night and day. A tool like YouTube Navigator was built with security in mind from the ground up. It offers a straightforward, ad-free interface that respects your time and your privacy.

    Recognizing a Secure Downloader

    A safe downloader always puts the user experience first. What does that look like? No intrusive ads, no forced installations, and a clear, simple process from start to finish. It should also be built on a secure HTTPS connection, which is non-negotiable for protecting your data.

    Ultimately, the best YouTube video downloaders are the ones you can trust to get the job done without any hidden dangers. This is especially true when you just need to pull the audio from a video—a process that should be quick, clean, and secure. For more on that, check out our guide on using a safe YouTube audio extractor for your projects. Choose wisely, and you’ll protect your device while streamlining your entire workflow.

    Still Have Questions About Downloading?

    Let’s be honest, even with a great tool, the idea of downloading YouTube videos can bring up a few nagging questions. It’s smart to be cautious. Let’s walk through some of the most common concerns I hear from creators, educators, and researchers so you can get what you need without any headaches.

    Is It Actually Legal To Download YouTube Videos?

    This is the big one, and the answer has some nuance. Officially, downloading videos without the copyright holder’s explicit permission goes against YouTube’s Terms of Service. It’s a definite no-go for commercial use or re-uploading someone else’s work.

    But for personal use? It’s largely a gray area. As long as you’re grabbing your own content for backups, using public domain footage, or creating “fair use” work like commentary, research, or reviews, you’re generally in the clear. The key is to be responsible and respectful of copyright.

    Can I Download Videos in HD or Even 4K?

    Absolutely. This is where a quality tool really makes a difference. With a good YouTube to MP4 Converter like the one in YouTube Navigator, you can grab videos in whatever resolution you need, provided the original was uploaded in that quality.

    You’ll typically see options for standard definition (SD), 720p (HD), 1080p (Full HD), and sometimes crystal-clear 4K. Just keep in mind that higher resolutions result in bigger file sizes, but the stunning visual quality is often worth it for editing.

    A quick reality check: You can’t download a video in a higher quality than it was originally uploaded. If the creator only uploaded a 720p file, that’s the best you’ll be able to get.

    Could a YouTube Downloader Give My Computer a Virus?

    Unfortunately, yes—if you wander into the wrong corners of the internet. Many of those “free” downloader websites are minefields of sketchy ads, misleading pop-ups, and fake download buttons designed to install malware. It’s a classic bait-and-switch.

    This is exactly why using a trusted, secure platform is so important. YouTube Navigator is built specifically for creators, educators, and researchers, which means it’s ad-free and focuses on one thing: giving you a clean, safe download without any nasty surprises.

    What’s the Difference Between MP4 and MP3 Anyway?

    Knowing this distinction is fundamental for any creator’s workflow. It’s pretty simple once you break it down:

    • MP4 is a video format. It bundles both the video and audio tracks together. You’ll want an MP4 if you need to watch the video offline, use a clip in an edit, or share the visuals.
    • MP3 is an audio-only format. This is your go-to when you just need the sound. Think of grabbing the audio from an interview for a podcast, isolating a music track, or transcribing spoken words.

    Choosing the right format from the start saves you a ton of time and conversion headaches down the road. And speaking of making smart choices, understanding how your videos perform is just as critical. You can get data-driven decisions to optimize your content strategy with our powerful YouTube Channel Analytics tool.


    Ready to stop guessing and start creating with tools you can actually trust? YouTube Navigator offers a complete suite of secure, ad-free tools designed to streamline your workflow and improve your productivity. Whether you’re downloading videos, extracting transcripts, or analyzing channel performance, we’ve got your back.

    Start using YouTube Navigator for free today!

  • 10 Killer Videos Ideas for YouTube to Explode Your Growth

    10 Killer Videos Ideas for YouTube to Explode Your Growth

    Feeling the pressure of the blank content calendar? Every creator, from seasoned pros to aspiring newcomers, eventually hits a wall when brainstorming fresh, engaging videos ideas for youtube. The key to sustainable YouTube success isn’t just consistency; it’s about diversifying your content strategy with proven formats that resonate with audiences and keep them coming back for more. This comprehensive guide moves beyond generic suggestions to provide a powerful roadmap for your next viral hit.

    This listicle will break down 10 versatile video concepts designed to revitalize your channel, attract new subscribers, and build a loyal community. We will explore each idea with actionable strategies, practical implementation tips, and real-world examples to help you execute them effectively. To truly stand out, you need more than just a great idea; you need a strategic plan and the right tools to bring it to life.

    For instance, before you even press record, you can gain a significant competitive advantage. By using YouTube Navigator’s YouTube Channel Analytics tool, you can analyze top-performing channels in your niche. This powerful tool delivers in-depth performance insights, enabling you to see which topics, formats, and thumbnail styles are currently capturing audience attention and optimize your content strategy with data-driven decisions. Let’s dive in and start building your content calendar with ideas that work.

    1. How-To Tutorials and Educational Content

    How-to tutorials are a foundational pillar of YouTube and one of the most reliable videos ideas for youtube creators looking to build an engaged audience. These instructional videos focus on teaching a specific skill or process, breaking down complex information into simple, actionable steps. This format thrives because it directly answers a user’s need, establishing the creator as a trusted expert and an authoritative resource.

    How-To Tutorials and Educational Content

    From Khan Academy’s groundbreaking educational series to Marques Brownlee’s crystal-clear tech walkthroughs, the tutorial format consistently attracts viewers actively seeking solutions. The key to a successful tutorial is a relentless focus on the end-user experience. A viewer who successfully learns a new skill from your video is highly likely to subscribe and return for more content.

    Actionable Tips for Implementation

    • Structure with Clarity: Before you even press record, create a detailed outline. Define clear learning objectives and structure your video with timestamps in the description. This allows viewers to easily navigate to the sections most relevant to them.
    • Enhance with Visuals: Use multiple camera angles, especially for physical demonstrations like cooking or repairs. For digital tutorials, screen recordings with zoom-ins on crucial details are essential.
    • Provide Downloadable Resources: A great way to add value is by offering supplementary materials like checklists, templates, or code snippets.

    Why This Format Works

    Tutorials have powerful evergreen potential, meaning they can continue to attract views and subscribers long after they are published. To make your educational content even more accessible and valuable, consider creating a full transcript. You can learn more about how to transcribe YouTube videos using a tool like our YouTube Transcript Extractor. It allows you to quickly and accurately extract time-stamped transcripts from any video, perfect for repurposing your tutorial into a blog post or providing viewers with a written version of your guide.

    2. Product Reviews and Unboxing Videos

    Product reviews and unboxing videos are a dominant force on YouTube, merging entertainment with valuable consumer advice. This format is one of the most popular videos ideas for youtube because it directly taps into viewer curiosity and helps them make informed purchasing decisions. Creators build trust by providing honest, in-depth assessments of products, from the initial first impression of an unboxing to a long-term performance review.

    Product Reviews and Unboxing Videos

    Channels like Marques Brownlee (MKBHD) and Unbox Therapy have built empires on this concept by offering viewers authentic, high-quality evaluations. The appeal lies in the vicarious experience; viewers get to see, feel, and learn about a product through the creator’s eyes before spending their own money. A well-executed review that balances pros and cons can solidify a creator’s reputation for integrity and expertise.

    Actionable Tips for Implementation

    • Establish Credibility: Always be transparent. Clearly disclose any sponsorships or affiliate links to maintain your audience’s trust. Your honesty is your most valuable asset.
    • Be Thorough and Balanced: Test products extensively before delivering a verdict. A comprehensive review should cover both the positive and negative aspects to provide a fair and realistic picture.
    • Optimize for Visuals: Use high-quality cameras and good lighting to showcase the product clearly. Multiple angles, close-ups of key features, and clean backgrounds make the product the star of the show.

    Why This Format Works

    Product reviews have immense search potential, as viewers often look for specific product names before making a purchase. This creates a steady stream of traffic from highly motivated viewers. To stand out in a crowded space, a compelling thumbnail is non-negotiable. You can analyze what works for top creators and then use our YouTube Thumbnail Studio. This advanced tool offers comprehensive features like layers and custom fonts to help you design professional, custom, eye-catching thumbnails that significantly boost click-through rates.

    3. Vlogs and Lifestyle Content

    Vlogs, short for video blogs, offer a uniquely personal and authentic window into a creator’s life, experiences, and thoughts. This format is one of the most powerful videos ideas for youtube for building a deep, intimate connection with an audience. By documenting daily routines, special events, or personal journeys, creators transform viewers into a loyal community that feels like they’re part of the story.

    Vlogs and Lifestyle Content

    Pioneered by creators like Casey Neistat and perfected by personalities such as Emma Chamberlain, vlogging relies on authentic storytelling over high-production polish. The goal is to make content that feels real and relatable. Whether it’s a “day in the life” video, a travel diary, or a simple chat about a personal interest, the strength of a vlog comes from the creator’s personality and their ability to share their world candidly.

    Actionable Tips for Implementation

    • Establish a Consistent Narrative: Define a core theme for your vlogs. Are you a student, an artist, a traveler, or a young professional? A consistent narrative helps viewers know what to expect and gives your channel a clear identity.
    • Prioritize Audio Quality: While viewers may forgive shaky camera work, poor audio can be an instant turn-off. Invest in a simple external microphone to ensure your voice is always clear and easy to understand, even when filming on the go.
    • Craft Compelling Thumbnails: Your thumbnail is a viewer’s first impression. Use a high-quality, expressive photo of yourself that reflects the video’s mood. You can use a dedicated YouTube Thumbnail Maker to easily add bold text and design elements that make your video stand out in a crowded feed.

    Why This Format Works

    Vlogging thrives on the creator-viewer relationship. By sharing personal stories, you foster a sense of trust and loyalty that is difficult to replicate with other formats. Engaging actively with comments and building a community around shared experiences turns passive viewers into dedicated fans. This format allows your personality to be the main attraction, creating a unique brand that can’t be easily copied and cementing your place in your niche.

    4. Gaming Content and Let’s Plays

    Gaming has evolved from a niche hobby into a dominant force in online entertainment, making it a powerful source of videos ideas for youtube. This category encompasses everything from detailed walkthroughs and critical reviews to the ever-popular “Let’s Play” format, where a creator’s personality and commentary are just as important as the gameplay itself. This genre connects with a massive, dedicated audience eager for both skilled gameplay and entertaining personalities.

    Gaming Content and Let's Plays

    Pioneered by creators like PewDiePie and Markiplier and now dominated by streamers like Ninja and Minecraft visionaries like Dream, gaming content thrives on a creator’s unique voice. The most successful channels build a strong community by blending impressive gaming skill with humor, relatable reactions, and consistent engagement, transforming passive viewers into loyal fans.

    Actionable Tips for Implementation

    • Invest in Quality Production: Clear audio is non-negotiable. A high-quality microphone and reliable screen recording software are essential first investments to ensure your commentary is crisp and the gameplay is smooth.
    • Develop a Unique Commentary Style: Your personality is your brand. Whether you’re analytical, hilarious, or incredibly skilled, lean into what makes your commentary unique. Don’t just narrate what’s on screen; share your thoughts, reactions, and stories.
    • Stay Current and Engage with Trends: Keep an eye on new game releases, popular updates, and community-driven challenges. Creating content around trending topics can expose your channel to a much wider audience.
    • Craft Compelling Thumbnails: Use dynamic in-game imagery combined with expressive text or reactions to create thumbnails that stand out. Highlight an exciting moment or a key challenge from the video to entice clicks.

    Why This Format Works

    Gaming content is incredibly diverse and caters to a highly engaged community that actively seeks new creators. The format allows for endless creativity, from horror game reaction compilations to strategic tutorials for competitive games. By consistently producing entertaining content and analyzing your performance, you can build a sustainable channel. To understand what’s resonating with your audience and track your growth against competitors, you can explore in-depth YouTube channel analytics to make data-driven decisions that refine your content strategy and accelerate your channel’s success.

    5. Comedy Skits and Entertainment

    Comedy is a universal language, making it one of the most powerful and shareable videos ideas for youtube for creators aiming for broad appeal and rapid growth. This genre encompasses everything from tightly scripted sketches and parodies to improvised pranks and humorous commentary. It thrives by tapping into relatable situations, current events, and human absurdities, offering viewers a much-needed dose of laughter and escape.

    Pioneers like Ryan Higa (nigahiga) and modern commentary comedians like Danny Gonzalez have built massive followings by mastering comedic timing and creating consistently funny content. A successful comedy video often goes viral because its humor is easily shared, connecting with audiences on an emotional level and encouraging them to pass it along to their friends.

    Actionable Tips for Implementation

    • Study Comedic Structure: Analyze successful formats like those from Key & Peele or classic Saturday Night Live digital shorts. Pay attention to the setup, punchline, and pacing. Great comedy is often built on a solid, almost mathematical, structure.
    • Keep It Concise: Modern attention spans are short, especially for comedy. Aim for sketches that are well-paced and get to the punchline efficiently. A tight 2-4 minute video is often more effective than a rambling 10-minute one.
    • Leverage Trends: Use current events, viral memes, and pop culture trends as a foundation for your humor. This makes your content immediately relevant and discoverable.

    Why This Format Works

    Comedy creates a strong, positive connection with viewers, making them more likely to subscribe for their next laugh. The success of a comedy video heavily relies on its initial hook, which is often the thumbnail. A compelling, funny, or intriguing thumbnail is crucial for getting that first click. Using an intuitive YouTube thumbnail maker can help you design expressive visuals with bold text and character cutouts that perfectly convey the tone of your sketch and dramatically increase your click-through rate.

    6. Music Covers and Original Compositions

    Musical content is a powerful and emotive genre on YouTube, making it one of the most resonant videos ideas for youtube for talented creators. This category includes everything from acoustic covers of trending songs and unique genre-bending arrangements to heartfelt original compositions. By showcasing musical skill, creators can build a dedicated community of fans and music lovers who connect deeply with their art.

    Channels like Boyce Avenue, who built an empire on beautifully produced acoustic covers, and Pentatonix, with their mesmerizing a cappella arrangements, demonstrate the massive potential of this niche. The key to success lies in combining genuine talent with high production value and a smart content strategy that balances familiar hits with unique original work.

    Actionable Tips for Implementation

    • Invest in Quality Audio: Your sound is everything. Invest in a quality microphone, audio interface, and recording software (DAW). Even a smartphone video can succeed if the audio is crisp, clear, and professionally mixed.
    • Understand Copyright: Be aware of copyright laws for cover songs. While YouTube’s Content ID system often handles revenue sharing with original artists, it’s crucial to understand how mechanical licenses work if you plan to distribute your music elsewhere.
    • Balance Covers and Originals: Use covers of popular or trending songs to attract new viewers who are searching for those tracks. Once you’ve captured their attention, introduce them to your original music to build a loyal fanbase that values your unique artistic voice.

    Why This Format Works

    Music evokes strong emotions, creating a powerful bond between the artist and the listener. This format allows creators to tap into existing fanbases by covering popular songs while simultaneously building a personal brand with original content. To further engage your audience, consider creating music tutorials. You can make them more effective by using the YouTube Transcript Extractor to get the transcript of a YouTube video. This allows your students to easily follow along with chord progressions or lyrics at their own pace.

    7. Challenge and Trend Videos

    Challenge and trend videos are a dynamic way to tap into the internet’s zeitgeist, offering one of the most explosive videos ideas for youtube for rapid growth. This format involves creating content based on viral challenges, popular social media trends, or even initiating your own challenges to foster community participation. By capitalizing on what’s currently popular, you can attract a wave of new viewers actively searching for that specific content.

    Creators like MrBeast have built empires on elaborate, high-stakes challenges, while channels like the Try Guys consistently engage their audience by tackling various internet trends with a unique comedic spin. The power of this format lies in its high shareability and built-in discoverability. When a trend is hot, the audience for it is massive and actively looking for new takes on the format.

    Actionable Tips for Implementation

    • Act Fast, But Add a Twist: Timing is critical. Monitor platforms like TikTok, X (formerly Twitter), and Instagram to catch trends early. However, don’t just copy; add a unique angle or a personal touch that makes your version stand out from the rest.
    • Prioritize Safety Above All: Many internet challenges can be risky. Always prioritize your safety and the safety of others. Clearly communicate any risks and avoid promoting dangerous activities. Responsible creation builds long-term trust.
    • Create Your Own Challenge: Don’t just follow trends, start them. Design an original, fun, and shareable challenge. Provide a clear hashtag and encourage your audience to participate, creating a powerful network effect that can make your channel the epicenter of a new trend.

    Why This Format Works

    Challenge videos excel at generating buzz and have a high potential for going viral, bringing a massive influx of traffic and subscribers in a short period. The audio is often a key component of a trend. If you need to analyze or repurpose the audio from a challenge video for commentary or parody, you can use our YouTube to MP4 Converter to extract audio from YouTube. This tool facilitates offline viewing and audio extraction, streamlining your workflow so you can focus on creating your response video.

    8. Reaction and Commentary Videos

    Reaction and commentary videos are a powerhouse format among videos ideas for youtube, tapping into the audience’s desire for shared experiences and expert opinions. This style involves a creator recording their real-time reactions to content like movie trailers, music videos, or viral clips, and then layering their unique perspective, analysis, or humor on top. It transforms passive viewing into an engaging, communal event, allowing viewers to experience the content through the creator’s eyes.

    Channels like FBE (Fine Brothers Entertainment) with their famous “React” series and Jaby Koay’s insightful movie trailer breakdowns have built massive followings with this format. The success of a reaction video hinges on the creator’s personality and their ability to add substantial value beyond simply watching something. A genuine, charismatic, and insightful host can make even a simple reaction compelling.

    Actionable Tips for Implementation

    • Prioritize Fair Use: Understand the basics of copyright and fair use. Your commentary must be transformative, meaning you add significant new expression or meaning. Never just re-upload content; your reaction and analysis are the core of the video.
    • Use a Professional Layout: A picture-in-picture (PiP) or side-by-side video format is standard. Ensure your face is clearly visible and your audio is crisp so your reactions are not lost.
    • Engage Authentically and Take Suggestions: Your genuine emotional responses are what viewers connect with. Encourage your audience to suggest content for future reactions to build a strong community and a steady stream of video ideas.

    Why This Format Works

    Reaction videos are effective because they leverage the popularity of existing, trending content to attract an audience. The key is to add your unique value through insightful commentary. To enhance your analysis, use the YouTube Transcript Extractor to transcribe the original video’s dialogue. This allows you to reference specific lines or moments, deepening your commentary and setting your content apart from more superficial takes.

    9. Behind-the-Scenes and Documentary Style

    Pulling back the curtain to reveal what happens “off-camera” is one of the most powerful videos ideas for youtube for building authenticity and a deep connection with your audience. This format provides an exclusive insider’s perspective, whether it’s the making of a product, the journey of an entrepreneur, or the intricate process behind a creative project. It transforms a simple video into a compelling narrative, satisfying viewers’ natural curiosity.

    Creators like Peter McKinnon, who offers insights into his photography business, and Corridor Crew, with their fascinating VFX breakdowns, have mastered this style. They leverage it to not only share information but also to tell a story that humanizes their brand and process. Viewers feel like they are part of an exclusive club, gaining access to secrets and workflows that are typically hidden from the public.

    Actionable Tips for Implementation

    • Craft a Compelling Narrative: Don’t just show random clips. Structure your footage with a clear story arc: a beginning (the goal), a middle (the challenges and process), and an end (the resolution or final product).
    • Prioritize High-Quality Audio: Clear audio is non-negotiable, especially for interviews or voiceovers that drive the story. Invest in a good microphone to ensure your narration and dialogue are crisp and easy to understand.
    • Incorporate Personal Stakes: The best documentaries make the audience care. Share your struggles, celebrate your wins, and be open about the emotional journey. This vulnerability creates a powerful bond with viewers.

    Why This Format Works

    Behind-the-scenes content fosters unparalleled trust and transparency, making your audience feel more invested in your work and your success. This format excels at building a loyal community that values the person or team behind the content, not just the content itself. To explore more strategies for creating compelling content that resonates deeply with viewers, you can learn more about engaging YouTube content on our blog. This approach turns passive viewers into dedicated fans who are eager to see what you will reveal next.

    10. Q&A and Ask Me Anything Sessions

    Q&A (Question & Answer) or AMA (Ask Me Anything) sessions are powerful videos ideas for youtube that build a strong, direct connection with your audience. This format involves dedicating a video to answering questions submitted directly by your subscribers and viewers. It’s an effective way to break the fourth wall, share personal insights, and demonstrate that you value your community’s curiosity and engagement.

    Pioneered and popularized by creators like Gary Vaynerchuk with his #AskGaryVee show and Casey Neistat’s candid Q&A vlogs, this format turns passive viewers into active participants. By addressing their specific queries, you not only provide unique content but also foster a deep sense of loyalty and community, making your audience feel seen and heard.

    Actionable Tips for Implementation

    • Gather Questions Strategically: Announce your upcoming Q&A video across all your platforms, like the YouTube Community tab, Instagram Stories, Twitter, or your newsletter. Use a specific hashtag to easily track submissions.
    • Screen and Curate: Sift through the questions beforehand. This allows you to group similar topics, filter out inappropriate queries, and create a balanced mix of serious, funny, personal, and professional questions for a more dynamic video.
    • Set Clear Boundaries: Be upfront about topics you are not willing to discuss. Establishing these boundaries respectfully maintains your privacy and keeps the session focused and positive.

    Why This Format Works

    Q&A sessions are a goldmine for content because your audience tells you exactly what they want to know, eliminating guesswork. It humanizes your brand, strengthens the creator-viewer relationship, and often reveals new content ideas for future videos. To make your Q&A more engaging, find inspiration for your thumbnail by seeing what successful creators are doing. Our YouTube Thumbnail Downloader allows you to effortlessly download high-resolution thumbnails from any video, ideal for inspiration, archival, and creative brainstorming.

    Top 10 YouTube Video Ideas Comparison

    Content Type Implementation Complexity 🔄 Resource Requirements ⚡ Expected Outcomes 📊 Ideal Use Cases 💡 Key Advantages ⭐
    How-To Tutorials and Educational Content High – requires research, scripting, editing Moderate to High – equipment, research time Strong authority, engagement, evergreen traffic Teaching skills, educational platforms Builds expertise, high retention, monetization
    Product Reviews and Unboxing Videos Moderate – product testing and script prep Moderate – product acquisition necessary Influences purchase decisions, affiliate income Consumer advice, tech, beauty, gadgets High affiliate potential, brand partnerships
    Vlogs and Lifestyle Content Low to Moderate – simpler production Low – basic recording equipment Builds personal brand, loyal audience Personal storytelling, daily life sharing Easy entry, strong community, flexible schedule
    Gaming Content and Let’s Plays Moderate to High – gameplay capture & editing High – gaming setup and software Large, engaged audience, sponsorships Game walkthroughs, live streams, entertainment Massive audience, community building, brand deals
    Comedy Skits and Entertainment Moderate to High – writing, acting, editing Moderate – cast, props, editing Viral potential, emotional connection Humorous entertainment, creative storytelling High shareability, creative freedom, merch ops
    Music Covers and Original Compositions High – audio recording, music production High – instruments, recording gear Builds music fanbase, multiple revenue streams Music performance, tutorials, original songs Showcases talent, cross-platform promotion
    Challenge and Trend Videos Low to Moderate – fast production Low – minimal equipment Viral growth, strong engagement Trend participation, community-driven content High discoverability, easy idea generation
    Reaction and Commentary Videos Low – simple setup and quick production Low – camera, mic Strong engagement, community building Commentary, reactions to videos/movies/music Low cost, consistent content, community input
    Behind-the-Scenes and Documentary Style High – planning, shooting, and editing High – multiple equipment and permissions Builds authority, high engagement Industry insights, personal journeys, storytelling Deep storytelling, credibility, emotional impact
    Q&A and Ask Me Anything Sessions Low to Moderate – live or recorded formats Low – minimal production gear High engagement, personal brand growth Audience interaction, advice, direct communication Strong community building, easy content sourcing

    From Idea to Impact: Your Next Steps to a Thriving Channel

    We’ve journeyed through a comprehensive landscape of videos ideas for YouTube, exploring ten powerful formats from educational tutorials to engaging Q&A sessions. Each category represents a proven path to building a community, showcasing your unique voice, and achieving sustainable channel growth. The key takeaway is that a great idea is only the first spark; consistent, high-quality execution is the fuel that turns that spark into a roaring fire. Your audience doesn’t just subscribe for one good video, they subscribe for the promise of more.

    The most successful creators understand that inspiration is a starting point, not a complete strategy. They don’t just wait for the perfect idea to fall into their lap. Instead, they build systems and workflows that allow them to consistently transform good ideas into great content. This is where you can gain a significant competitive advantage.

    Bridging the Gap Between Concept and Creation

    The journey from a promising video concept to a published, high-performing asset involves several critical stages. The true challenge lies not just in brainstorming but in the strategic execution of that idea.

    • Data-Driven Brainstorming: Don’t guess what your audience wants. Use data to validate your instincts. Before you even press record, dive into your channel’s performance or analyze similar successful videos in your niche. Understanding what already resonates is the fastest way to refine your next big idea.
    • Visual First Impressions: The battle for clicks is won or lost in seconds. Your thumbnail is your video’s billboard, and it must be compelling enough to stop a viewer from scrolling. A high-quality, clear, and intriguing thumbnail is non-negotiable for maximizing your reach.
    • Content Repurposing and Accessibility: A single video can be the source of dozens of other content pieces. Extracting the transcript allows you to create blog posts, social media captions, and detailed show notes, extending the life and reach of your hard work while also making it accessible to a wider audience.

    By focusing on these core pillars, you move beyond simply having videos ideas for YouTube and start building a strategic content engine.

    Your Actionable Blueprint for Success

    To turn this newfound knowledge into tangible results, you need a clear, actionable plan. It’s time to move from passive learning to active creation. Your next steps should be methodical, focusing on building a repeatable process that saves time and maximizes impact. This is where having the right set of tools becomes a game-changer, transforming tedious tasks into streamlined, efficient workflows.

    Consider how integrating a dedicated toolkit can elevate your process. Imagine analyzing a competitor’s most successful video with the YouTube Channel Analytics tool to identify content gaps you can fill. Then, use the YouTube Transcript Extractor to study their video’s structure and pacing. As you create your own response, you can design a superior visual hook with the YouTube Thumbnail Studio, ensuring your video stands out in a crowded search results page. This systematic approach is how you turn abstract videos ideas for YouTube into a concrete, data-informed content strategy that consistently drives views and subscribers.

    Stop letting your brilliant ideas wither on the vine. The difference between a stagnant channel and a thriving one often comes down to the efficiency and intelligence of your workflow. Start by choosing one idea from this list that genuinely excites you, commit to the process, and leverage the right tools to bring it to life with professional polish. Your audience is waiting.


    Ready to transform your ideas into high-performing content? Equip yourself with the Youtube Navigator suite of free tools designed to streamline your entire creation process, from data-driven brainstorming to crafting the perfect thumbnail. Visit Youtube Navigator to start optimizing your channel and building your next great video today.

  • A Guide to Using YouTube Audio Extractor

    A Guide to Using YouTube Audio Extractor

    A YouTube audio extractor is a simple concept with a powerful punch. For creators, educators, and researchers, it’s a tool that lets you grab just the sound from any YouTube video and save it as a separate audio file, like an MP3. This means you can create podcasts from your video content, listen to lectures, or analyze interviews on the go, without needing to keep the video open.

    Why Extracting YouTube Audio Is a Game Changer

    Image
    Ever found yourself wanting to listen to a YouTube video while driving, hitting the gym, or just tidying up around the house? Being able to pull the audio from a video unlocks a ton of new possibilities, completely changing how you consume and repurpose content. It’s less of a technical trick and more of a genuine productivity hack for a whole lot of people.

    For educators and students, this is huge. Think about turning a two-hour university lecture into a series of audio chapters you can listen to while commuting. You’re basically adding valuable study time to your day without being chained to a screen.

    Researchers get a ton of value here, too. When you’re analyzing spoken interviews or historical speeches, the video itself can be a distraction. By stripping it down to just the audio, you can focus completely on the nuances of speech, tone, and inflection. It makes transcription and analysis so much more efficient.

    The need for these tools isn’t just a niche thing. The demand for YouTube audio extractors has been climbing steadily, hitting a major trend milestone by 2025. This surge is directly tied to the massive amount of audio-first content living on the platform. With YouTube boasting over 2.5 billion monthly active users and more than 2.4 million videos uploaded every single day, the appetite for audio-only options is bigger than ever. You can learn more about how video trends are shaping the way we consume content.

    A Goldmine for Content Creators

    If you’re a content creator, a reliable YouTube audio extractor is an absolute goldmine. It lets you seamlessly repurpose your video content into entirely new formats, stretching its reach and getting more value out of every minute you record.

    • Launch a Podcast: Instantly convert your video essays or interviews into podcast episodes for platforms like Spotify and Apple Music.
    • Create Audio Samples: Easily pull specific sound bites, music clips, or unique sound effects from your videos to build a custom audio library for future projects.
    • Improve Accessibility: Offer audio-only versions of your content for your visually impaired audience or for those who simply prefer to listen.

    The real power here is efficiency. Instead of recording separate audio tracks, you can produce one solid piece of video content and multiply its impact across different platforms. A tool like the YouTube to MP4 Converter from YouTube Navigator, which also handles MP3 extraction, makes this process incredibly fast and straightforward.

    Who Needs a YouTube Audio Extractor and Why

    So, who exactly benefits from ripping audio from YouTube? It’s a surprisingly diverse crowd. From students cramming for exams to podcasters looking for their next episode, the use cases are vast. Here’s a quick look at who’s using these tools and why.

    User Persona Primary Use Case Benefit
    Students & Academics Converting lectures and educational talks into audio files. Enables on-the-go learning and easier revision without screen time.
    Content Creators Repurposing video interviews into podcast episodes. Expands audience reach to audio-only platforms and saves production time.
    Music Lovers Saving live performances or DJ sets for offline listening. Creates personal playlists and allows access to music not on streaming services.
    Language Learners Isolating dialogue from movies or vlogs to practice listening. Improves comprehension and allows for repetitive, focused practice.
    Researchers Transcribing spoken interviews or historical speeches. Focuses on vocal nuances for qualitative analysis without visual distraction.

    As you can see, the ability to extract audio isn’t just a convenience—it’s a productivity booster that unlocks new ways to learn, create, and enjoy content that was previously locked behind a screen.

    How to Extract Audio from Any YouTube Video

    Image

    The idea of ripping audio from a video might sound like something reserved for tech wizards, but it’s surprisingly simple these days. Forget about downloading clunky software or messing with confusing settings. Let’s walk through a real-world example to show you just how easy it is with the right online tool.

    Imagine you’re a researcher studying historical speeches. You want to weave in some powerful audio clips to analyze the speaker’s tone and delivery. After a bit of searching, you find a fantastic public domain recording of a historic speech on YouTube, but you only need the audio. This is where a YouTube audio extractor becomes your best friend.

    Finding Your Content and Getting Started

    First things first, you need the video. A quick search on YouTube for “public domain historical speeches” leads you to the perfect clip. The video itself is a little grainy—it’s old, after all—but the audio is crisp and clear. That’s all that matters for your project.

    Once you have the video open, all you have to do is copy its URL from your browser’s address bar. That link is the only key you need. No need to download the video first or install some sketchy browser extension. The entire process is designed to be as direct and painless as possible.

    With that URL copied, you’re ready to go.

    The Simple Extraction Workflow

    This is where you’ll see what a difference a good tool makes. Head over to a dedicated converter, like the one offered by YouTube Navigator. The first thing you’ll notice is the clean, clutter-free interface. There’s just one input field waiting for your link.

    Paste the YouTube URL you just copied into the box. The tool gets to work instantly, analyzing the link and prepping the file for conversion. Instead of bombarding you with technical terms, it gives you clear, simple choices. You can either download the whole video or, in our case, just the audio.

    Pro Tip: Before you grab the audio, think about whether a written transcript would also be useful. You could use a YouTube Transcript Extractor at the same time. This gives you both the audio file for your analysis and a full text document for pulling quotes—a complete research package.

    After pasting the link, you’ll choose your audio format. MP3 is almost always the best choice here because it works on virtually any device and keeps the file size small. Click the convert button, and the tool does all the heavy lifting on its servers. In just a few moments, your audio file is ready to save directly to your computer.

    It’s that easy. You’ve successfully turned a video into a portable audio file without any technical drama. This streamlined process is a huge time-saver, whether you’re a student rushing to meet a deadline, a researcher collecting materials, or a creator looking to repurpose content. And while we focused on audio here, grabbing the full video is just as simple. You can learn more about how to use a YouTube to MP4 Converter to save videos for offline viewing.

    Why an Intuitive Interface Matters

    The real magic of this process is its simplicity. Modern web-based tools have torn down the walls that once made tasks like audio extraction feel so intimidating.

    • No Software to Install: Everything happens right in your browser. This means no downloads and nothing to install, which keeps your computer clean and secure.
    • Clear, Simple Steps: You’re guided through the process with easy-to-understand prompts, not a menu of confusing technical options.
    • Warp-Speed Processing: The conversion is handled on powerful servers, meaning you get your file in seconds, not minutes.

    This kind of user-friendly design puts the power in your hands, letting anyone—no matter their tech-savviness—unlock the valuable audio content hidden inside videos.

    Choosing the Right Audio Format and Quality

    So, you’ve used a YouTube audio extractor and pulled the sound from a video. Great! But now you’re at a crossroads, facing a choice that will shape your final file: what format and quality should you pick? This isn’t just a tiny technical detail—it’s a decision that directly impacts everything from file size to how crisp the audio sounds.

    The right answer really depends on what you plan to do with the audio. Not all formats are created equal, and knowing the difference between options like MP3, M4A, WAV, and FLAC is the key to getting exactly what you need without any headaches later.

    Lossy vs. Lossless Audio: What’s the Big Deal?

    At the core of this decision is a concept called compression. Think of it as packing a suitcase. You can either neatly fold everything to save space but maybe wrinkle a shirt (lossy), or you can use a special vacuum bag that shrinks everything without a single crease (lossless).

    • Lossy formats (like MP3 and AAC) are the smart packers. They shrink the audio file by cleverly removing bits of sound data your ears are least likely to notice. This is why they’re perfect for streaming or cramming a huge music library onto your phone. The trade-off? A tiny, often unnoticeable, drop in pure audio fidelity.
    • Lossless formats (like WAV and FLAC) preserve every single drop of original audio data. They use compression tricks that shrink the file size without throwing anything away, kind of like a ZIP file for sound. You get a perfect, studio-quality copy of the original audio, but the file will be much, much larger.

    This chart shows just how popular some of the most common formats are in the wild.

    Image

    As you can see, MP3 is still the king of compatibility, while WAV remains the go-to for anyone who needs professional, high-fidelity sound.

    Matching the Format to Your Project

    Okay, let’s get practical. How do you actually choose?

    Imagine you’re turning your video interviews into a podcast. An MP3 is your best friend here. It’s small, uploads quickly, and works on every podcast app and device imaginable. Your listener on their morning commute isn’t going to miss the subtle audio data that was trimmed during compression.

    But what if you’re a music producer who found a killer drum break in a rare live performance on YouTube? You’ll want a lossless format like WAV. You need every bit of that audio data intact to slice, mix, and master the sound without degrading it further. A WAV file gives you the raw, untouched clay you need for serious audio work.

    The rule of thumb is pretty simple: Go for lossy formats when convenience and compatibility are your top priorities. Choose lossless when you need pristine quality for editing, production, or archiving. Nailing this choice upfront means you won’t have to go back and re-extract the file later.

    To make it even easier, here’s a quick guide to help you pick the best format for your needs the next time you use a YouTube audio extractor.

    Audio Format Comparison Guide

    Choosing an audio format can feel a bit like ordering coffee—so many options, but which one is right for you? This table breaks down the most common formats you’ll find in audio extractors, helping you pick the perfect one for your project.

    Format Best For Key Feature Typical File Size
    MP3 Podcasts, casual listening, sharing online Universal compatibility and small file size. Small
    M4A/AAC Modern devices (Apple), streaming Slightly better quality than MP3 at the same bitrate. Small
    WAV Professional audio editing, music production Uncompressed, perfect studio-quality sound. Very Large
    FLAC Archiving music, audiophile listening Lossless compression (smaller than WAV). Large

    Ultimately, the best tools, like those you’ll find on YouTube Navigator, put the power in your hands by offering these choices. By understanding what each format brings to the table, you can strike the perfect balance between quality and file size for any project, making sure your extracted audio is ready for whatever you have planned.

    How Creators and Educators Can Use Extracted Audio

    Alright, you’ve used a YouTube audio extractor to grab the sound from a video, and now that shiny new audio file is sitting on your desktop. What’s next? This is where the real fun begins. That single audio file isn’t just a copy; it’s raw material you can spin into a ton of new content.

    For creators, this is a massive win. You can instantly launch a podcast version of your video channel, giving your audience a way to tune in during their commute, at the gym, or while walking the dog. It’s also a perfect chance to build a custom library of sound effects, jingles, or recurring audio memes for your future projects.

    Expand Your Content Universe

    Repurposing audio isn’t just about saving time—it’s about getting the most mileage out of the hard work you’ve already invested. Every new piece of content you create from that original audio is another opportunity for people to find you.

    • Launch a Podcast: Got video essays, interviews, or in-depth tutorials? Turn them into episodes for platforms like Spotify and Apple Podcasts. This opens the door to a completely different audience that lives and breathes audio content.
    • Create Audio-Based Social Media Clips: Snip the best quotes or most compelling highlights from your audio to create engaging audiograms. A powerful 30-second clip on Instagram Stories, TikTok, or X can be an incredible traffic driver, pulling people back to your full-length video.
    • Build an Audio Course: If you’re an educator, you can bundle extracted lecture audio into a tidy audio course. This gives students super-accessible, on-the-go study materials they can review literally anywhere.

    The core idea here is to stop thinking of your audio as a finished product and start seeing it as raw material. With a bit of smart thinking, one video can become multiple content assets, each perfectly suited for a different platform and audience.

    Level Up Your Repurposed Content

    Just ripping the audio is step one. To make your repurposed content genuinely impressive, you need to package it professionally. This is a non-negotiable if you’re serious about launching a podcast.

    After you’ve turned a video into a podcast episode, for example, you can use a tool like the YouTube Thumbnail Maker to design killer cover art. Professional branding is what makes someone stop scrolling and give your show a listen on crowded platforms. It helps you create a consistent, recognizable look across everything you do, from your YouTube channel to your podcast feed.

    You should also think about adding extra value. Consider providing show notes to go along with your podcast episodes. Our guide on how to use a YouTube Transcript Extractor shows you how to do this in minutes, giving your audience a complete package of both audio and text to engage with.

    The demand for audio-first content is absolutely massive. As of early 2025, YouTube is the world’s second-largest search engine, with 2.5 billion monthly users digging for content. Music-related searches, including artist names and trends like ASMR, consistently dominate the charts, proving just how huge the audience for audio experiences really is. This data isn’t just a fun fact; it’s confirmation that offering audio versions of your content is one of the smartest moves you can make.

    Navigating Copyright and Fair Use for Audio

    Using a YouTube audio extractor is an incredibly handy skill, but it’s one of those “with great power comes great responsibility” situations. Before you start turning every cool video into an MP3, it’s worth taking a moment to understand the ethical and legal lines. This isn’t about boring legal jargon; it’s about respecting other creators and keeping your own projects out of trouble.

    Think of it this way: just because you can rip the audio from a blockbuster movie trailer doesn’t mean you should use it as the intro for your podcast. That original sound is protected by copyright, giving the owner the exclusive right to say how it gets used.

    Staying on the Right Side of Copyright

    So, how do you use these tools without wandering into a legal minefield? It all comes down to focusing on content you actually have the right to use. Your safest bet is always to stick with sources that give you explicit permission.

    Here’s a quick rundown of what’s generally safe to extract:

    • Your Own Content: This one’s a no-brainer. If you uploaded the video to your channel, you own the rights. Feel free to repurpose the audio for a podcast, a sample, or anything else you can dream up.
    • Public Domain Works: This is your go-to for anything where the copyright has expired. Think historical speeches, certain classical music recordings, or old government films. They’re free for everyone.
    • Creative Commons Licenses: A lot of creators on YouTube use Creative Commons (CC) licenses to let others use their work. Just make sure you check the specific terms—some require you to give credit, while others might not allow commercial use.

    At its core, this whole issue is about respecting intellectual property. Using a YouTube audio extractor for personal study—like saving a professor’s lecture to listen to on your commute—is usually considered fair use. But taking a copyrighted song you ripped and sharing it, even for free, is a clear-cut case of infringement.

    Understanding Fair Use in Practice

    “Fair use” is one of those legal concepts that feels a bit fuzzy, but it’s designed to allow limited use of copyrighted material without permission for things like criticism, commentary, news reporting, and education. It’s all about context.

    For instance, a media studies teacher pulling a 15-second audio clip from a news report to analyze in class would almost certainly fall under fair use. On the other hand, a vlogger who lifts the entire background track from a popular creator’s video is definitely crossing the line into copyright infringement.

    The goal is to use these tools for legitimate research, learning, and creative projects that transform the original work—not just to pirate content. For more tips on building your channel the right way, check out some of the other articles on the YouTube Navigator blog.

    Common Questions About YouTube Audio Extraction

    Image

    Even with a step-by-step guide, it’s natural to have a few questions about grabbing audio from YouTube. Let’s tackle some of the most common ones so you can get started with total confidence.

    Is It Legal to Extract Audio from YouTube?

    This is the big one, and the answer isn’t a simple yes or no. The short answer? It depends.

    It is perfectly legal to extract audio from your own videos, content in the public domain, or anything under a Creative Commons license that allows for reuse. The problems start when you pull audio from copyrighted material—like a hit song or a movie scene—and use it without getting permission first. That’s a fast track to violating YouTube’s terms of service and copyright law.

    The golden rule is to always respect intellectual property. Stick to content you know you have the rights to use.

    Will Extracting Audio Harm My Computer?

    Not if you’re smart about it. Using a reputable, browser-based tool is completely safe. Online extractors like the one from YouTube Navigator do all the heavy lifting on their own servers. That means you never have to download or install mystery software that could be hiding malware or viruses.

    The biggest security risk comes from downloading unknown programs from untrustworthy sites. Always stick to well-known, secure browser-based tools that use HTTPS encryption to protect your activity and downloads.

    Can I Get High-Quality Sound?

    Absolutely. The final audio quality really comes down to two things: how good the original video’s audio was and the settings you pick during extraction. For the best results, always start with a video that was uploaded in high definition, as it will naturally have a better-quality audio track to begin with.

    From there, you’ll want to choose a higher bitrate like 320kbps MP3 or, if the tool has it, a lossless format like WAV. This ensures you’re capturing as much of the original sound fidelity as possible.

    A pro tip is to check out a channel’s overall content quality by looking into its history and performance. Digging into YouTube channel analytics can give you a solid idea of which creators consistently put out high-quality audio and video that’s actually worth extracting for your projects.


    Ready to turn those YouTube videos into amazing audio content? The tools from YouTube Navigator make it simple, secure, and incredibly fast. Whether you need an MP3 for your podcast or a transcript for your research, everything you need is right at your fingertips, completely free. Start creating more efficiently today at https://youtubenavigator.com.

  • How to Transcribe a YouTube Video: A Complete Guide for Creators

    How to Transcribe a YouTube Video: A Complete Guide for Creators

    As a YouTube creator, you know how much effort goes into every single video. But what if you could make that effort work even harder for you? The secret lies in a simple text file. When you transcribe a YouTube video, you’re not just creating subtitles; you’re unlocking a powerful asset that can supercharge your channel’s growth, accessibility, and content strategy.

    This guide will walk you through everything you need to know, from the strategic “why” to the practical “how,” so you can turn your spoken words into a growth engine for your channel.

    Why Transcribing Your Videos Is a Game-Changer

    Image

    For many creators, transcription feels like an optional extra—a chore to tackle after the real work is done. But savvy creators, educators, and researchers understand the truth: a transcript is a strategic tool. It’s the key to boosting your video’s SEO, making it accessible to a wider audience, and effortlessly repurposing your content.

    This isn’t just a niche tactic; it’s a booming market. The global marketing transcription market was valued at USD 2.24 billion in 2025 and is on track to hit a massive USD 5.64 billion by 2035. This explosion is fueled by smart creators and businesses who are eager to repurpose content, climb search rankings, and meet modern accessibility standards.

    So, how can you get started? Let’s look at the options.

    Transcription Methods At a Glance

    Method Best For Typical Cost Speed
    YouTube’s Auto-Captions Quick, free captions for basic accessibility. Free Instant
    Manual Transcription When 100% accuracy is non-negotiable and you have time. Free (your time) Very Slow
    AI Transcription Tools Fast, affordable, and highly accurate transcripts for most uses. Free to low-cost Minutes
    Human Transcription Services Mission-critical content where professional accuracy is required. ~$1.25+/minute 24-48 Hours

    While each method has its place, AI-powered tools have become the go-to for most creators. They offer a fantastic balance of speed, cost, and accuracy that streamlines the entire workflow. Now, let’s dig into how a simple text file can fuel your channel’s success.

    Boost Your Discoverability with SEO

    Search engines like Google are brilliant at reading text, but they can’t “watch” your video to understand its content. When you provide a transcript, you’re essentially handing them a detailed script of everything you discussed.

    Every keyword, niche phrase, and key topic you mentioned becomes indexable. This is a game-changer for discoverability. Your video is suddenly far more likely to appear in search results when users are looking for the exact information you provide, driving valuable organic traffic directly to your channel.

    Make Your Content Accessible to Everyone

    Consider the audience you might be unintentionally excluding. Viewers with hearing impairments, non-native speakers, or people watching in a noisy environment without headphones all rely on text to understand your message.

    Transcripts and captions are more than a feature—they are a bridge. They ensure your content is accessible to everyone, regardless of their ability or situation, helping you build a more inclusive and engaged community.

    Providing a text version breaks down these barriers, expanding your reach and showing your audience that you value their experience.

    Unlock Effortless Content Repurposing

    The constant pressure to create fresh content is one of the biggest challenges for any creator. A transcript is your ultimate content repurposing shortcut. That single text file can be sliced, diced, and transformed into a whole new suite of assets.

    • Blog Posts: Easily expand a detailed tutorial video into a full-length article for your website.
    • Social Media Updates: Pull out insightful quotes, quick tips, or surprising stats for engaging posts on Twitter, LinkedIn, or Instagram.
    • Email Newsletters: Summarize the main points of your video and share them with your email list to drive traffic back to your channel.
    • Lead Magnets: Combine transcripts from a video series into a downloadable eBook or a comprehensive guide.

    This is all about working smarter, not harder. Instead of starting from scratch, you can efficiently multiply the value of your hard work. Using a tool like the YouTube Transcript Extractor makes this process incredibly fast, giving you a clean text file in seconds.

    Using YouTube’s Built-In Transcription Tool

    Image

    Sometimes, the simplest solution is right in front of you. YouTube has its own built-in transcription feature that allows you to quickly grab the text from any video without leaving the platform. It’s a fantastic starting point for many creators and researchers.

    To find it, go to any video page and look for the “…” (More) button below the player, next to “Share” and “Save.” Click it, and you’ll see an option for “Show transcript.” A full, time-coded transcript will instantly appear beside the video.

    The best part? The transcript is interactive. Click on any line of text, and the video will jump to that exact moment. This is incredibly useful for finding specific quotes or reviewing a key section without scrubbing through the timeline.

    Getting the Most Out of YouTube’s Transcript

    Once the transcript panel is open, you can click the “…” menu at the top to toggle timestamps on or off. Removing the timestamps gives you a clean block of text, perfect for pasting into a document as a rough draft for a blog post or script notes.

    However, it’s important to set realistic expectations. While convenient, YouTube’s auto-generated text is not always perfect.

    The accuracy of YouTube’s AI transcriptions depends heavily on audio quality. For a single speaker with a clear voice and minimal background noise, the results can be surprisingly good. But for videos with heavy accents, technical jargon, multiple speakers, or poor audio, the accuracy can drop significantly.

    For quick tasks, like grabbing a quote for a presentation or getting the gist of a long video, this method is often good enough.

    When to Look for a Better Solution

    The limitations of YouTube’s free tool become apparent when you need professional-grade accuracy. For researchers needing precise data, educators creating study materials, or creators repurposing content for high-stakes projects, small errors can become major headaches.

    Manually correcting a long, messy transcript can take more time than using a more accurate tool from the start.

    If your workflow is more complex, a dedicated tool is essential. For example, you might want to use a YouTube to MP4 converter to download the video, extract the audio, and run it through specialized transcription software for much higher accuracy. This gives you far more control and a superior final product.

    How to Transcribe Any YouTube Video Instantly

    When you need a clean, accurate transcript without the hassle of manual corrections, dedicated tools are your best friend. They save you from fixing endless punctuation and formatting errors, giving you a polished text file in seconds. This is how you transcribe YouTube video content with professional speed and efficiency.

    Let’s walk through the exact process using a free and powerful tool: the YouTube Transcript Extractor. This simple workflow is designed to get you from a video URL to a usable transcript as quickly as possible.

    The Simple Workflow for Instant Transcripts

    The goal here is simplicity and speed. No complicated steps, no unnecessary clicks—just the text you need. This is a huge time-saver for educators creating study guides, researchers gathering data, and creators turning video scripts into blog posts. You get all the spoken words without the clutter of timestamps, ready for immediate use.

    This infographic shows just how easy it is.

    how to transcribe youtube video
    Infographic

    As you can see, it’s a straight shot from finding your video to having an editable transcript in your hands.

    All you need to get started is the URL of the YouTube video. Simply find the video on YouTube and copy the web address from your browser.

    Once you have the link, the rest is incredibly easy. Just paste the URL into the tool’s input field.

    Pro Tip: This method works for nearly any public YouTube video, not just your own. It’s perfect for analyzing competitor content, studying lectures from educational channels, or grabbing quotes from interviews for a research paper.

    After pasting the link, just click the button to get the transcript. The tool pulls the data directly from YouTube, strips out the unnecessary formatting, and presents it in a clean, readable format.

    Here’s a look at the minimalist interface, designed for one thing: speed.

    Design interface
    Design interface of Youtube Navigator’s Transcript tool

    The design is all about function. Paste your link, get your text. No distractions.

    From Raw Text to Usable Content

    The tool provides a clean block of text—one continuous paragraph without timestamps. This format is incredibly versatile:

    • Quick Blog Drafting: Copy the text and drop it straight into a document to start outlining a new article.
    • Easy Dialogue Analysis: Researchers can scan through conversations without the visual clutter of time codes.
    • Efficient Proofreading: It’s much faster to read and edit a clean paragraph than a script broken up by timestamps.

    The final step is just as simple. A “Copy to Clipboard” button lets you grab the entire transcript with one click. From there, you can paste it into your word processor, note-taking app, or content management system. The whole process, from finding the video to having an editable script, takes less than a minute.

    Formatting Your Transcript for Maximum Impact

    Getting the raw text is just the first step. The real magic happens when you edit and format it. A raw block of text is just data; a well-formatted transcript is a valuable asset that people will actually want to read and engage with.

    First, always proofread. AI tools can miss names, unique brand terms, or specific jargon. A quick read-through is essential to catch any errors and ensure your final output is professional and accurate.

    A transcript full of mistakes can undermine your credibility. A few minutes of proofreading protects the authority you’ve worked hard to build with your video content and shows your audience you care about quality in all formats.

    After a quick cleanup, your next mission is to break up the “wall of text.” Adding structure makes the content easier to read and digest.

    Creating a Scannable Structure

    Your goal is to make your transcript look and feel like a high-quality blog post. Here’s how:

    • Add Headings and Subheadings: Identify the main topics or questions from your video and turn them into clear, descriptive headings (H2s and H3s). This organizes the content and makes it easy to skim.
    • Use Bold Text: Emphasize key takeaways, important statistics, or actionable tips by making them bold. This helps readers quickly find the most valuable information.
    • Incorporate Bullet Points: If you listed examples or steps, format them as a bulleted or numbered list. It’s far more readable than a long, dense sentence.
    • Break Up Paragraphs: Keep your paragraphs short, ideally two to three sentences each. This creates white space and makes the content feel more approachable.

    This kind of formatting is more important than ever. The entertainment transcription services market hit USD 1.2 billion in 2024 and is expected to more than double to USD 2.5 billion by 2033. This boom is driven by the demand for accessible, searchable content on streaming platforms and websites. Clearly, getting your text right is a big deal.

    Integrating Other Assets for a Richer Experience

    Once your text is clean and structured, you can elevate it further by integrating other media. Use your video’s thumbnail as the featured image for your blog post to create a clear visual link to the original content.

    This is also a great time to think about branding. If you’re turning the transcript into a downloadable PDF, why not design a branded cover page? Tools like a YouTube Thumbnail Maker are perfect for this. Their templates and design elements can help you create polished graphics that complement your repurposed text.

    By combining well-structured text with strong visuals, you can transform a simple transcript into a premium asset for your audience.

    Advanced Transcription Workflows for Professionals

    For professional creators, educators, and researchers, a simple text file often isn’t enough. Precision and versatility are key. It’s time to move beyond the basics and build a workflow that turns a video into a polished, multi-format digital asset.

    The demand for high-quality transcription is exploding. The U.S. transcription market was valued at USD 30.42 billion in 2024 and is projected to climb to USD 41.93 billion by 2030. This growth reflects how vital accurate transcripts have become for everything from academic data analysis to corporate training. You can explore these trends in this detailed market analysis.

    Creating Time-Coded Subtitles for a Global Audience

    One of the most powerful things you can do is create precise, time-coded subtitles. A plain text transcript is great for a blog post, but an SRT (SubRip Subtitle) file is the gold standard for professional captions. These files contain not just the text but also the exact start and end times for when each line should appear on screen.

    This is a game-changer for several reasons:

    • Go Global: An SRT file is the foundation for accurate multilingual subtitles. You can give the time-coded English file to a translator, and they can create foreign-language captions that are perfectly synced to your video.
    • Boost Accessibility: For viewers with hearing impairments, precisely timed captions offer a much better experience than YouTube’s often clunky auto-captions.
    • Signal Professionalism: Uploading your own accurate captions shows your audience that you are committed to quality and detail, boosting your channel’s authority.

    An SRT file transforms your video from a local piece of content into a global-ready asset. It’s the single most effective way to break down language barriers and connect with a much wider audience.

    The Audio-First Approach for Maximum Accuracy

    When you need the highest level of accuracy to transcribe a YouTube video, separating the audio is your best strategy. The process is simple: first, download the video using a tool like a YouTube to MP4 converter. Then, extract the audio as a standalone MP3 or WAV file.

    This isolated audio file can be run through high-end, specialized transcription software or sent to a human transcription service. These professional-grade options can achieve accuracy rates above 99% because they focus solely on the audio without any video data distractions.

    This method is ideal for:

    • Academic Researchers who need flawless transcripts for qualitative data analysis.
    • Legal Professionals documenting video depositions or evidence.
    • Corporate Trainers creating official training materials from video workshops.

    Tailoring your transcription workflow to your project’s needs ensures the final output is not just accurate but perfectly suited for its purpose. To identify which of your videos would benefit most from this detailed approach, use a YouTube channel analytics tool to analyze your viewership data.

    Common Questions About Video Transcription

    As you start to transcribe YouTube video content more often, you’ll likely have some questions. Let’s tackle a few of the most common ones to help you move forward with confidence.

    These questions often cover the ethics of using others’ content, the reliability of free tools, and the fastest ways to get the job done right.

    Is It Legal to Transcribe Someone Else’s YouTube Video?

    The short answer is: it depends on what you do with the transcript.

    For personal use—like study notes, research, or better understanding—transcribing a video is perfectly fine. The legal gray area appears when you publish that transcript publicly.

    Publishing a full, word-for-word transcript of someone else’s video without permission can lead to a copyright claim. However, the principle of fair use often applies if you use the transcript to create something new and transformative, such as a reaction video, a critical analysis, or a summary that adds your unique insights.

    The golden rule is simple: always credit the original creator. Use transcripts as a foundation for your own original work, not as a copy-and-paste shortcut.

    How Accurate Are Free Transcription Tools?

    The accuracy of free tools, whether it’s YouTube’s built-in feature or a third-party app, almost always comes down to the audio quality of the original video. For a video with a clear speaker, minimal background noise, and simple language, you can expect an accuracy rate of over 90%.

    However, accuracy can decrease with:

    • Strong regional or foreign accents
    • Multiple people talking at once
    • Poor microphone quality or background noise
    • Highly technical or specialized jargon

    For most daily tasks, like drafting a blog post or pulling key quotes, these tools are sufficient. But for projects where precision is critical—such as legal, medical, or academic work—a human review is essential.

    Can I Get a Transcript in a Different Language?

    Yes, and YouTube’s own features can be quite helpful here. Many popular videos have auto-translated captions and transcripts available in dozens of languages. You can usually select your desired language from a dropdown menu in the transcript panel.

    However, be cautious. Machine translation is great for getting the general idea of a video, but it’s not perfect. It often misses cultural nuances, grammar, and idioms. For any professional use, it should never replace a review by a native speaker. We explore more content strategies for creators on the YouTube Navigator blog, where we share tips for reaching a broader audience.


    Ready to streamline your workflow and create more content? The suite of free tools from YouTube Navigator is designed to speed up your entire creative process. Get instant, accurate transcripts with the YouTube Transcript Extractor and see how easy it is to repurpose your video content today.